
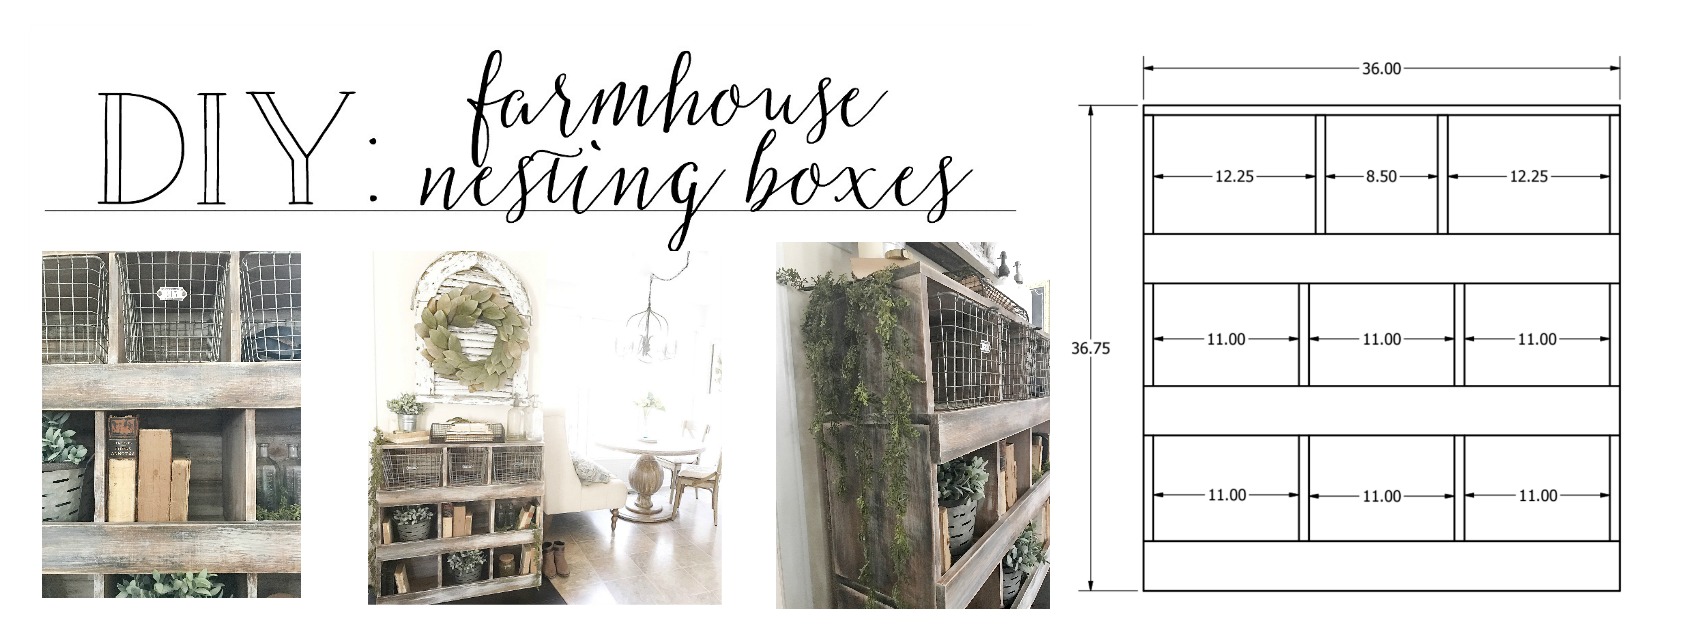
Who said you had to have chickens to have nesting boxes?! Well in our little builder basic farmhouse we built these vintage inspired nesting boxes to serve as functional pieces of storage for our everyday piles of stuff. So as promised today I'm sharing with y'all the full DIY nesting box tutorial.
For those of you that are going what the heck is a nesting box and why would you need chickens, here is a little background information on "nesting boxes." Nesting boxes are boxes for birds (chickens) to build their nests in to lay eggs. But in our home they will be used to hold mail, keys, shoes, and all the clutter that accumulates from everyday life. I love how they add a farmhouse feel and actually function as a useable piece of furniture.
This year for Christmas Austin and I decided not to buy each other presents and instead work on a project together. These nesting boxes are something I have been wanting to build for a while, so on Christmas Eve we made a trip to Lowes Hardware and I documented the build so I could it share with y'all.
I was originally inspired by Liz Marie's husband's build on his blog Craftsman Drive. I changed it up a bit and decided to add vintage locker basket drawers to my nesting boxes, but you could use any type of basket, build wooden drawers, or just have all open boxes. I will be providing the plans for ours with the vintage locker basket drawers and one with all open boxes. *However if you choose to use another type of basket or even vintage locker baskets your measurements will/may differ. I learned not all vintage locker baskets are the exact same size.

DIY NESTING BOXES WITH VINTAGE LOCKER BASKET DRAWERS:
Tools Needed for the Project
- Miter Saw
- Table Saw
- Power Drill
- Kreg Jig for Pocket Holes- Trust me it's worth it!
- Measuring Tape
- Finish Nail Gun
- Square
- Clamps
- Pencil for Marking
- Safety Glasses
Materials Needed: For building a single- 36" wide nesting box with locker basket drawers. I built two for my project.
- (2) 1x12x12 Pine Boards. For building 2 nesting boxes: (4)
- (2) 1x4x6 Pine Boards. For building 2 nesting boxes: (3)
- (4) 6' Cheap Fence Post Board. For building 2 nesting bozes: (7)
- Box of 1.25" Kreg Screws- Course Thread
- Wood Glue
- MinWax Stain- Early American
- MinWax Stain- Ebony
- Annie Sloan Chalk Paint- Old White
- MinWax or Annie Sloan Clear Furniture Wax
- Latex Gloves
- Paint Brush
- Cotton Cloths
CLICK HERE- For a PRINTABLE PDF CHECKLIST for the supplies needed. Just to make your trip to the hardware store a little easier.
How to DIY: For a single nesting box with locker basket drawers
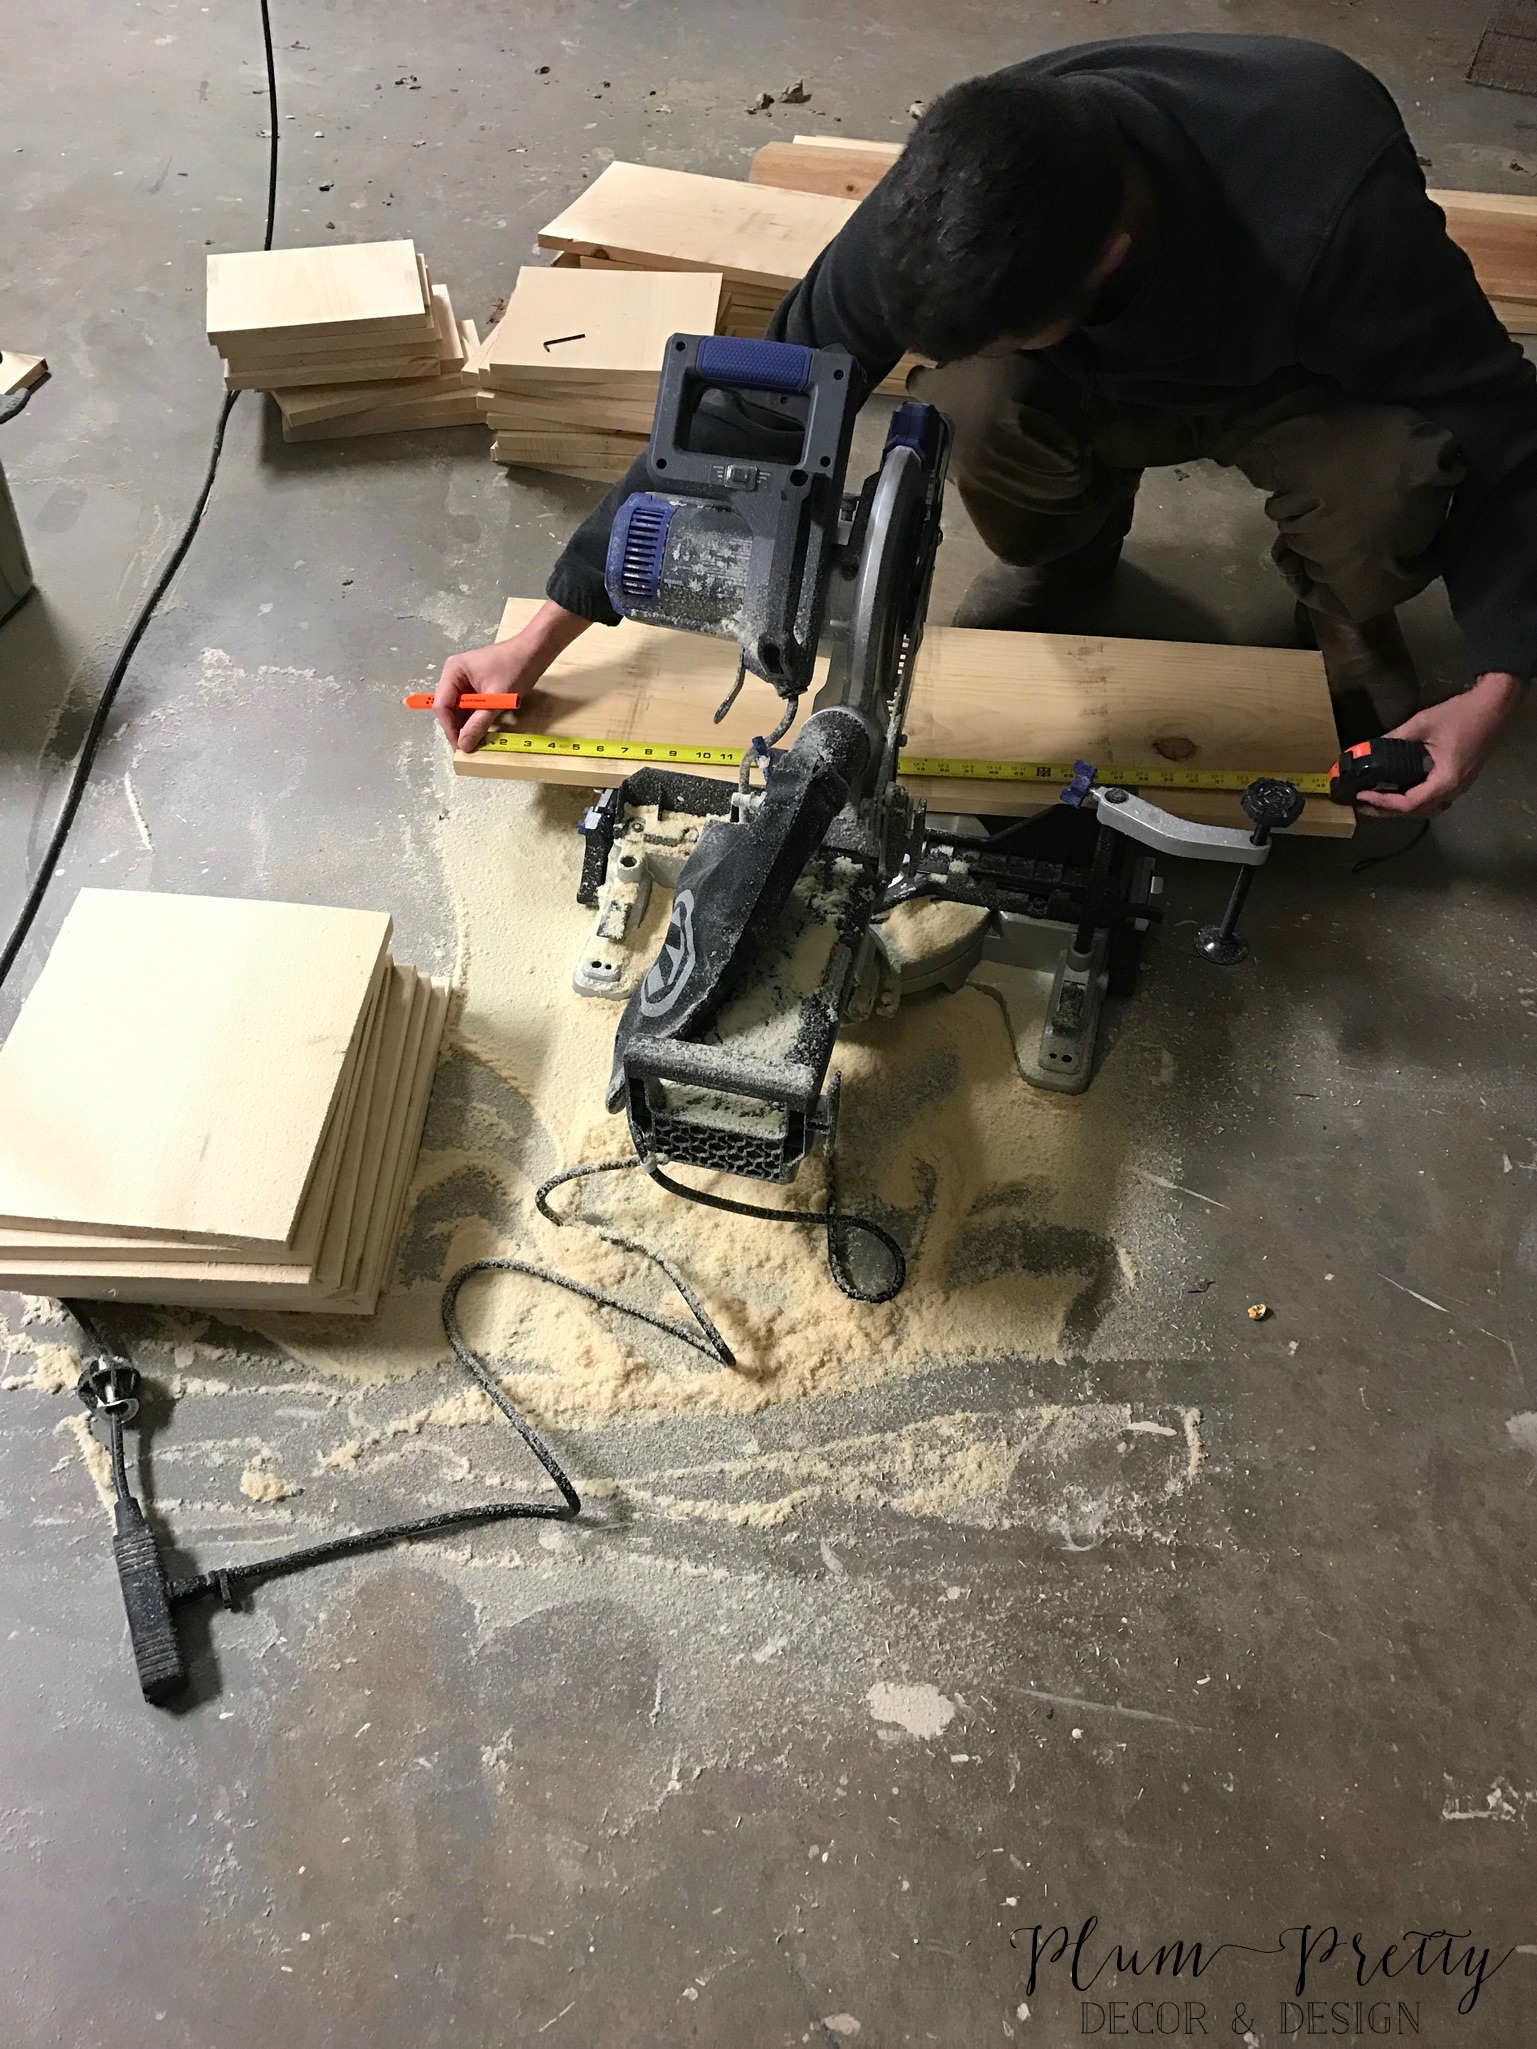
Step one- Cut all materials to needed lengths. Cut one of the 1x12x12 into (4) 3' boards. Cut the other 1x12x12 into (4) 11" piece, (4) 13.75" and (4) 9" pieces. The dividers for each section had to be a different size to keep an even look to the box openings and to keep the overall height of the nesting box around 36"; because we had to accommodate the height of the locker baskets. Cut the 1x4x6 into (4) 3' boards (You will have one extra). Cut the 6' fencing boards into (8) 3' pieces (Cut each board in half- you will have one extra piece).
Cut Boards Numbers:
- (4) 1x12x 3'
- (4) 1x12x 11"
- (4) 1x12x 13.75"
- (4) 1x12x 9"
- (3) 1x4x 3'
- (7) 3' Fencing Boards
Step two- Drill all your Kreg Jig holes into all the divider pieces. We used two Kreg Jig Holes at each joining with a total of 4 per piece. See picture below for reference.

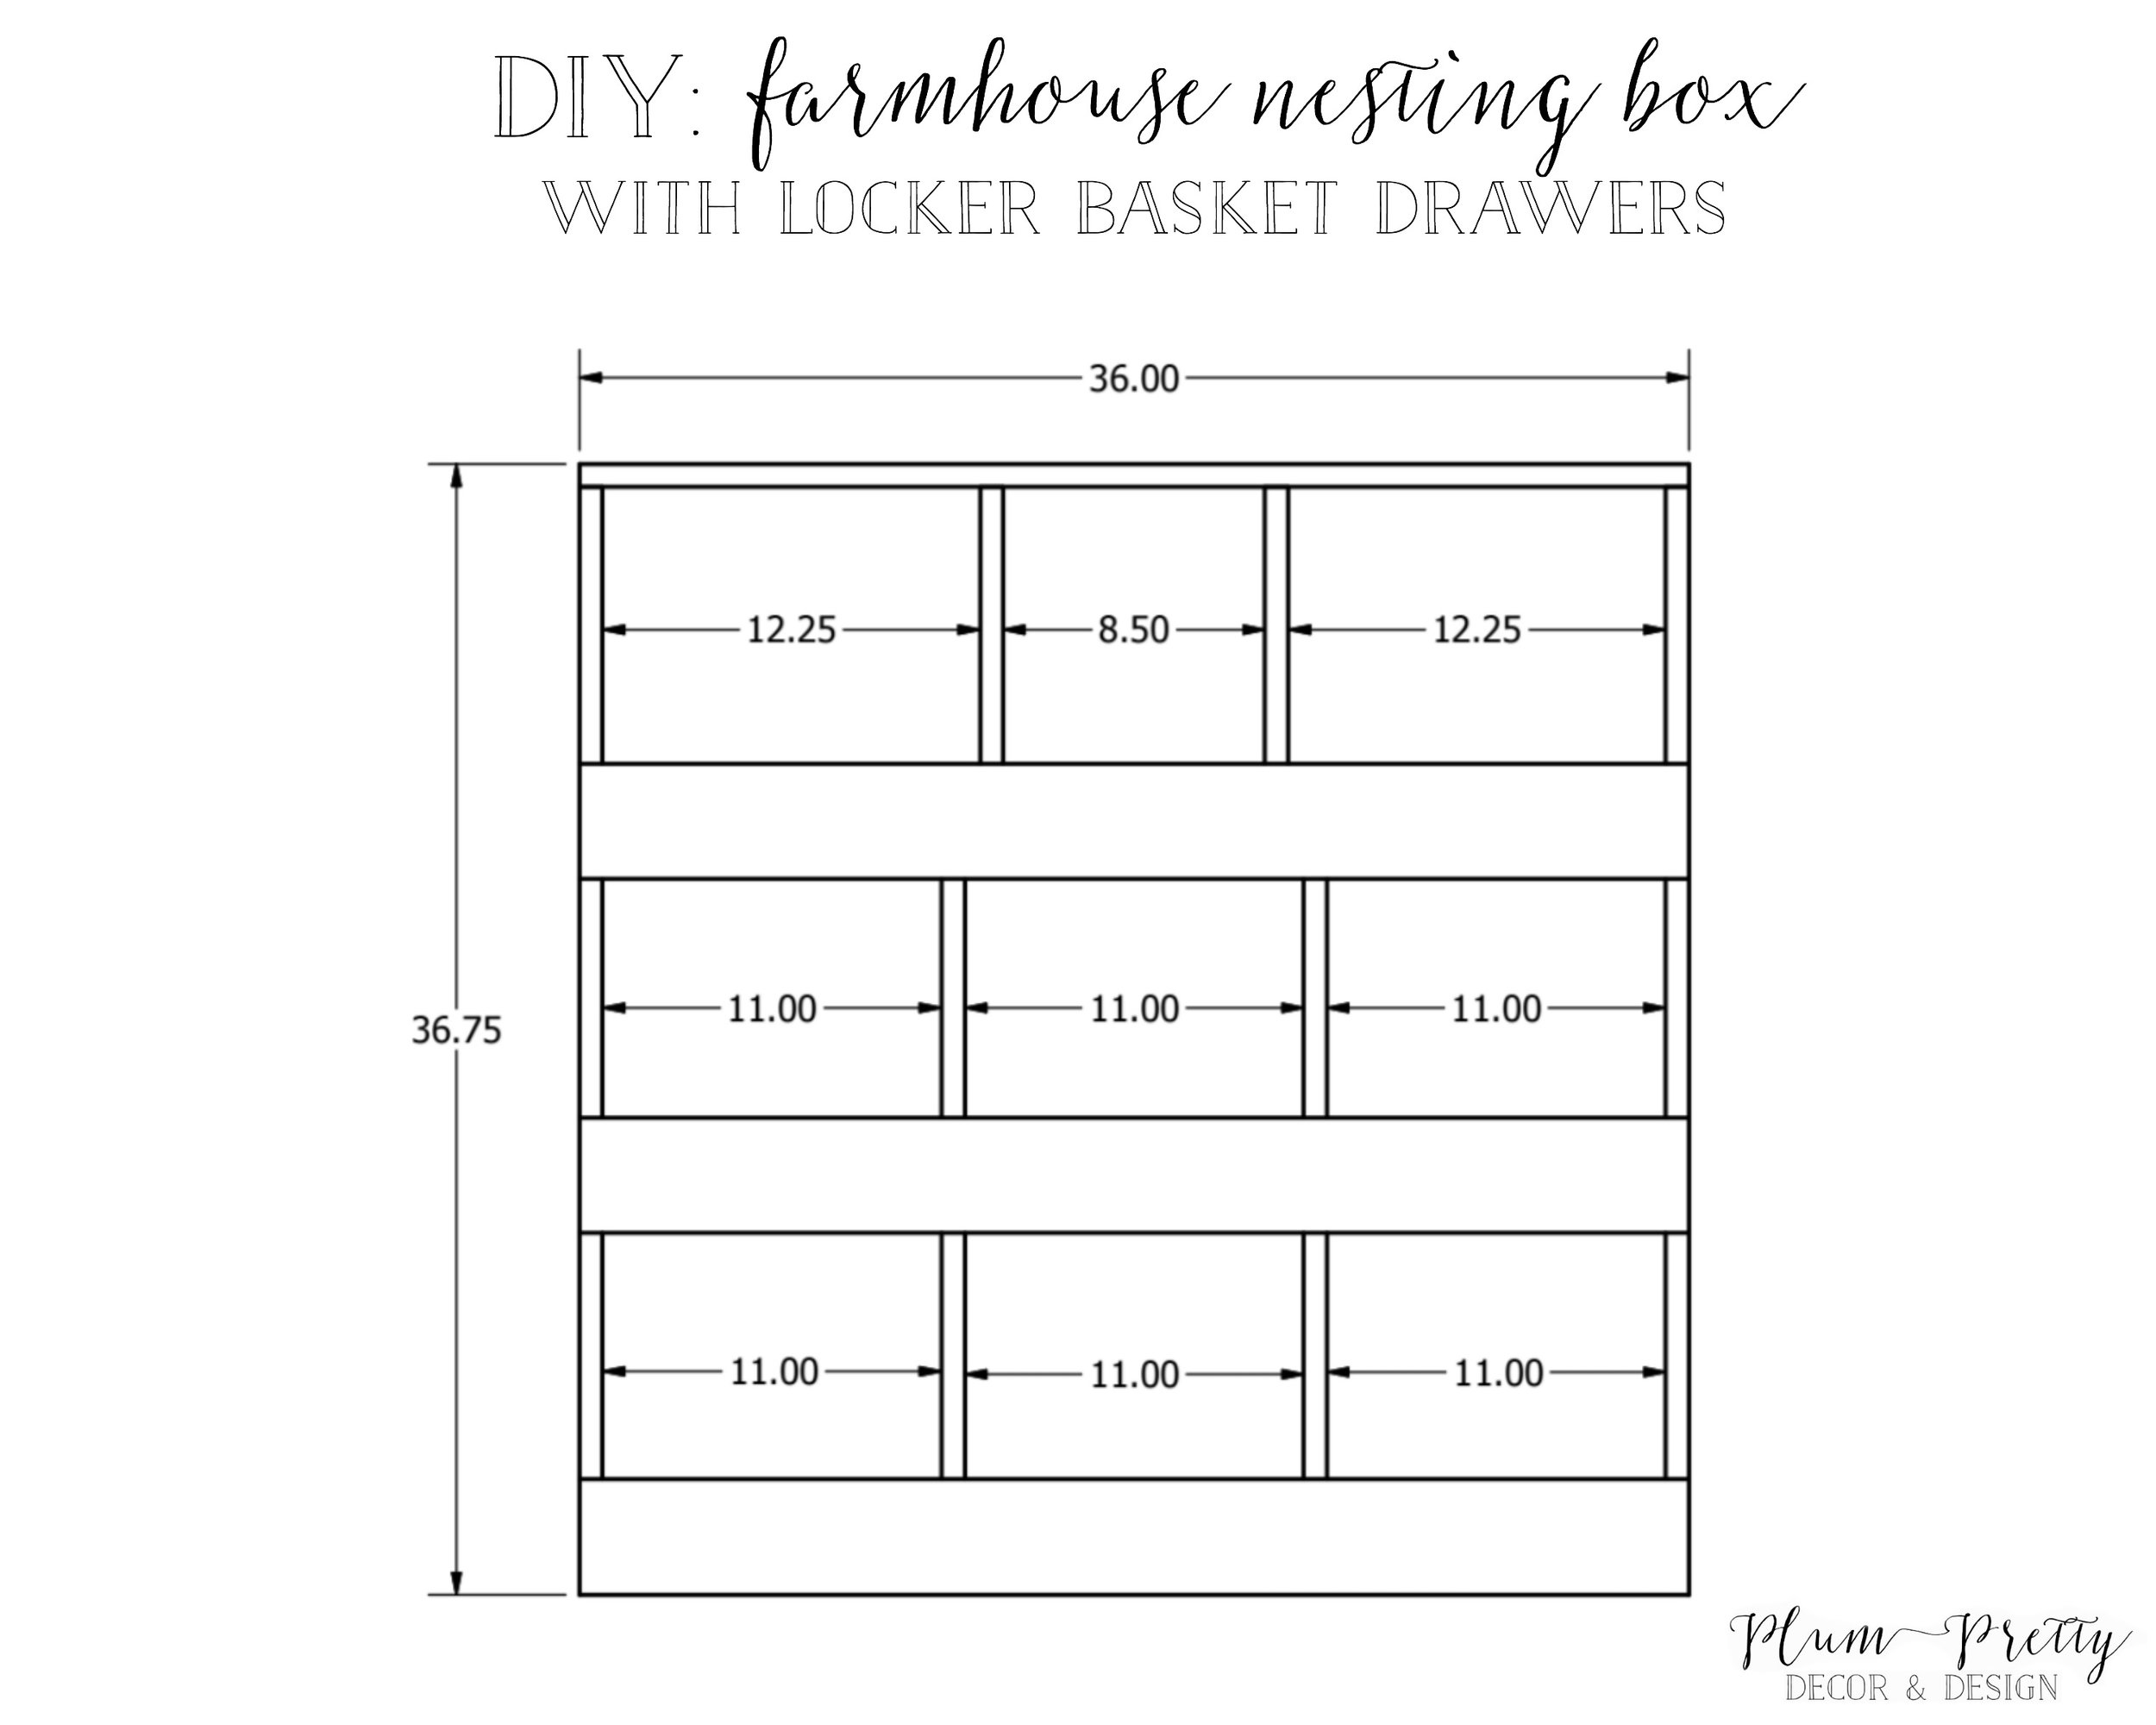
Step three- Build from the bottom up. Start by laying down one of the 3' 1x12s and you will add the (4) 11" divider pieces you cut from a 1x12x12. *Applying glue to every joining and making sure the Kreg Jig Holes are facing inward attach the two end pieces flush with the ends of bottom board. Use a clamp to help hold boards in place while drilling. Next add the two center 11" dividers measuring over 11" from the side dividers you just attached. This will give you an even opening of 11" on all the boxes on the bottom row.
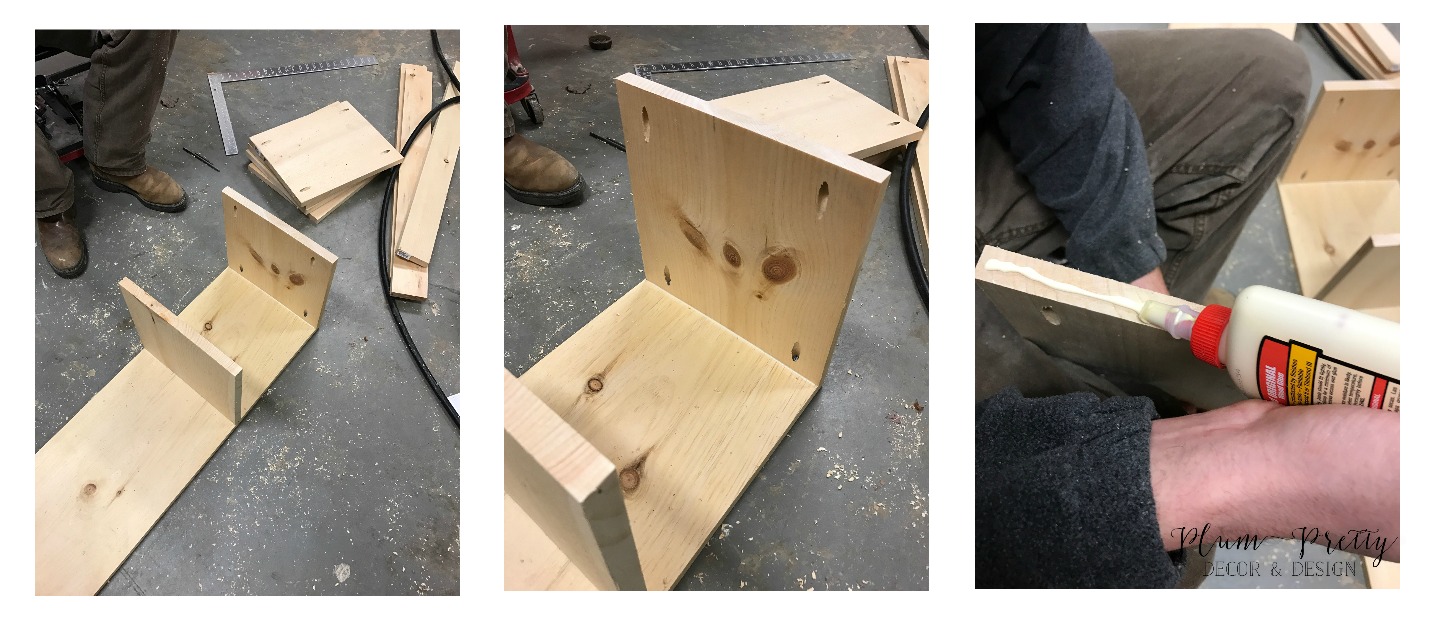
Next add wood glue to the top of the dividers you just placed and add your second 3' 1x12 on top. Clamp and screw the board into place. Then you will add the 13.75"dividers the same way you did the 11" dividers. *Remember to apply glue, make sure the Kreg Jig holes are facing inward, and use clamps to hold the dividers in place while screwing. Attach the two end divider pieces flush with the ends of 1x12. Next add the two center 13.75" dividers measuring over 11" from the side dividers.
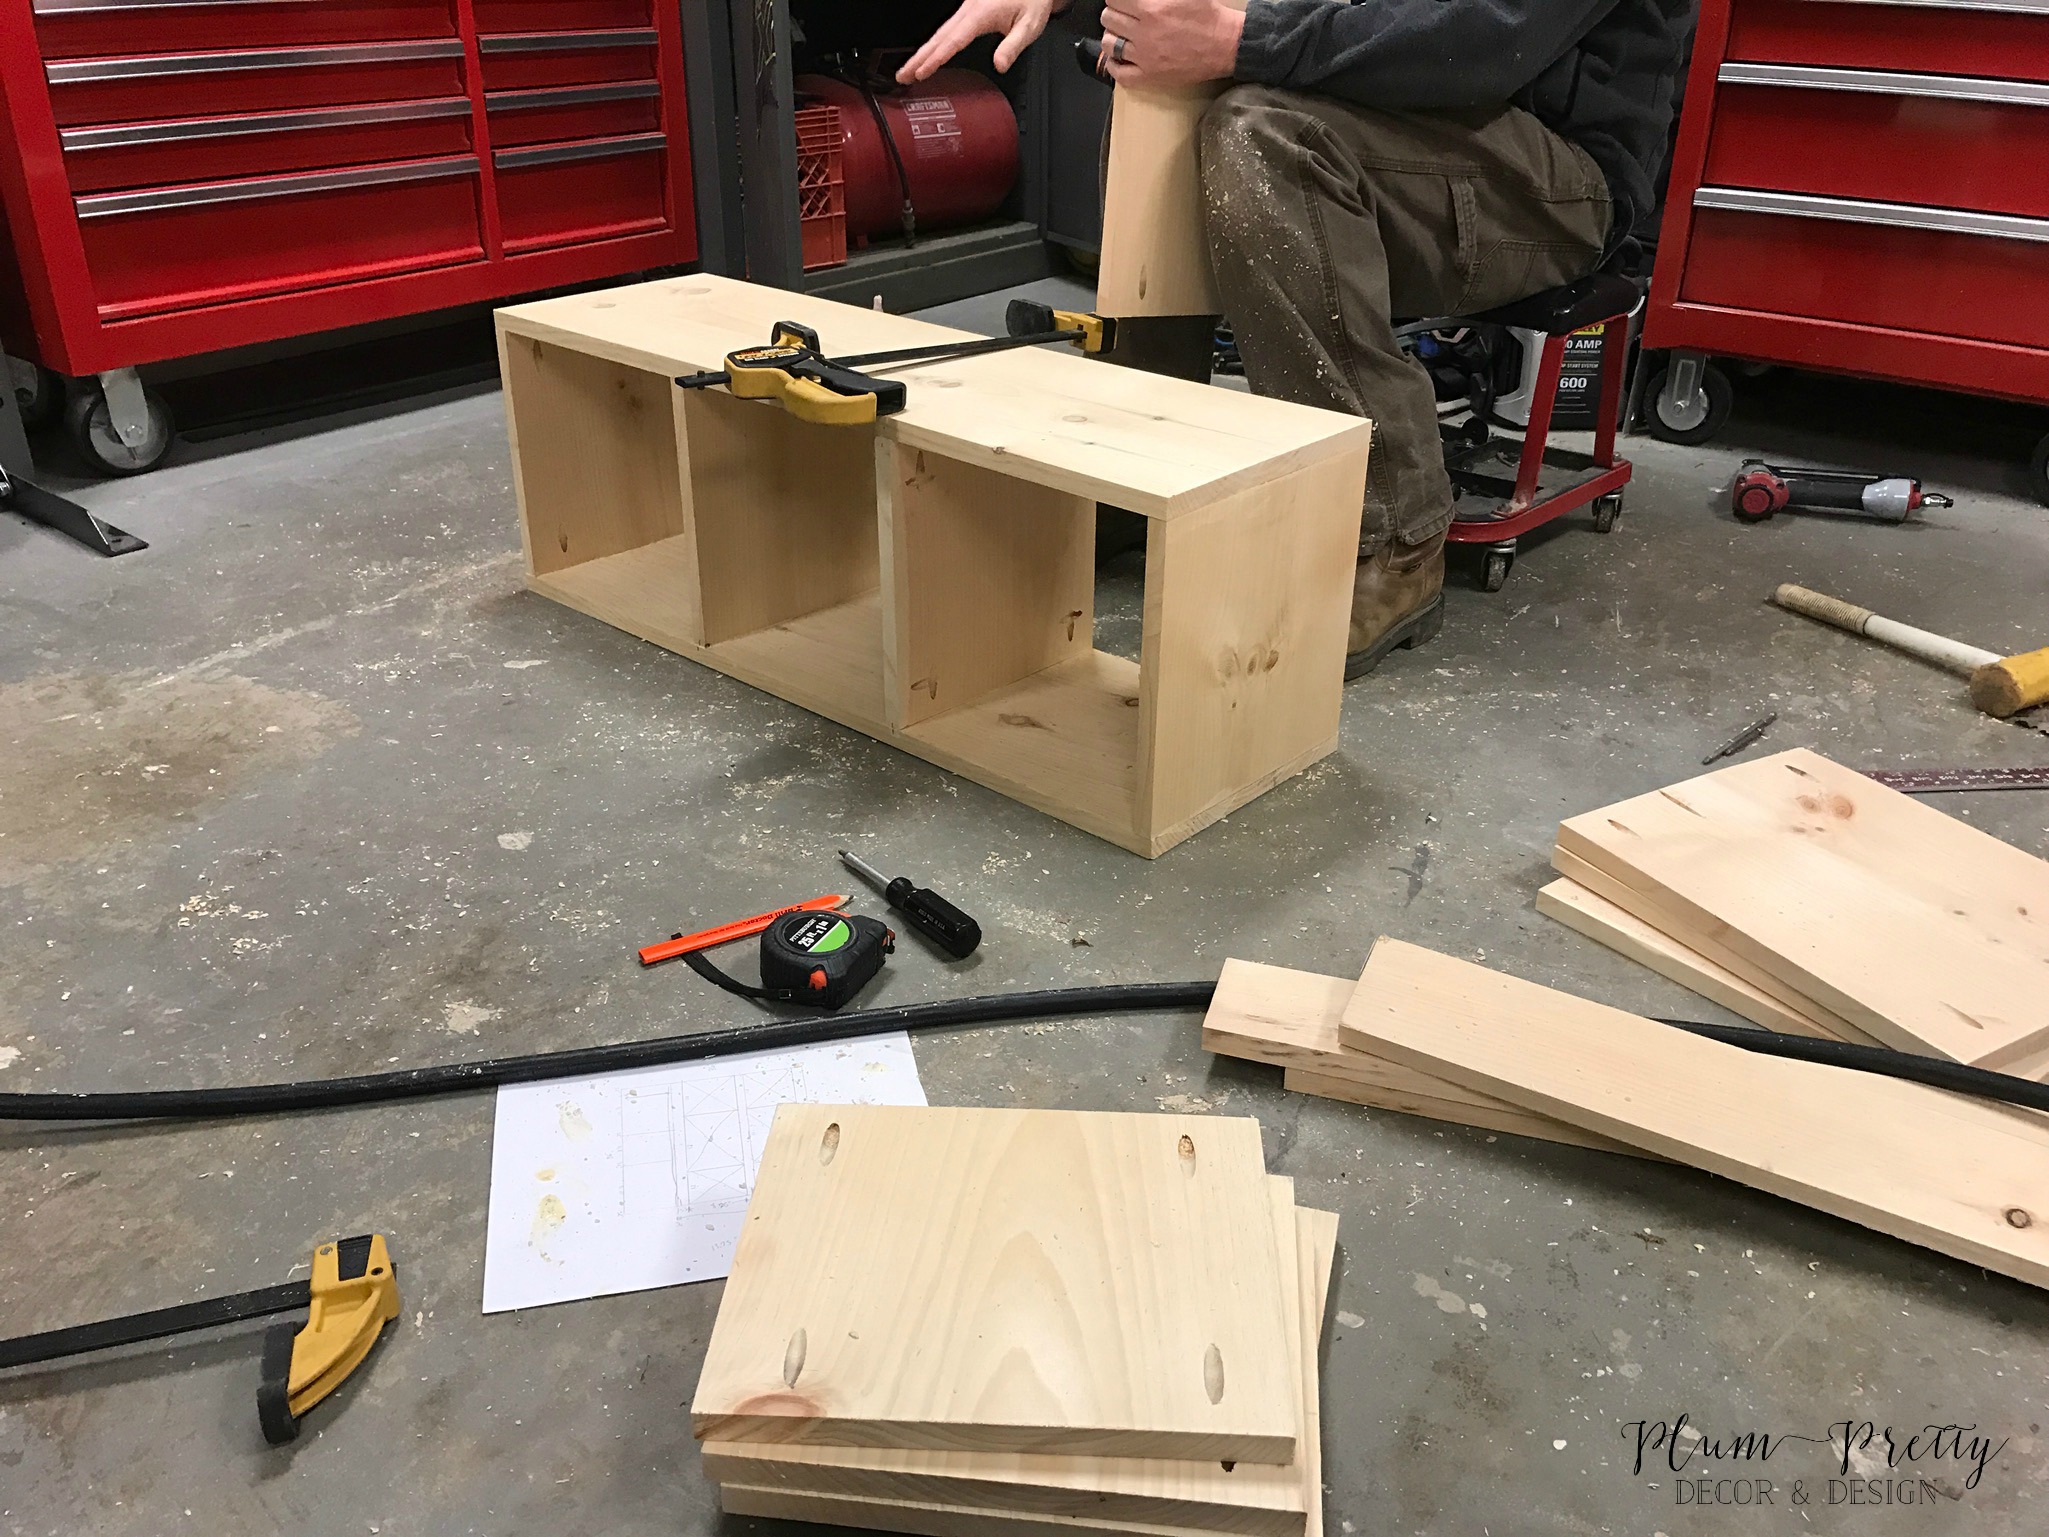
Repeating the above process add wood glue to the top of the dividers you just placed and add your third 3' 1x12 on top. Clamp and screw the board into place. Then you will add the 9"dividers the same way you did the 11" and 13.75" dividers. *Remember to apply glue, make sure the Kreg Jig holes are facing inward, and use clamps to hold the dividers in place while screwing. Attach the two end divider pieces flush with the ends of 1x12. Next add the two center 9" dividers measuring over 12.25" from the side dividers. The box in the middle will be slightly smaller (8.5") to accommodate the more narrow locker basket I used.
***Remember if you choose to use another type of basket or even vintage locker baskets your measurements will/may differ. I learned not all vintage locker baskets are the exact same size. Simply place the basket you are using on top to the board and mark where the dividers need to go.***
Next step add wood glue to the top of the dividers you just placed and add your fourth and final 3' 1x12 on top. Clamp and screw the board into place. Now you have completed the main frame of the nesting box!
Step four- Add the 1x4s to the front of the nesting box using the Kreg Jig from the inside of the nesting box. Use wood glue on each joining.
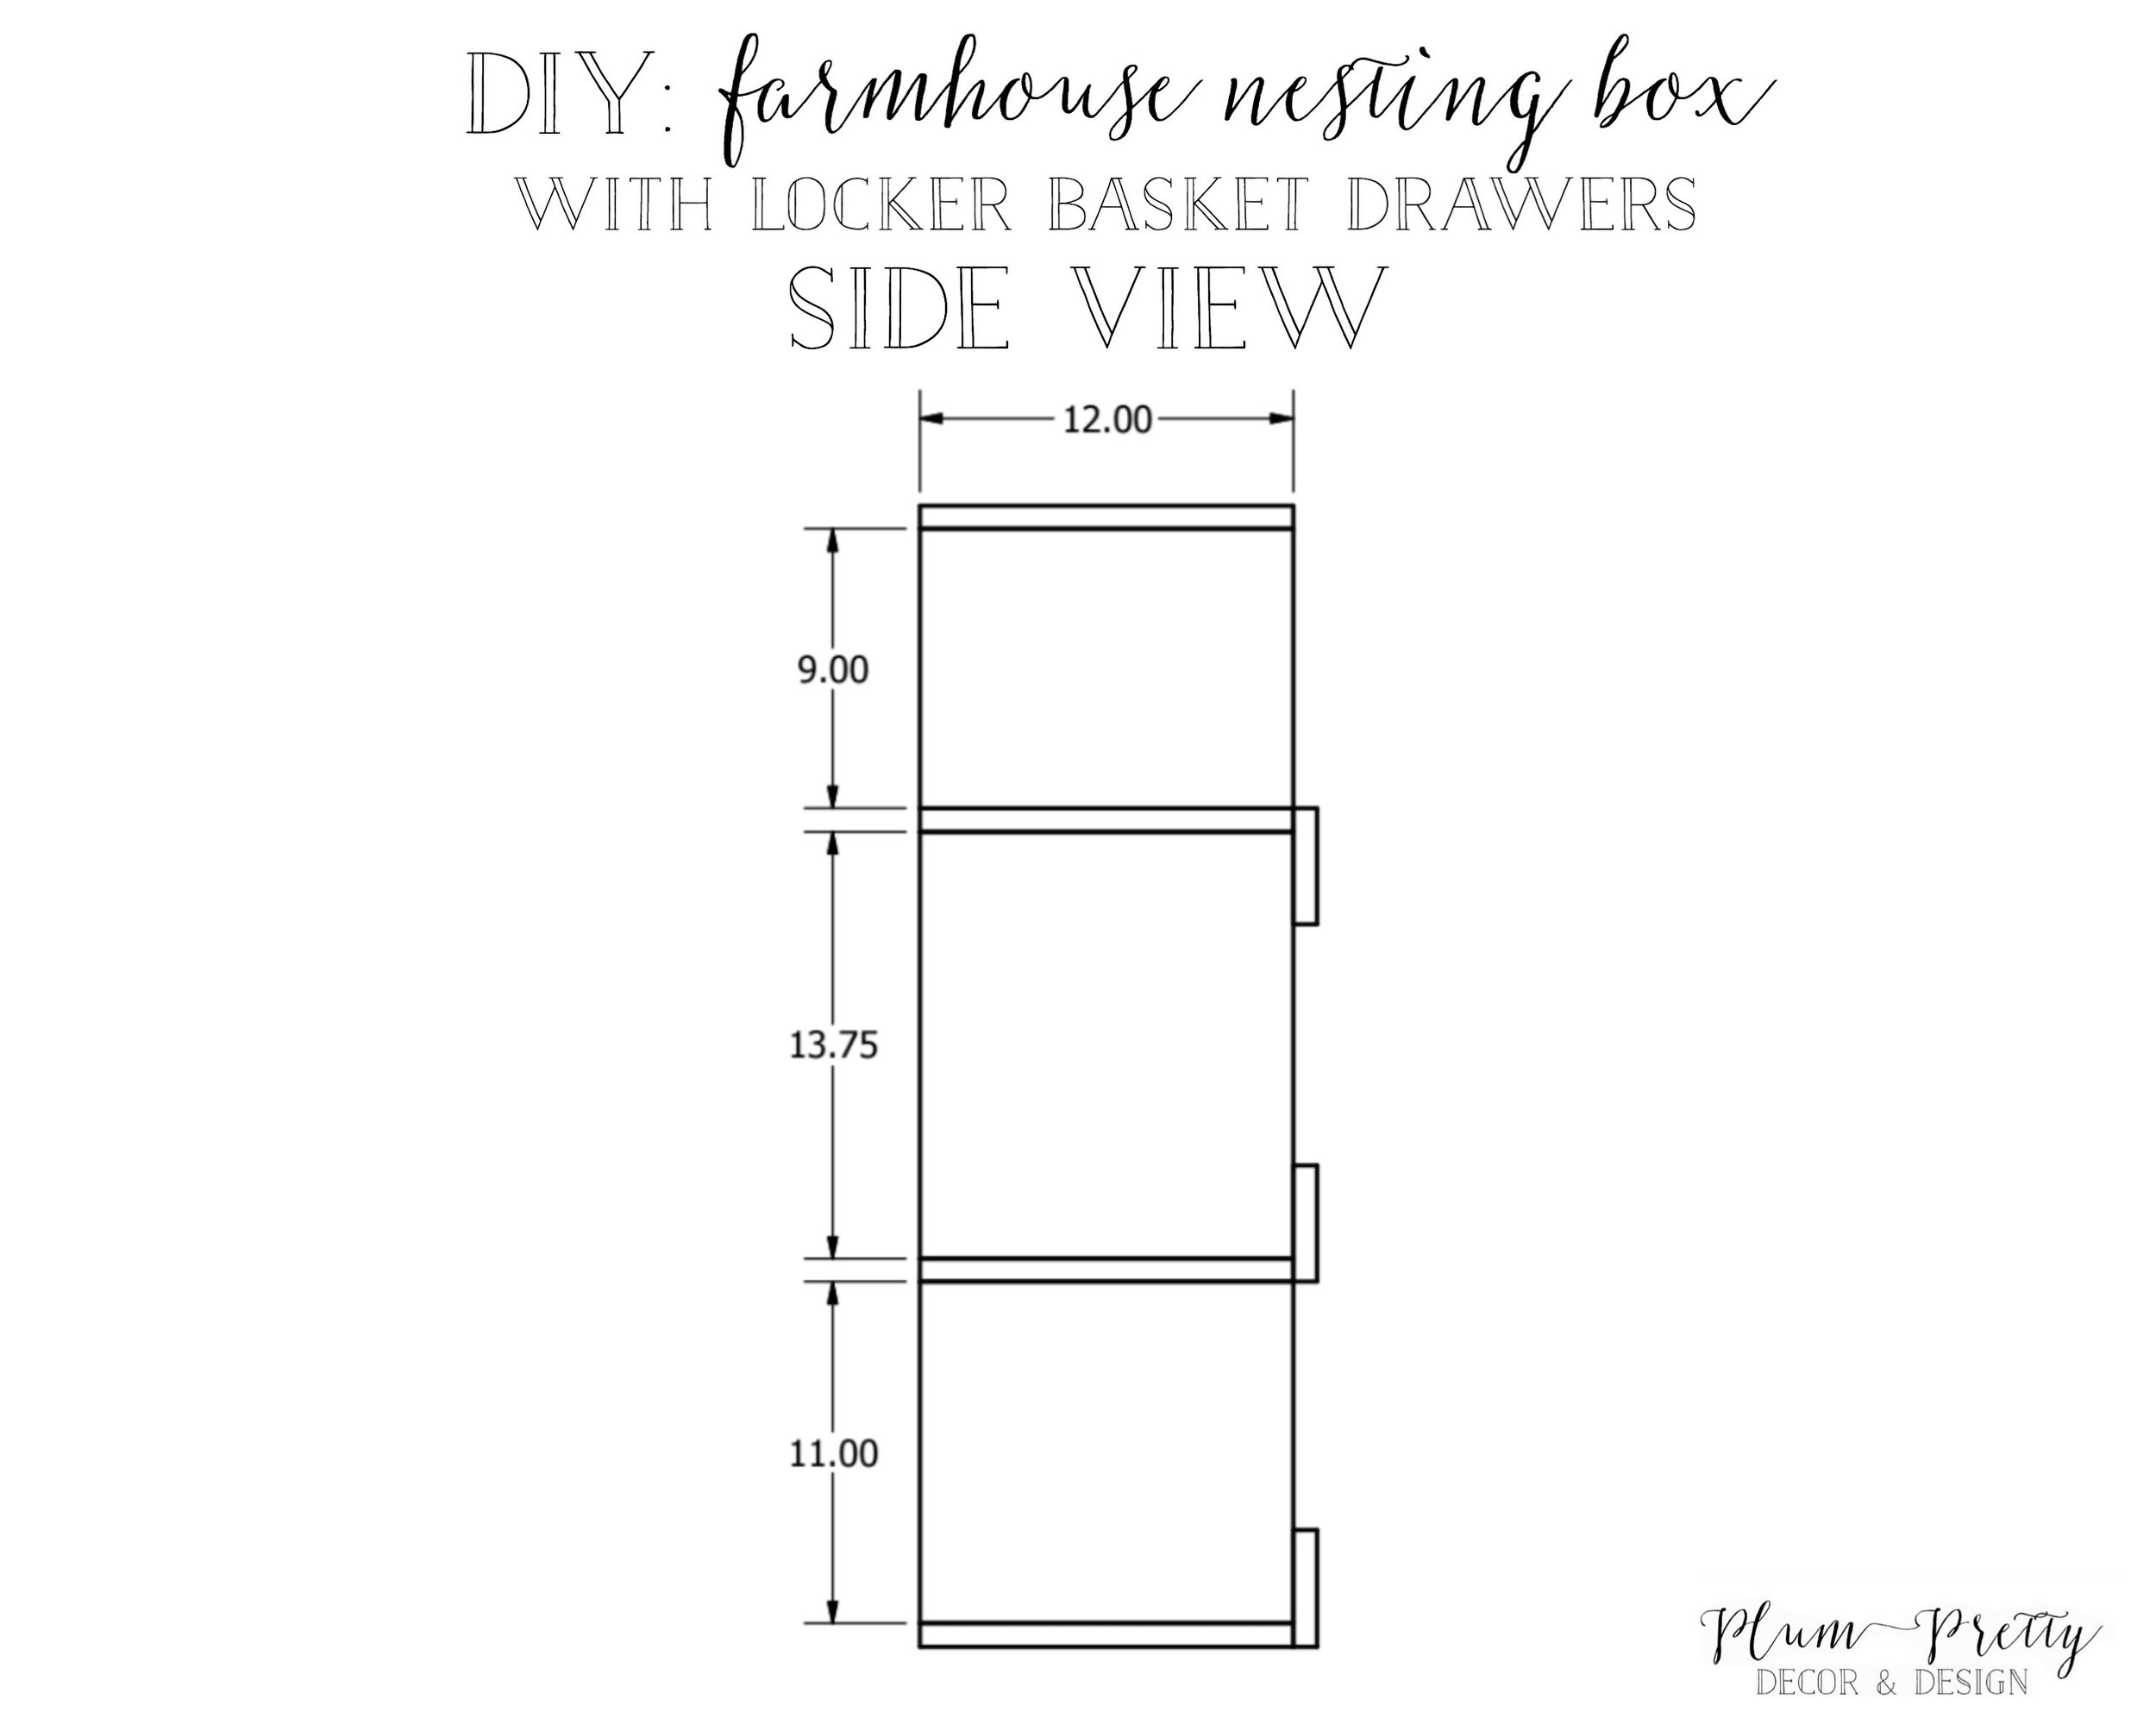
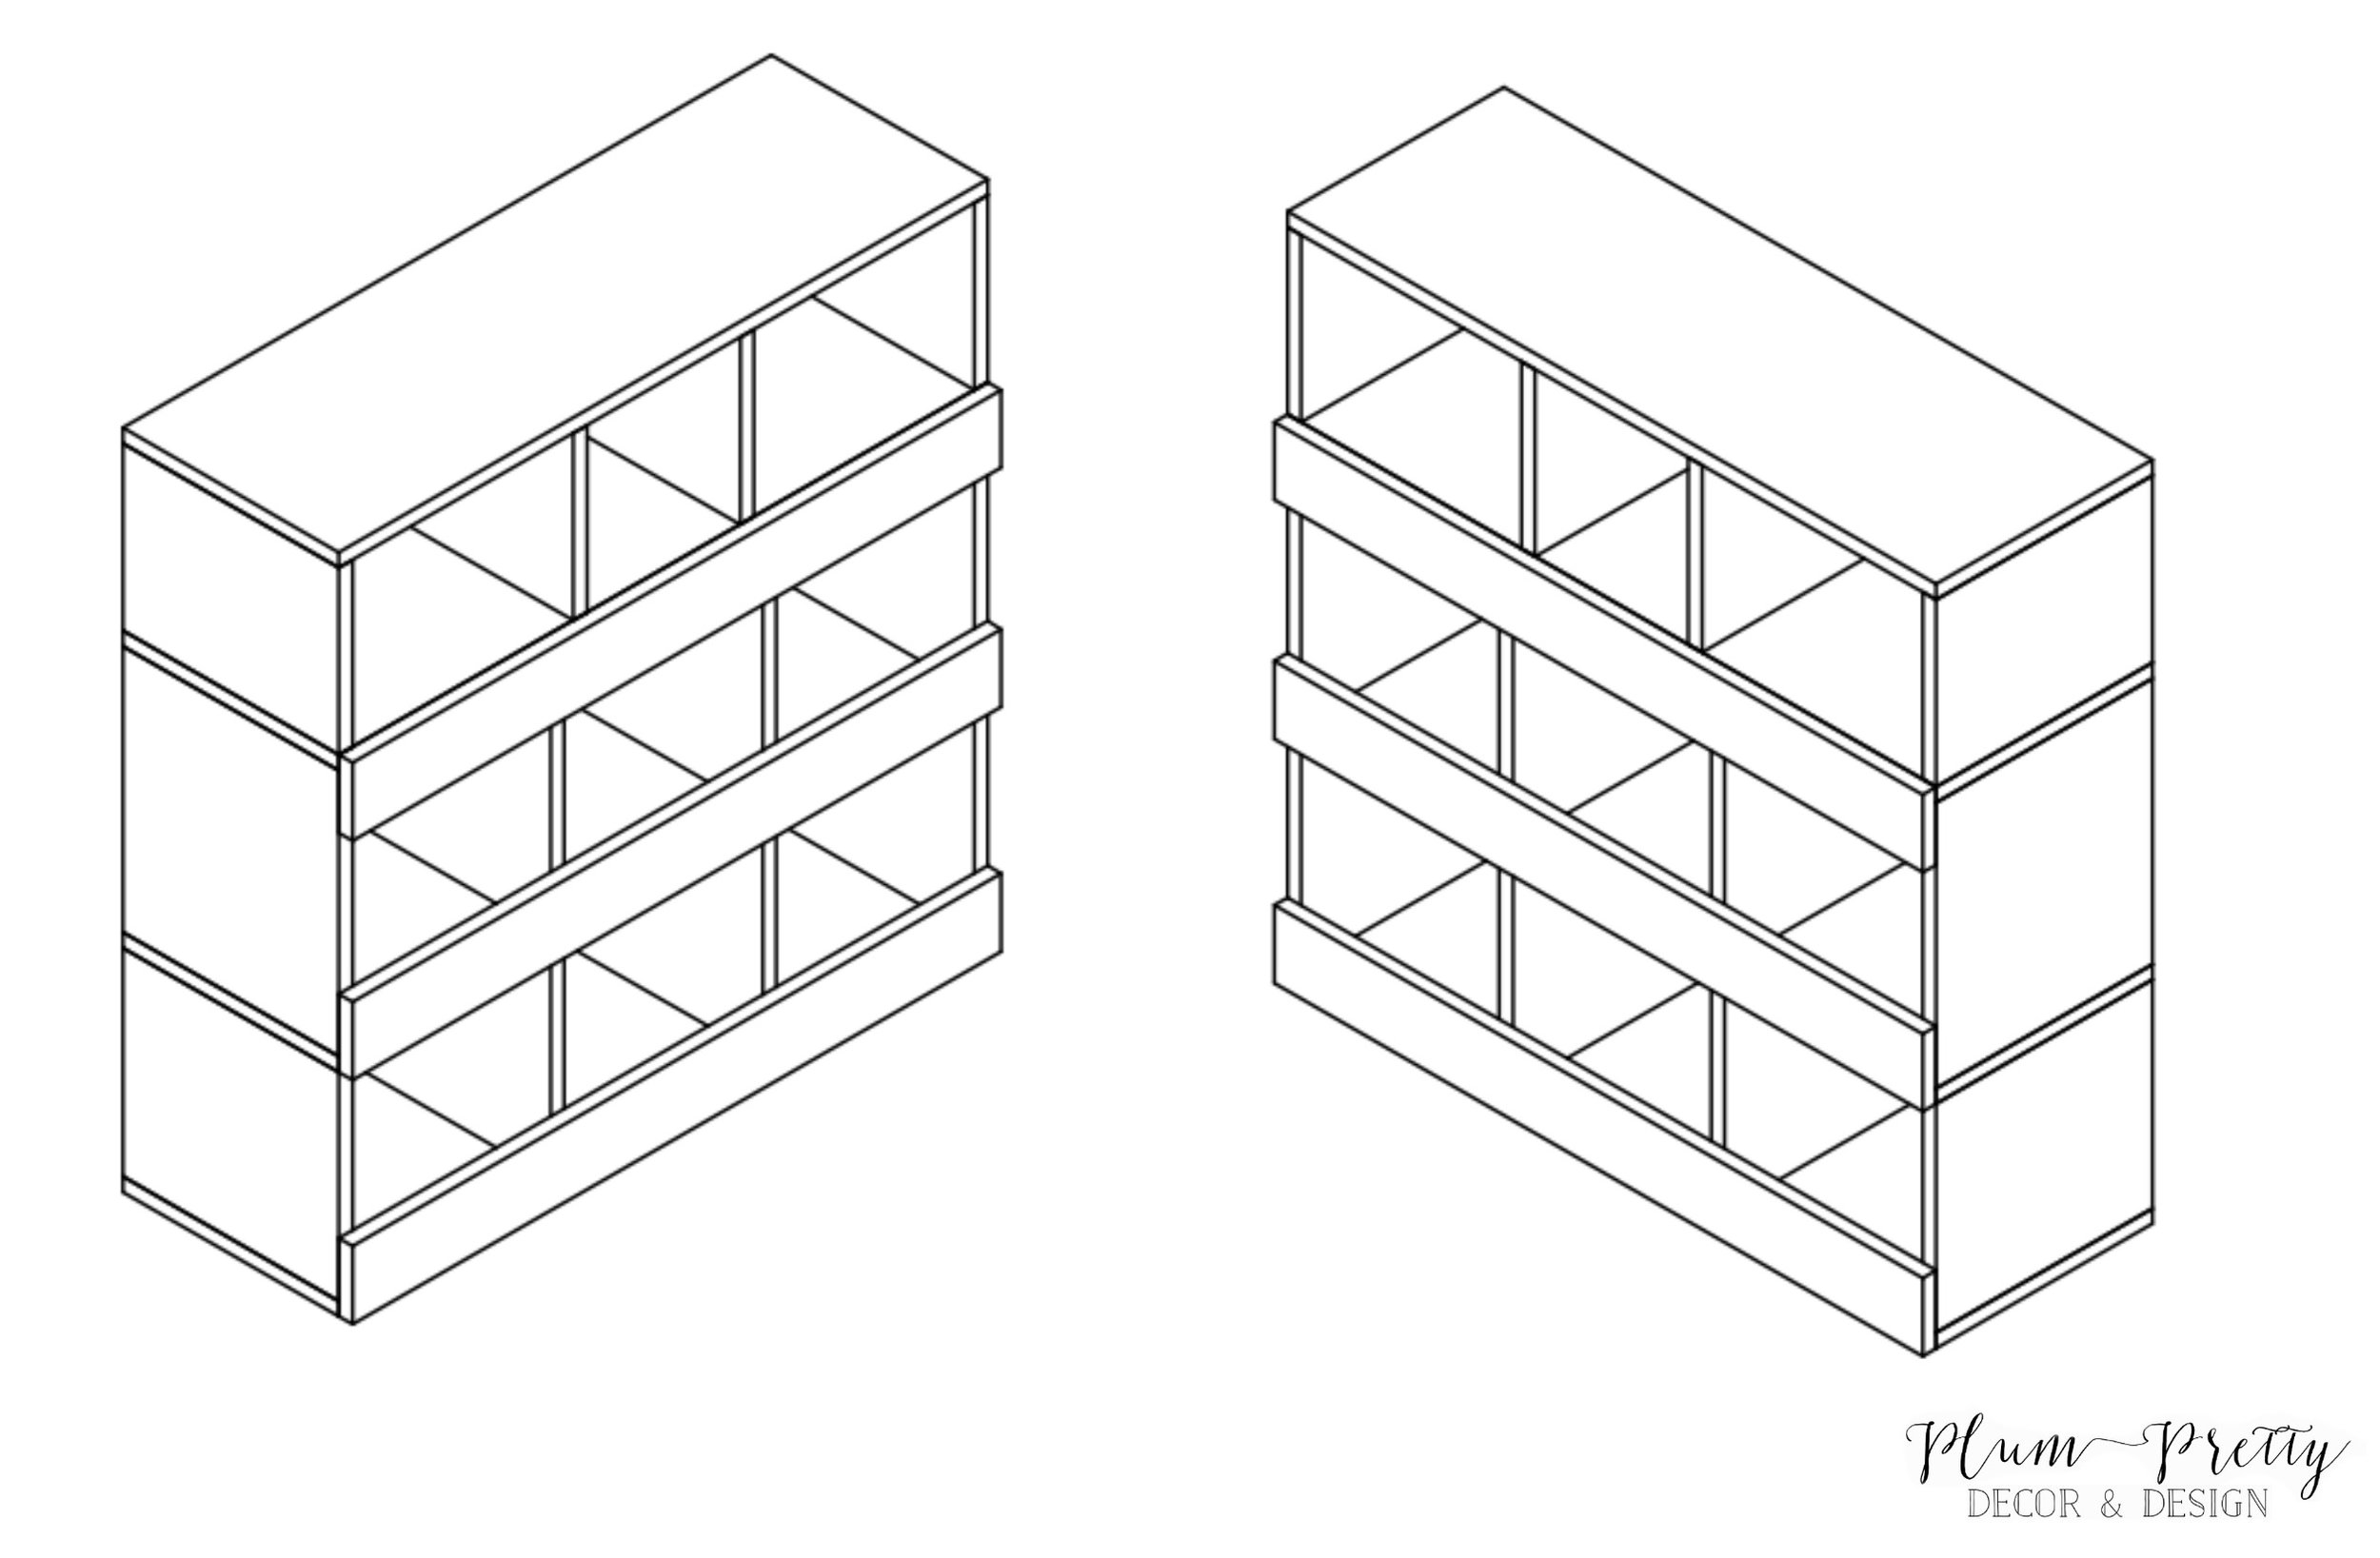
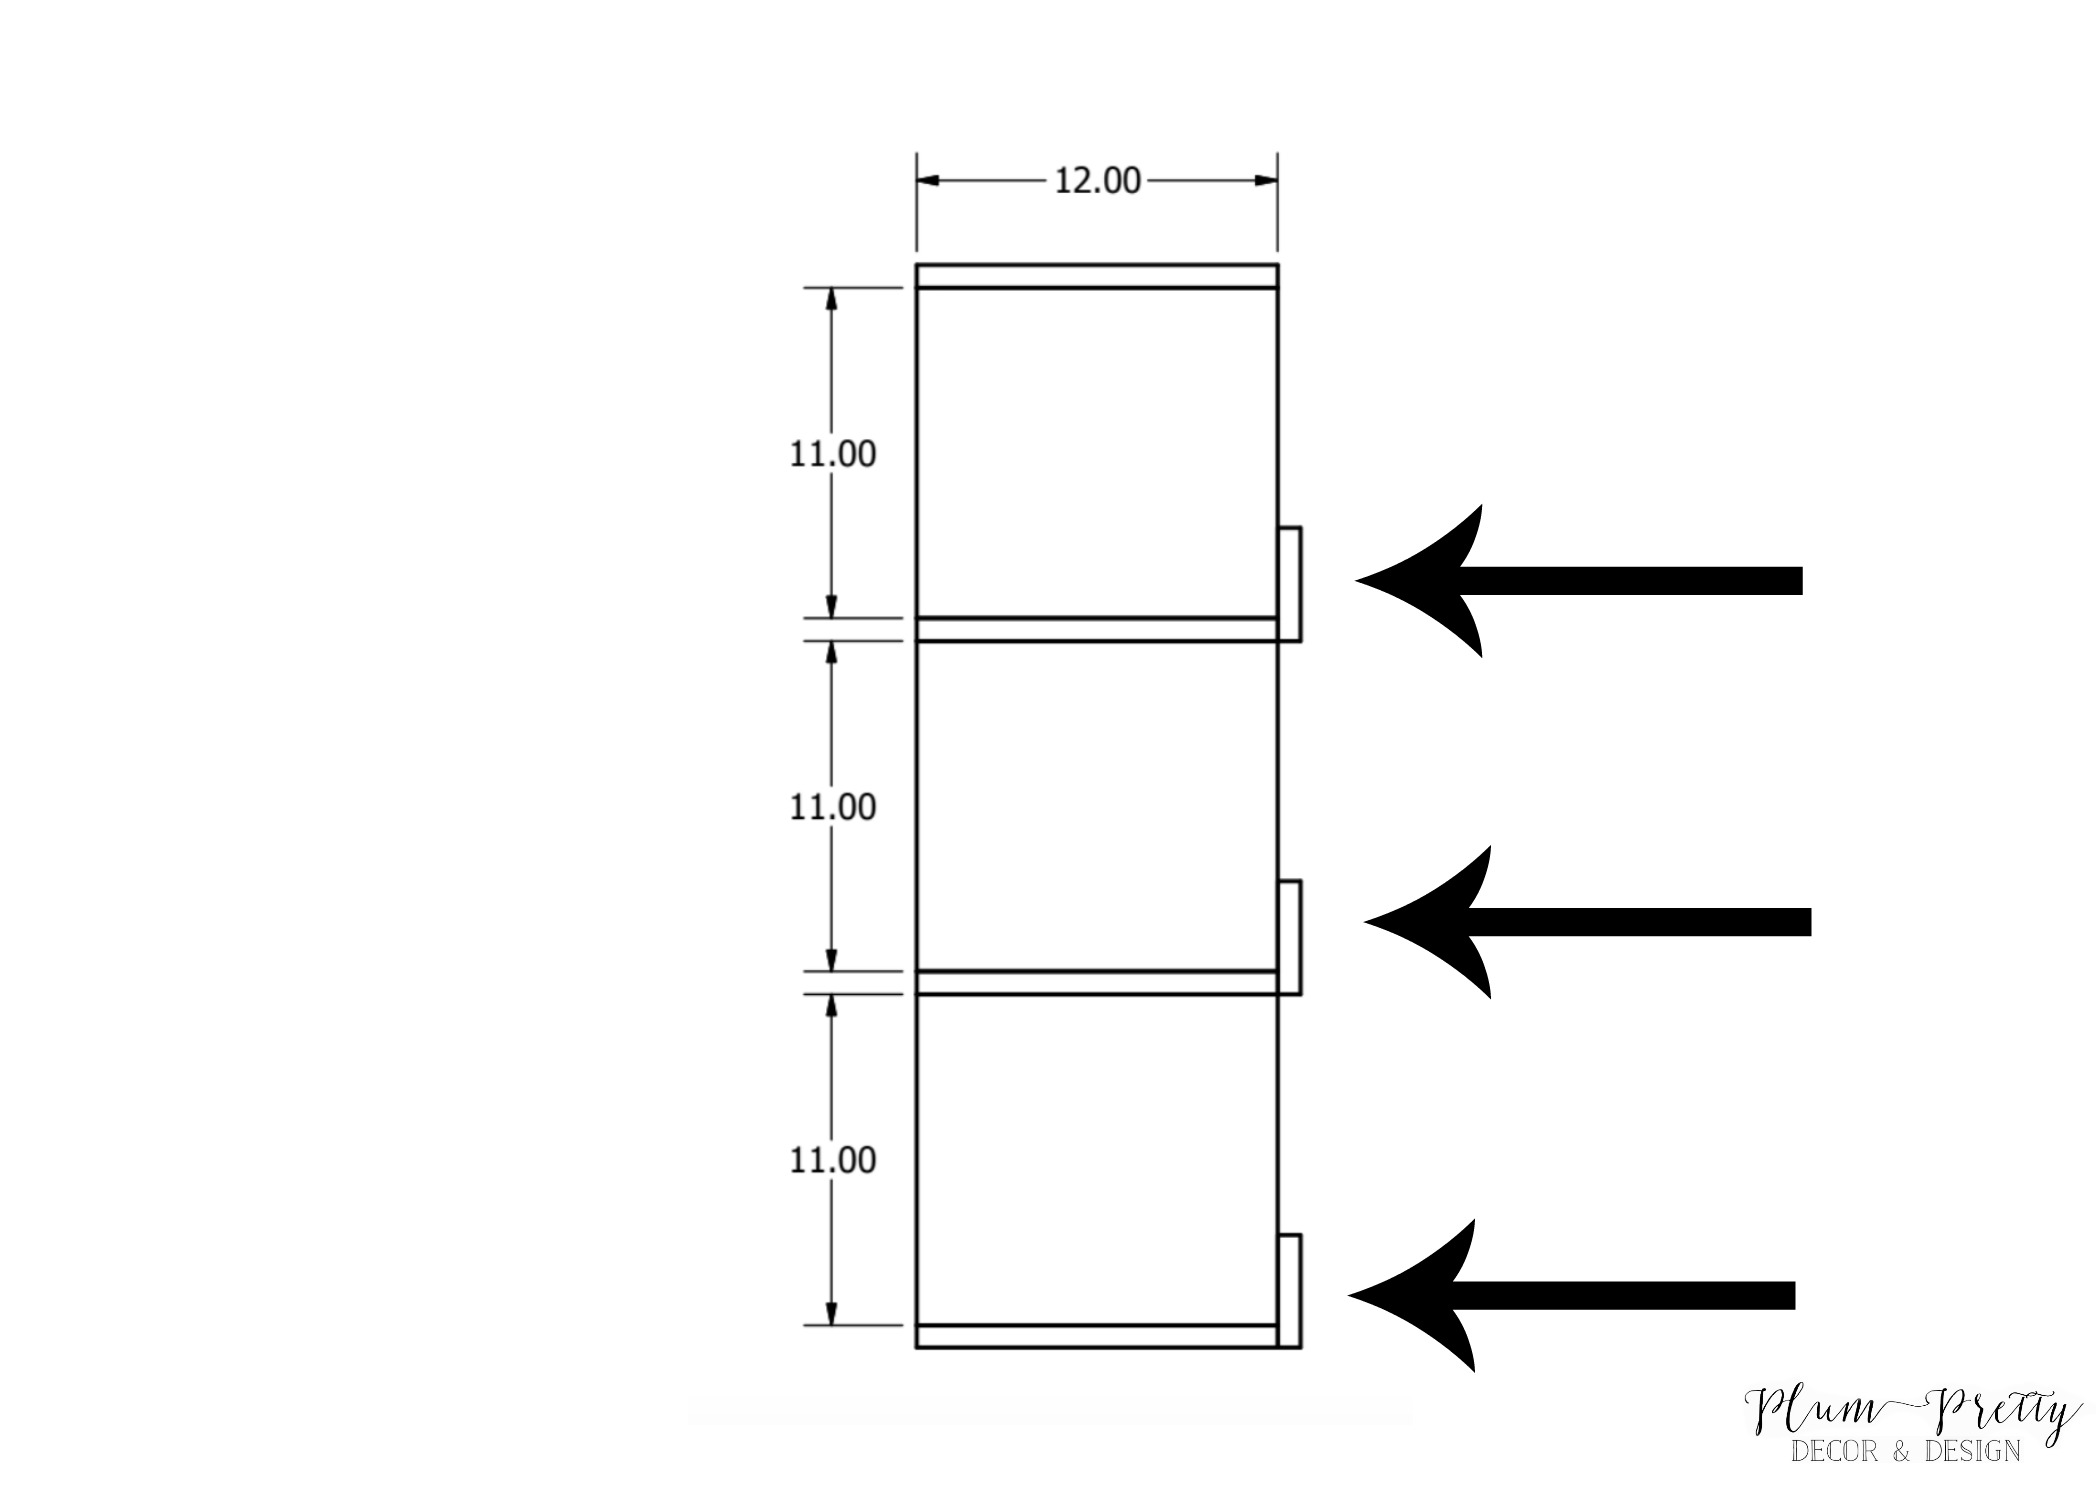
Add the bottom one first, making it flush with the bottom of the 1x12 bottom of the nesting box. Add the second 1x4 flush with the bottom of the second row boxes 1x12. Add the third and final 1x4 flush with the third row 1x12, top of the second row boxes, **You will attach this 1x4 to the top of the second row boxes. You can not add to the bottom of the third row boxes because of the locker basket drawers. But by adding it to the top of the second row boxes it still gives the look of a true vintage nesting box. **Refer to the arrows on the diagram below.

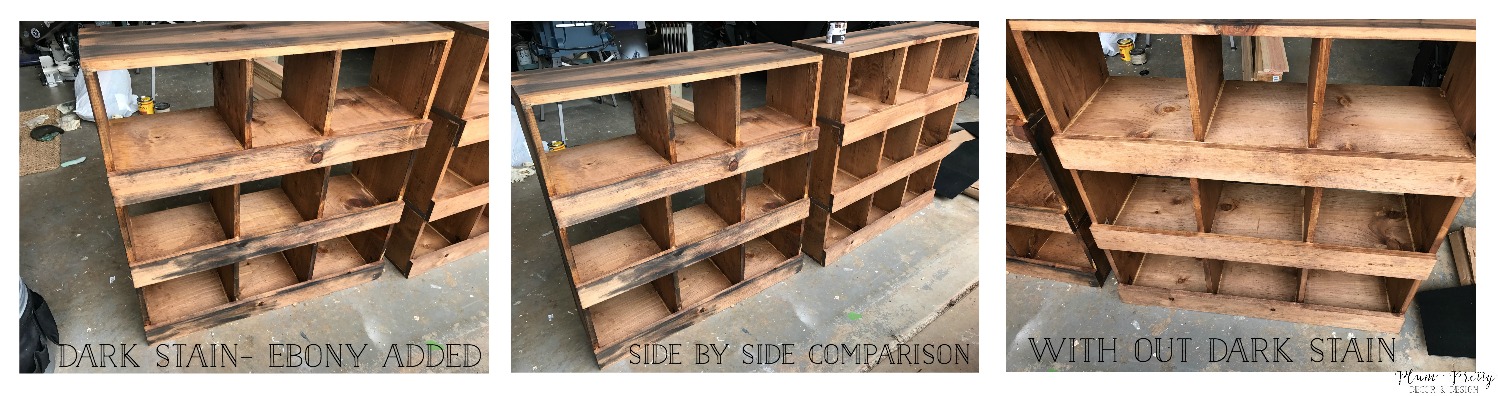
Step five- Stain the boxes now before adding the back. This makes getting inside the boxes a lot easier. First using a cotton cloth apply the Early American MinWax stain to the entire nesting box. *Always apply stain going with the grain of the wood.

Then once you get the entire thing covered with the Early American apply the Ebony MinWax stain in splotches. There is no right or wrong way to do this step just add a little here and there rubbing it in and slightly blending it with the Early American color stain. This step helps add character and the appearance of age and wear to the piece. Now let it dry.
Once the stain has dried take a sander and lightly sand over the piece. Sanding heavier in some areas and lighter in others. Again this process also helps add character and the appearance of age and wear to the piece. Once you get the look you want its time to start white washing the piece.
Step six-White washing. This step is optional. If you like the look of the natural wood skip this step. Dip the very tip of your paint brush into the white chalk paint and feather the paint by swiping it on a plate or piece of cardboard. You can also dip your brush into a little bit of water to help thin the paint if its too thick.
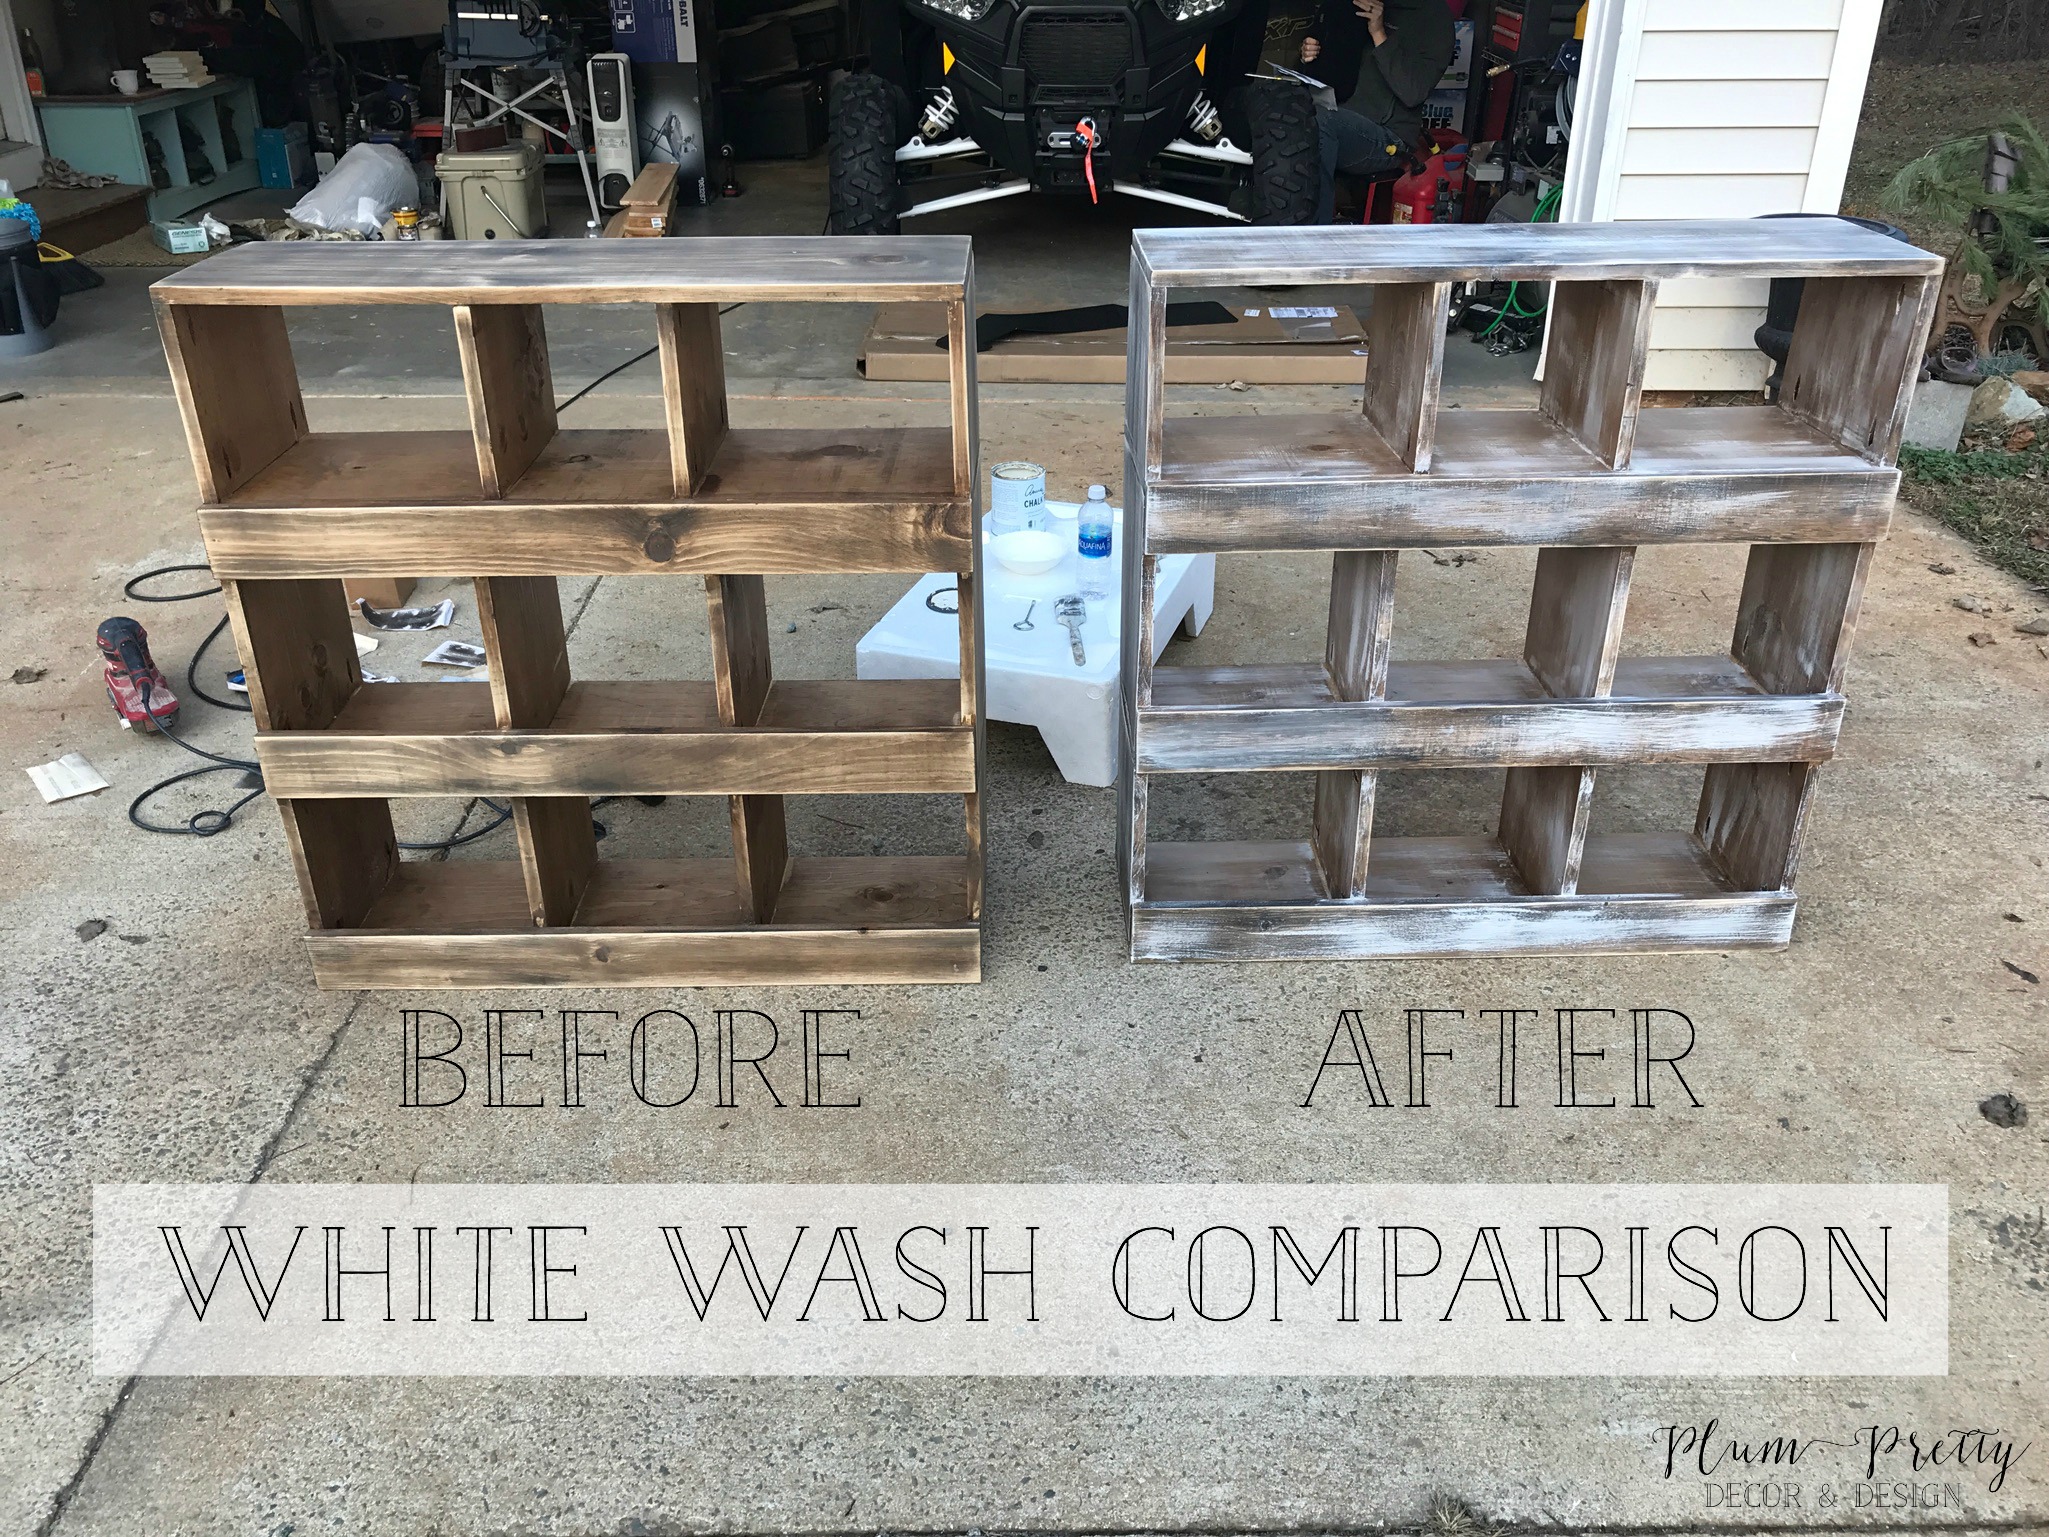
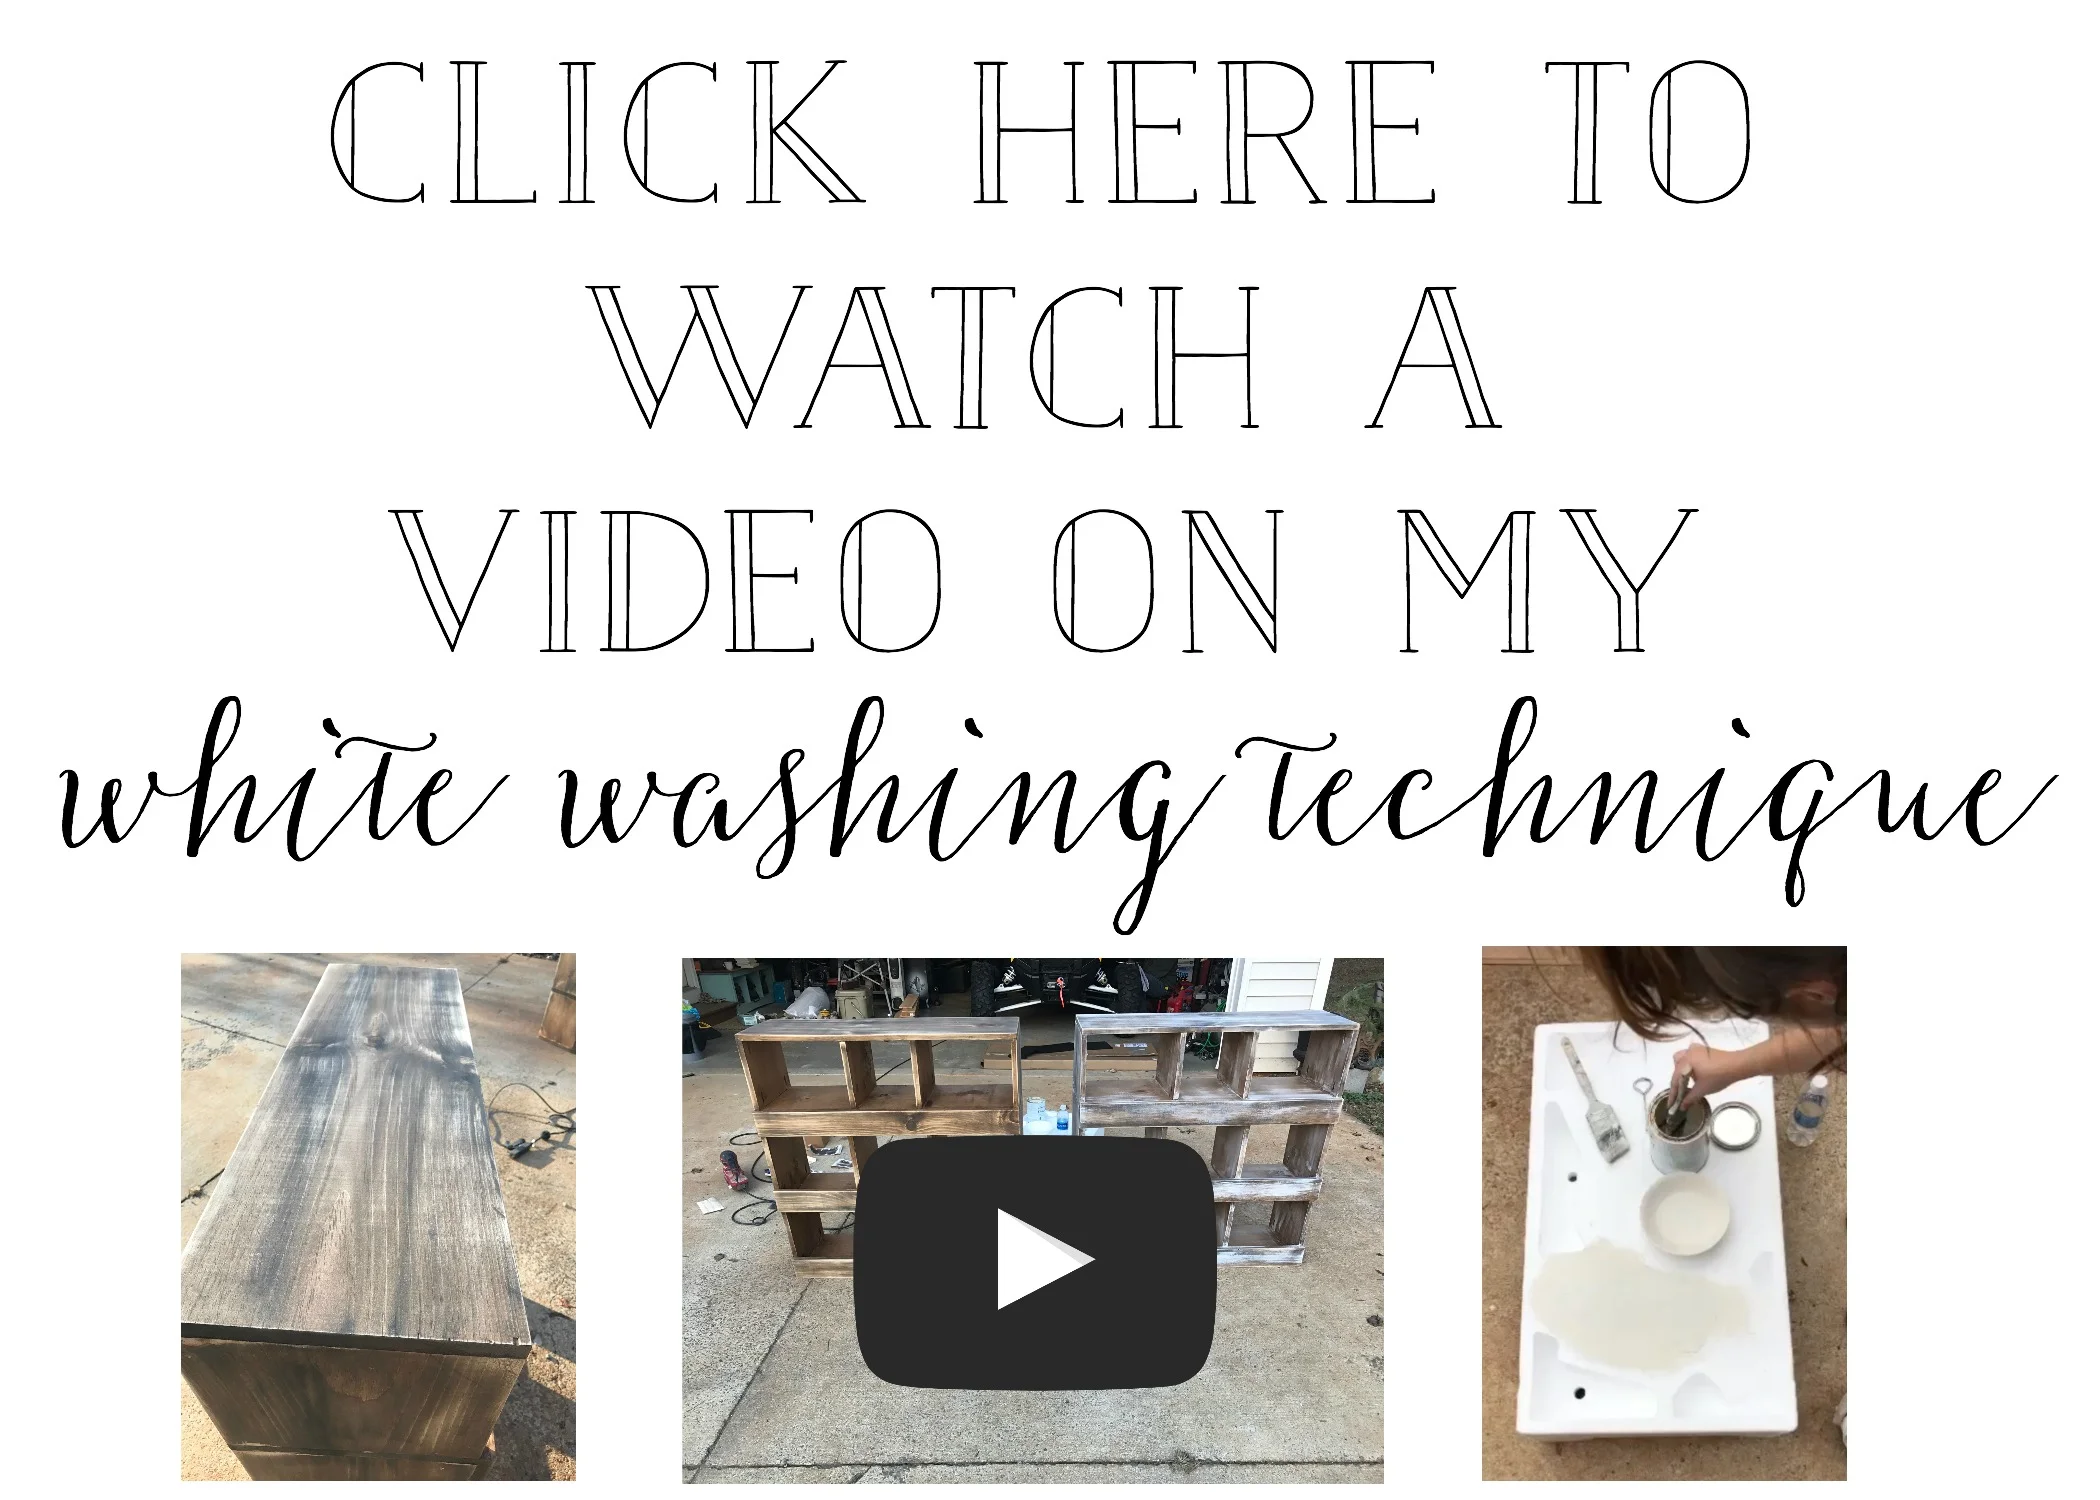
Then in a fast swiping motion apply the paint over the stained wood. If you get a little too much or an area doesn't look like you want it to, simply wipe it off with a cotton cloth. I added a video below so you can visually see the technique. Hope this helps with my explanation a little better.
Step seven- Stain and white wash the boards for the back of the nesting box *before you attach them.* Attach the fence post boards to the back of the nesting box using a finish nailer starting at the bottom and working your way up. The last board you would attach (DON'T attach it yet) will be too wide and stick out above the back of the nesting box. You will need to rip this board down using the table saw. Measure the width of the space needed and mark your board to fit. After you rip the board to fit attach it with the finish nailer. Now your nesting box is completely built! YA!!
Step eight- Seal the nesting box with a wax. This protects the piece from wear and water. Simply apply the wax with a wax brush or cotton cloth. If you plan to use the nesting box in an outdoor setting I recommend using a polyurethane sealer in a matte finish.
How to DIY: For a single nesting box without locker basket drawers.
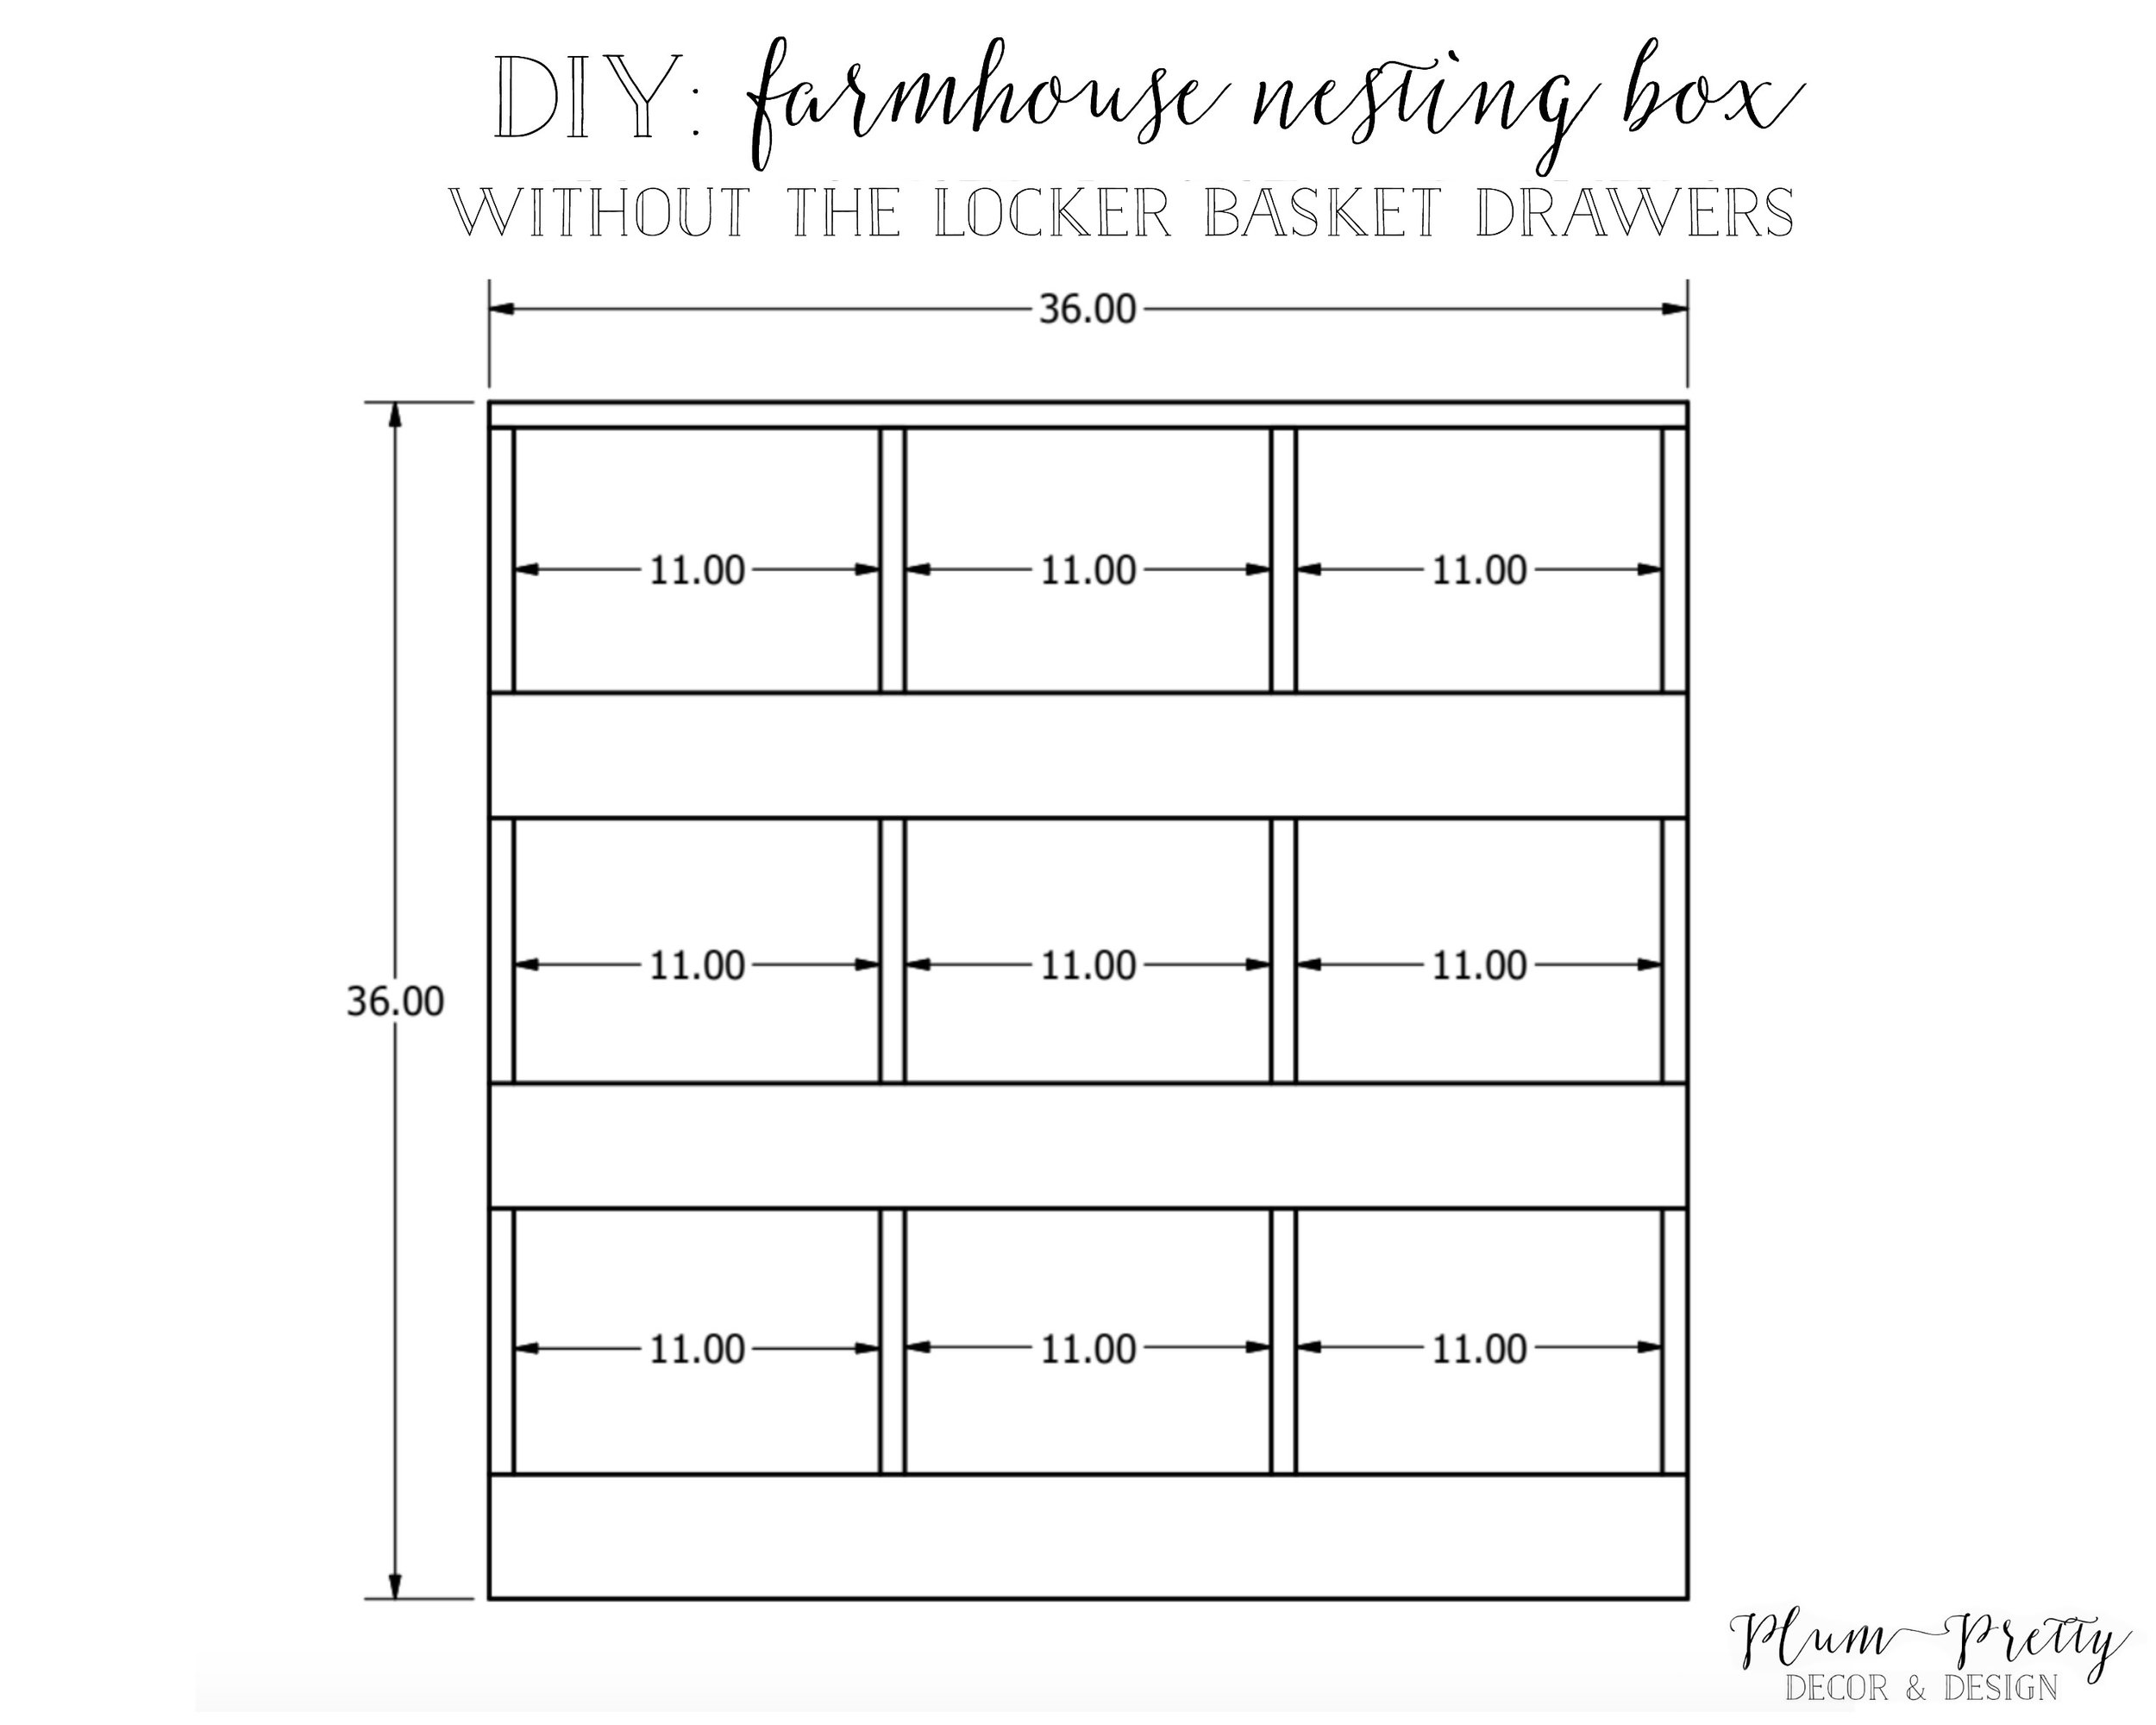
*For building the nesting box without the locker basket drawers the materials and tools needed are the same as the nesting box with the locker basket drawers. The cut and size of the dividers and placement of the front 1x4s is all that is different.
Cut Boards Numbers:
- (4) 1x12x 3'
- (12) 1x12x 11"
- (3) 1x4x 3'
- (7) 3' Fencing Boards
Follow the same step as the nesting box with locker basket drawers but make these changes:
- Step one- cut all dividers at 11"
- Step three- Measure over 11" for every divider. All boxes will have the same dimensions.
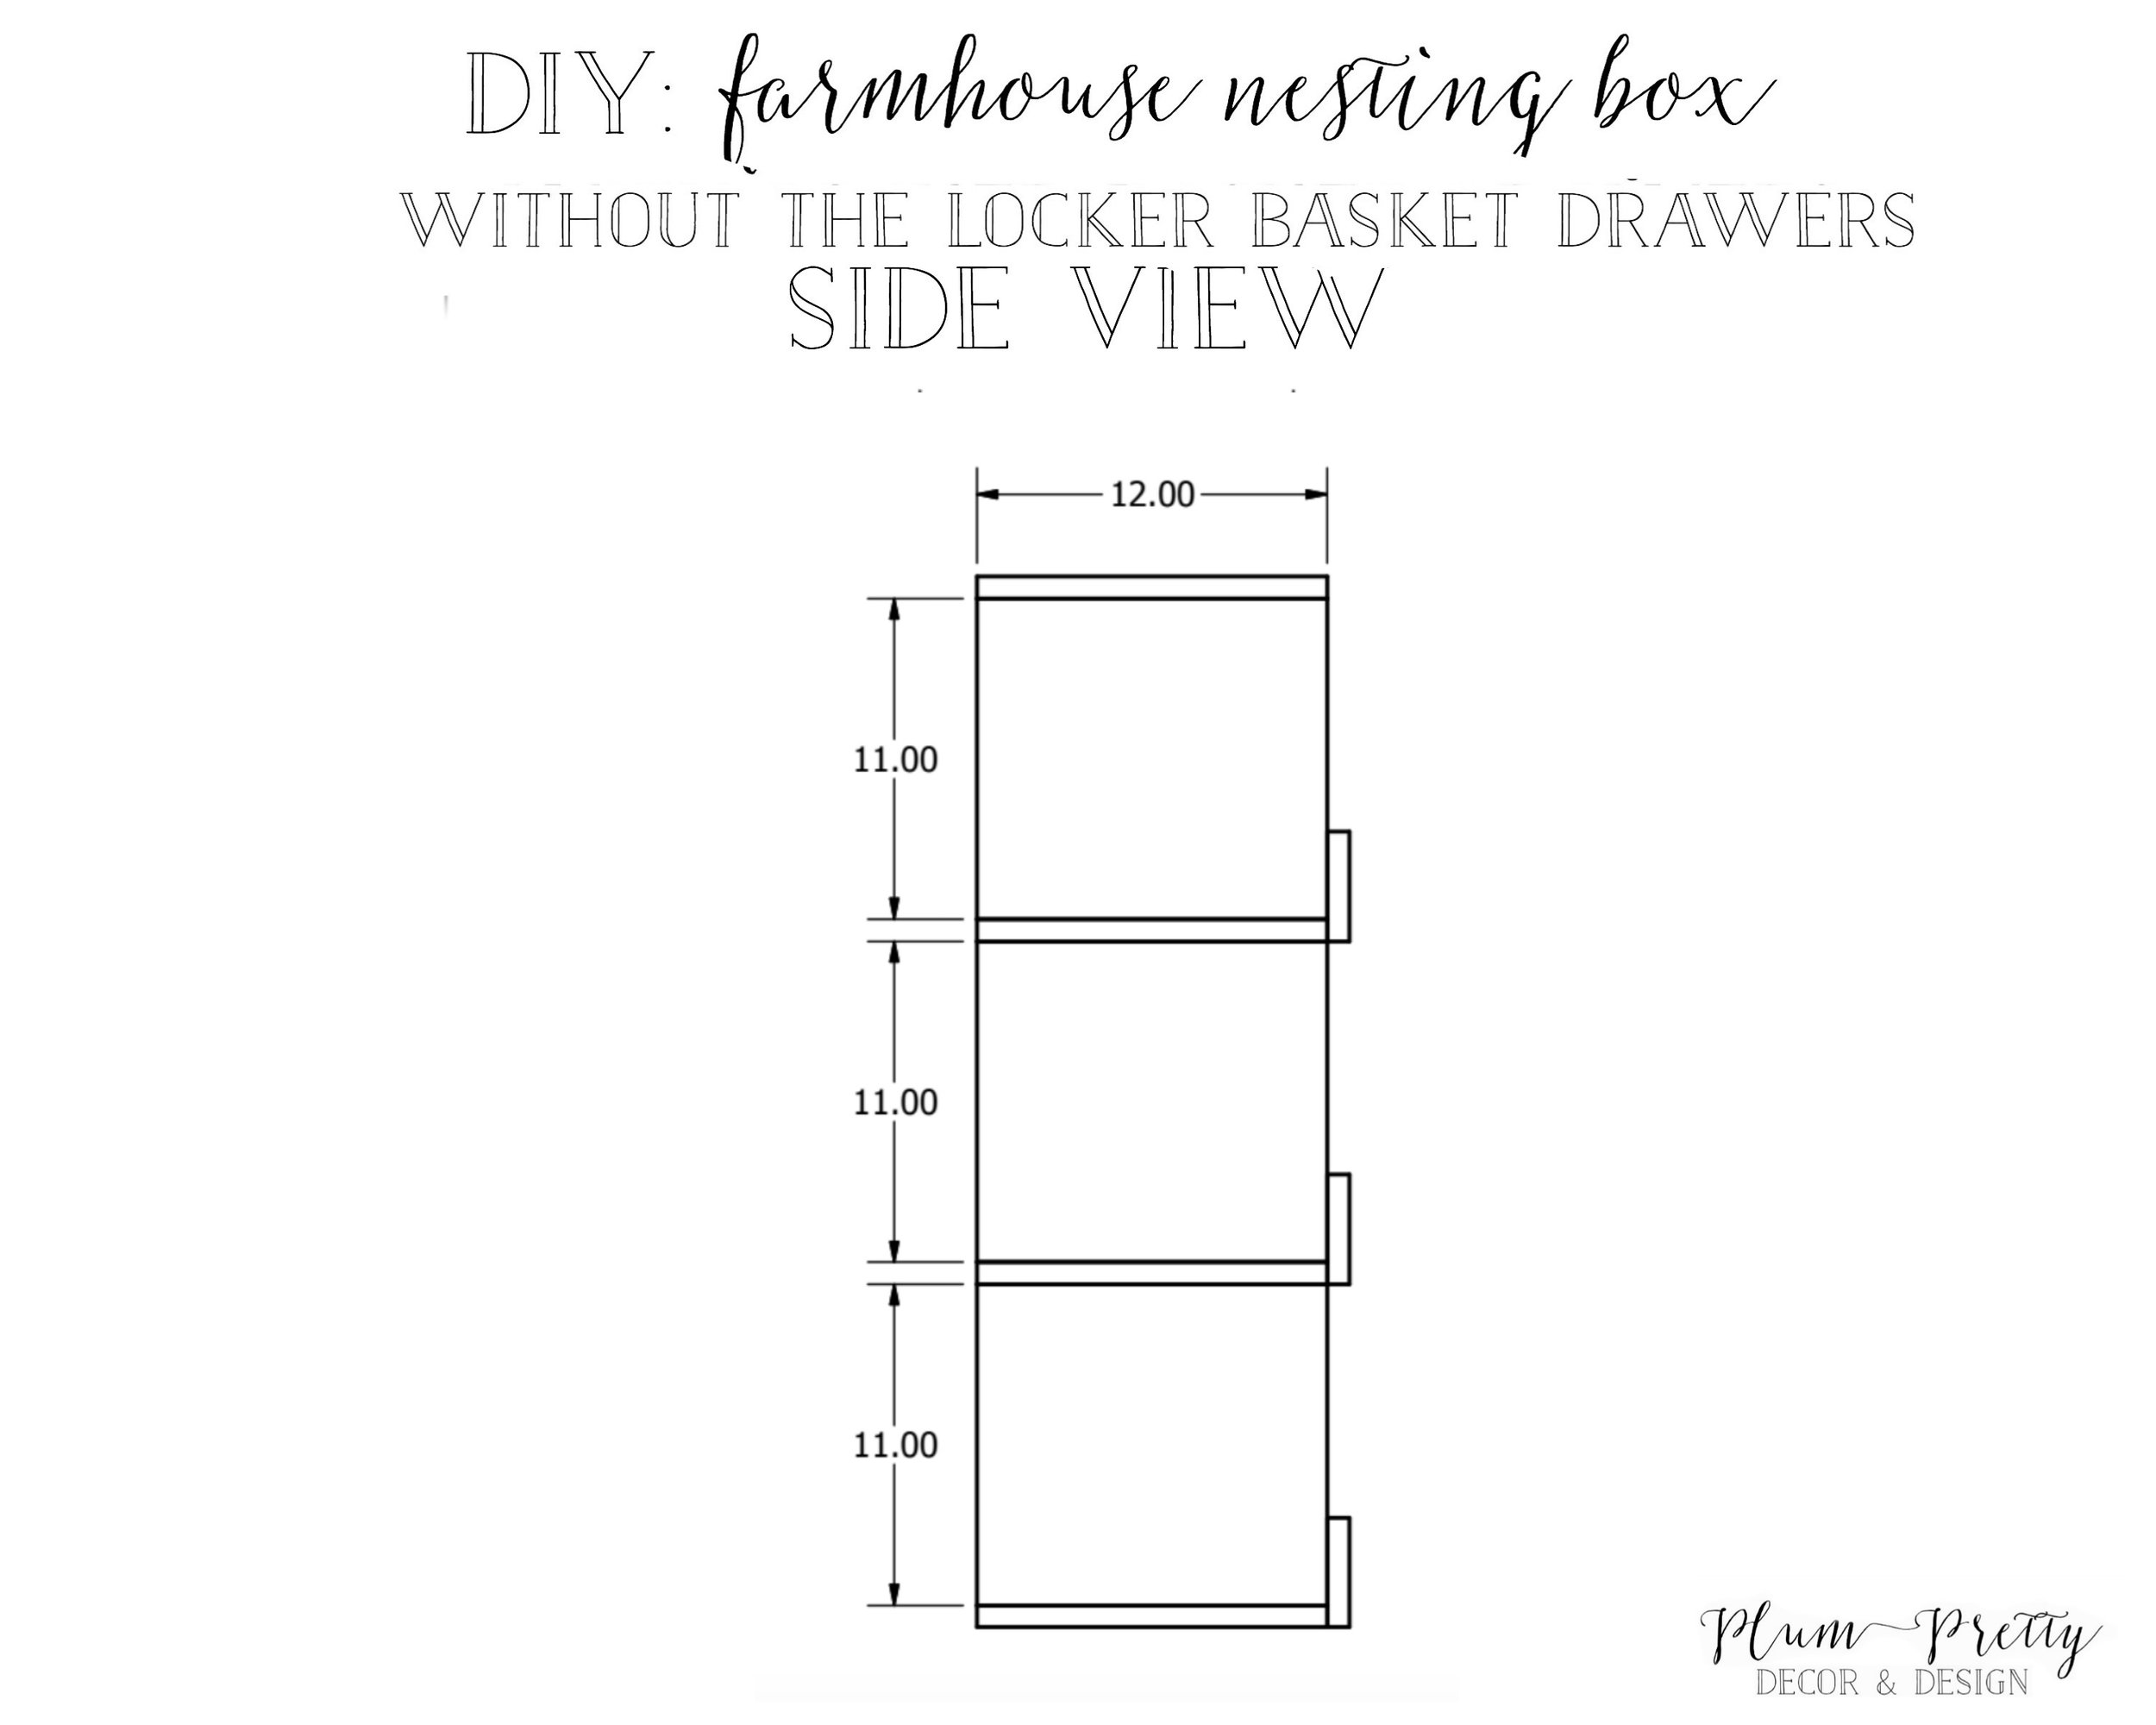
- Step four- Attach the third 1x4 flush with the bottom of the third row 1x12 (See side view picture below).

Thank you so much for stopping by today and reading my blog. I hope you guys found this DIY tutorial helpful in building your very own nesting box. Let me know if you have any questions or if something wasn't very clear. I would be more than happy to help!
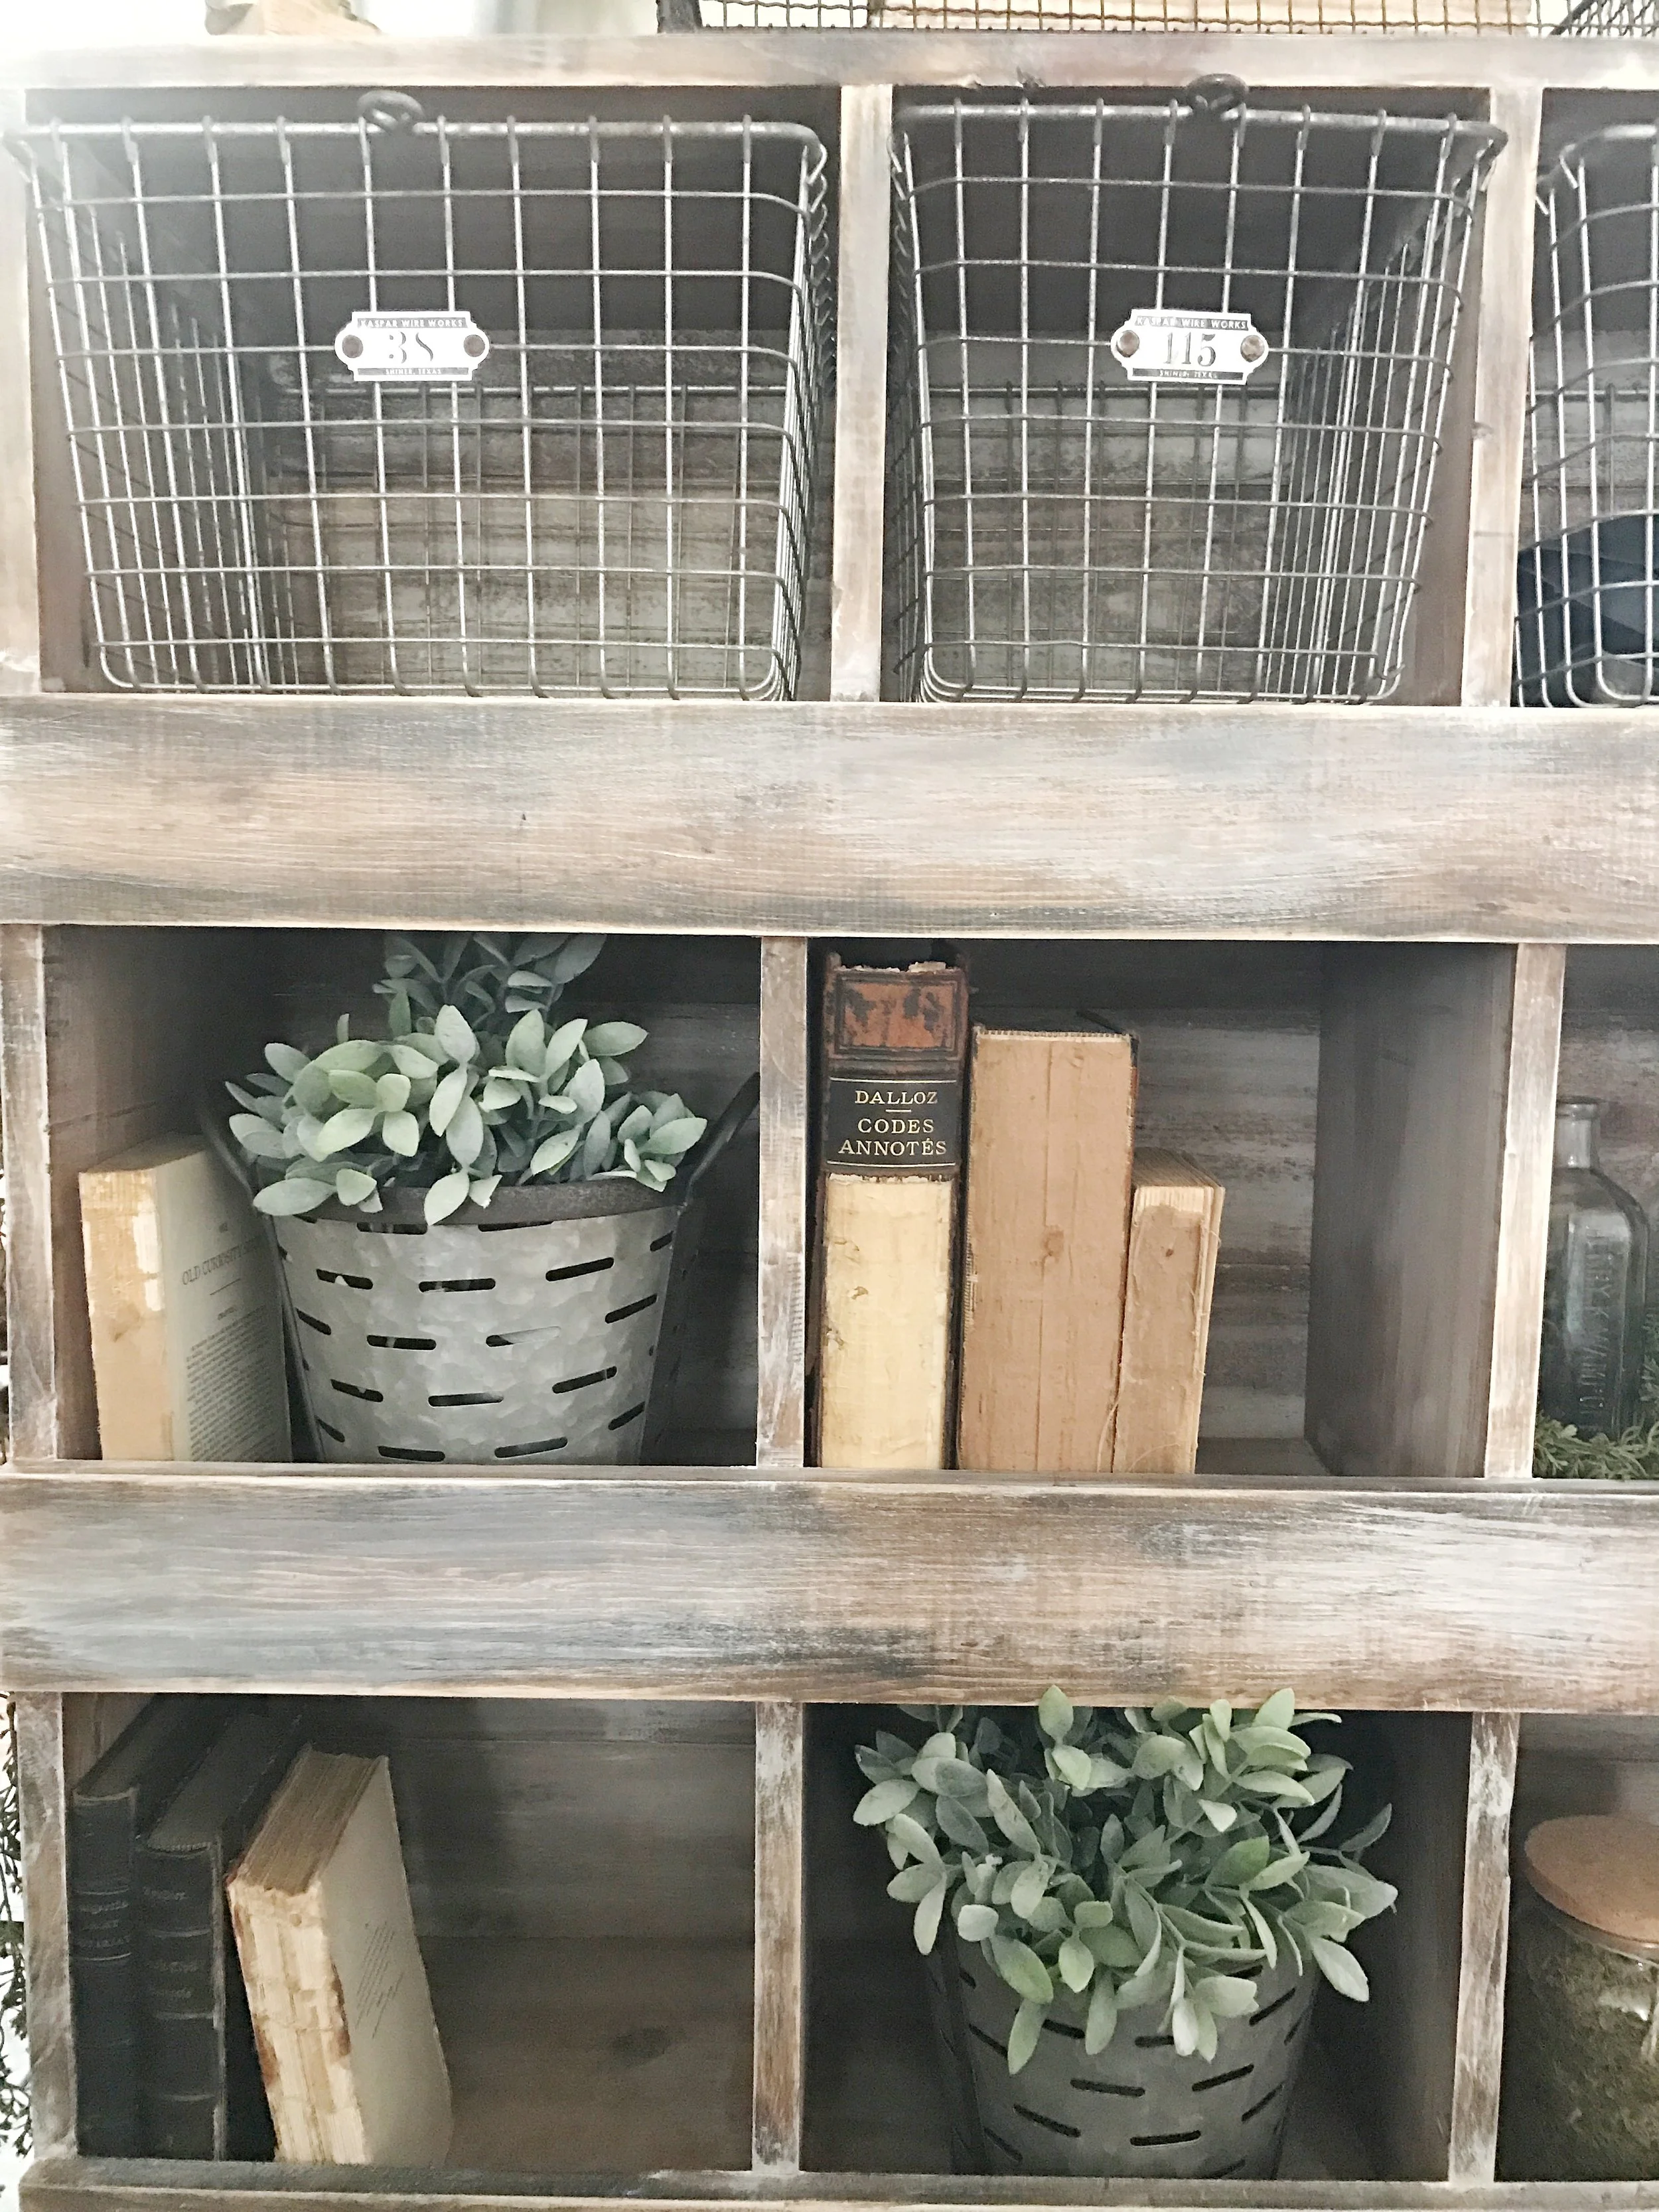
I have had my set of nesting boxes in my house for a little over a week and I have to say I love them! Not only do they fit the style of my living room better than the blue console table I had there before they are actually helping organize our stuff. Of course I styled them for pictures but right now them baskets are full of mail, keys, papers, and receipts.
Be sure to follow me over on FACEBOOK and INSTAGRAM for more behind the scenes and more pictures of these nesting boxes in my home.
With love,

Want to see more of my living room? Click the picture below for my living room tour.
