
Walls aren’t just for pictures!
Gallery walls have become quite the trend recently and many people have such a hard time capturing the looks they see flooding social media. I have had countless people ask me how I came up with the idea to hang various things on my walls.


Gallery walls are my favorite- one look around my house and that statement becomes very obvious. Who knows what I will be hanging on my walls next. Wall hangings do not only have to be pictures. Plates, barn wood, wooden paddles… the list is endless and these things can help add character and texture to your walls. Not to mention gallery walls create a nice focal point in any room.

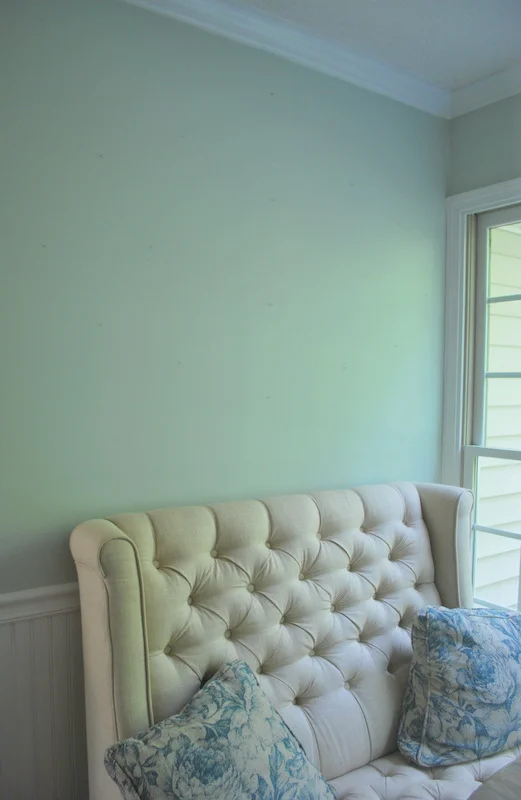
To create a gallery wall first pick a wall in your house that seems as though it is lacking character and one you would like to create into a focal point in that space. Gallery walls do not have to be over a large area they can be small and still have an impact. I choose the wall in my breakfast nook behind my tufted settee because I felt as though it was missing something and I love how the morning sun floods onto that wall through my windows. This is a small wall and lacks a whole lot of room for anything very large. You do not want your gallery wall to overpower the space, you simply want it to complement and provide a focal point.
Next think about the style or theme you want for that space. Simple and classic, rustic, colorful, modern- whatever that look may be start thinking of items that would go with that style and your space. I knew I wanted to cover majority of the wall but without overpowering my small breakfast nook. I have always collected white antique china so this was a great time to get it out of boxes and finally put on display. This space is light and airy with a very neutral palette so using white and soft blue plates and platters stayed within this color palette nicely. I found the soft blue platter and plates at Home Goods and had originally planned on using them in a place setting. I find myself using things in other ways than intended all the time.
With the size of the plates and platters I was able to cover almost the entire wall without overpowering the space. Each piece was small but together they covered a large portion of the wall and made a beautiful display.

Here is a step by step guide to designing your plate gallery wall (or any gallery wall).
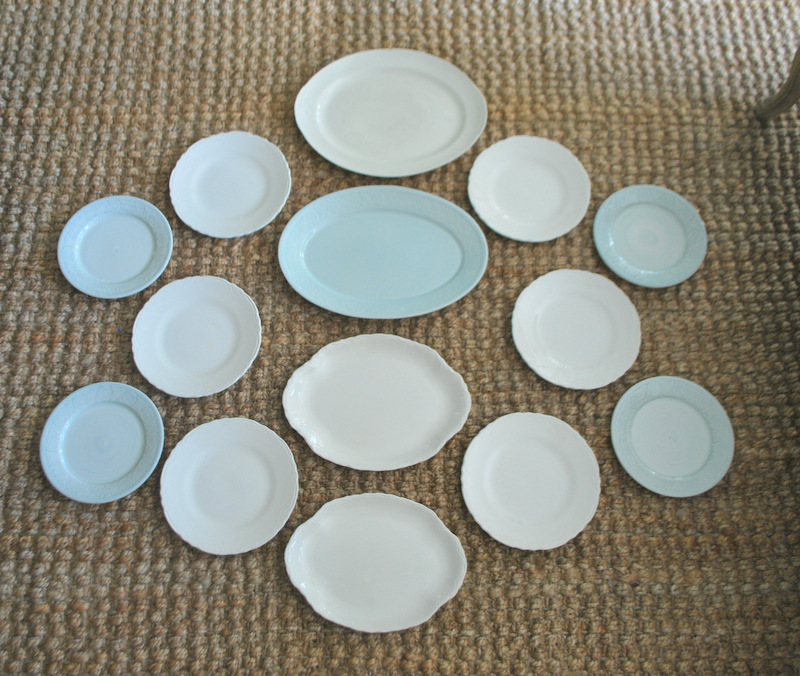
1. Plan your design- Don’t just start nailing holes everywhere. Lay all your plate out on the floor and get a design you like before putting holes all in your walls.

I started with the larger platters in the middle and arranged them from largest to smallest in a descending order. This provided my foundation for me to build upon.

Next I added plates on the sides of the platters in a way that flowed along the edges.

I finished the design with four decorative soft blue plates that match the larger platter and some extra small saucers.

2. Now you have to get the plates ready to hang on the wall. For my larger platters I used Disc Adhesive Plate Hangers--- {Click HERE- for Disc plate hangers). These are super easy to apply with easy to follow instructions. Wet them and stick them to your plates. You do have to wait a while for them to dry and cure before hanging.

However when you have 10+ plates to hang this can become quite expensive. For my smaller plates I used a different approach. I used a hot glue gun, some stripes of thick card stock and some twine. Here is what you do- Squeeze a dab of hot glue onto your plate, place the twine over the glue, top with a piece of card stock and press down. Voila! You just made your own plate hanger. Once the glue dries you can hang it on up!


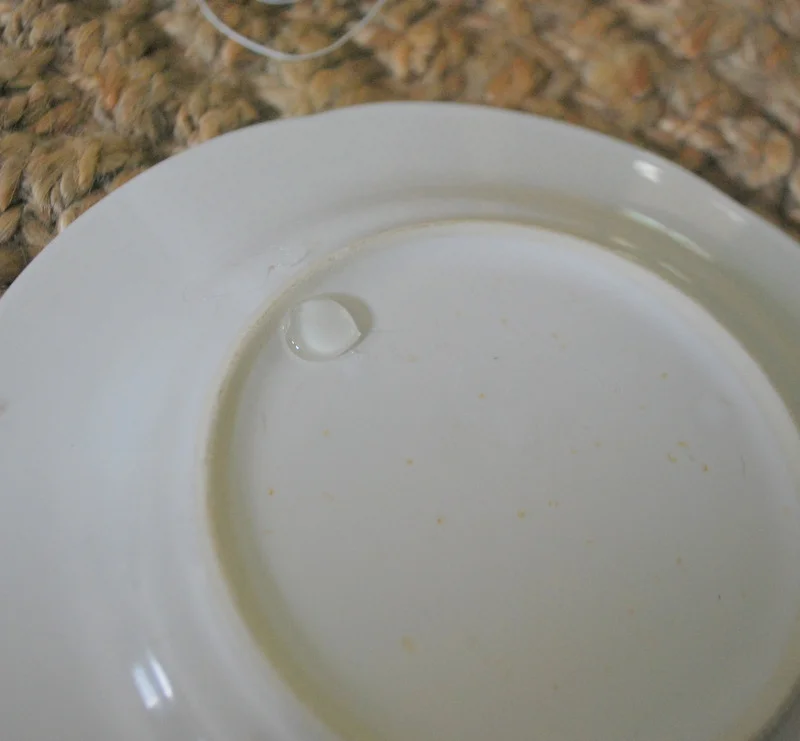


This does not damage your plate and once it dries the glue can be peeled off.
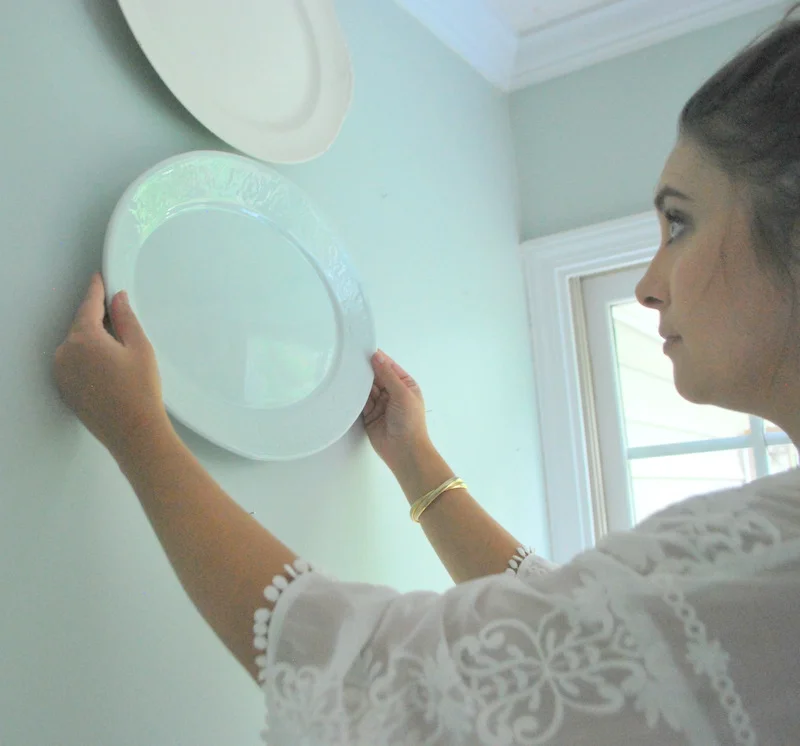
3. Getting your plate design on the wall can be a little tricky. My advice to you is USE a level and mark where each nail needs to go with a faint pencil mark. When doing a consistent design if something if slightly off it will show.


4. Now that you have everything marked and nailed start hanging up your plates one by one slowly transferring the design from your floor to your wall.


5. Sit back and admire your new beautiful plate wall.


With Love,
