

If you're not familiar with the most recent "shiplap" craze you may be wondering what in the world is it!? And I just recently realized some people watch other channels on tv than just HGTV. So yes, there may be still some people in this world that have no idea what shiplap is exactly.
Well shiplap is a type of wooden board paneling often used in the construction of barns and historic homes. It is either rough-sawn 1" or milled 3/4" pine. It varies in width from 3" to 10" and has a 3/8" to 1/2" rabbet on opposite sides of each end- similar to tongue and grove boards. Shiplap is not just boards you nail to the wall.
If you watch HGTV's Fixer Upper you know Chip and Joanna Gaines are huge fans of shiplap and it makes a debut in almost all of their reveals. However, most of us do not own an early American farmhouse/historic old home where deep down behind that sheetrock rest beautiful original shiplap. And if you do own an early American farmhouse/historic old home- lucky you!
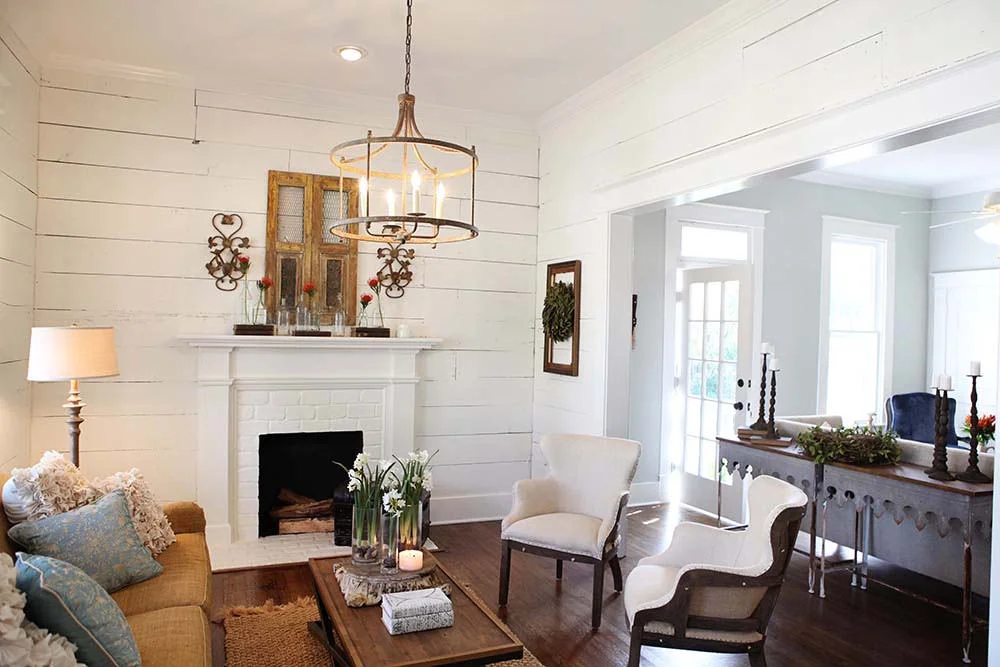
Photo: HGTV

Photo: HGTV
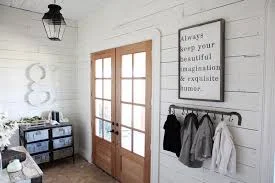
Photo: HGTV
If you are like me and your house was build in 1999 and does not have shiplap under the sheetrock.... you can add it! There are many ways you can add shiplap to your home, you can buy salvaged or new pine boards to recreate this look in your home. However this requires a little more carpentry work than my DIY faux shiplap. I have tried using actual shiplap and it was both time consuming and expensive. I used shiplap boards from a local sawmill in my half bath renovation and paid $8.50 per board. Bringing my total for the small wall in my half bath to over $100.

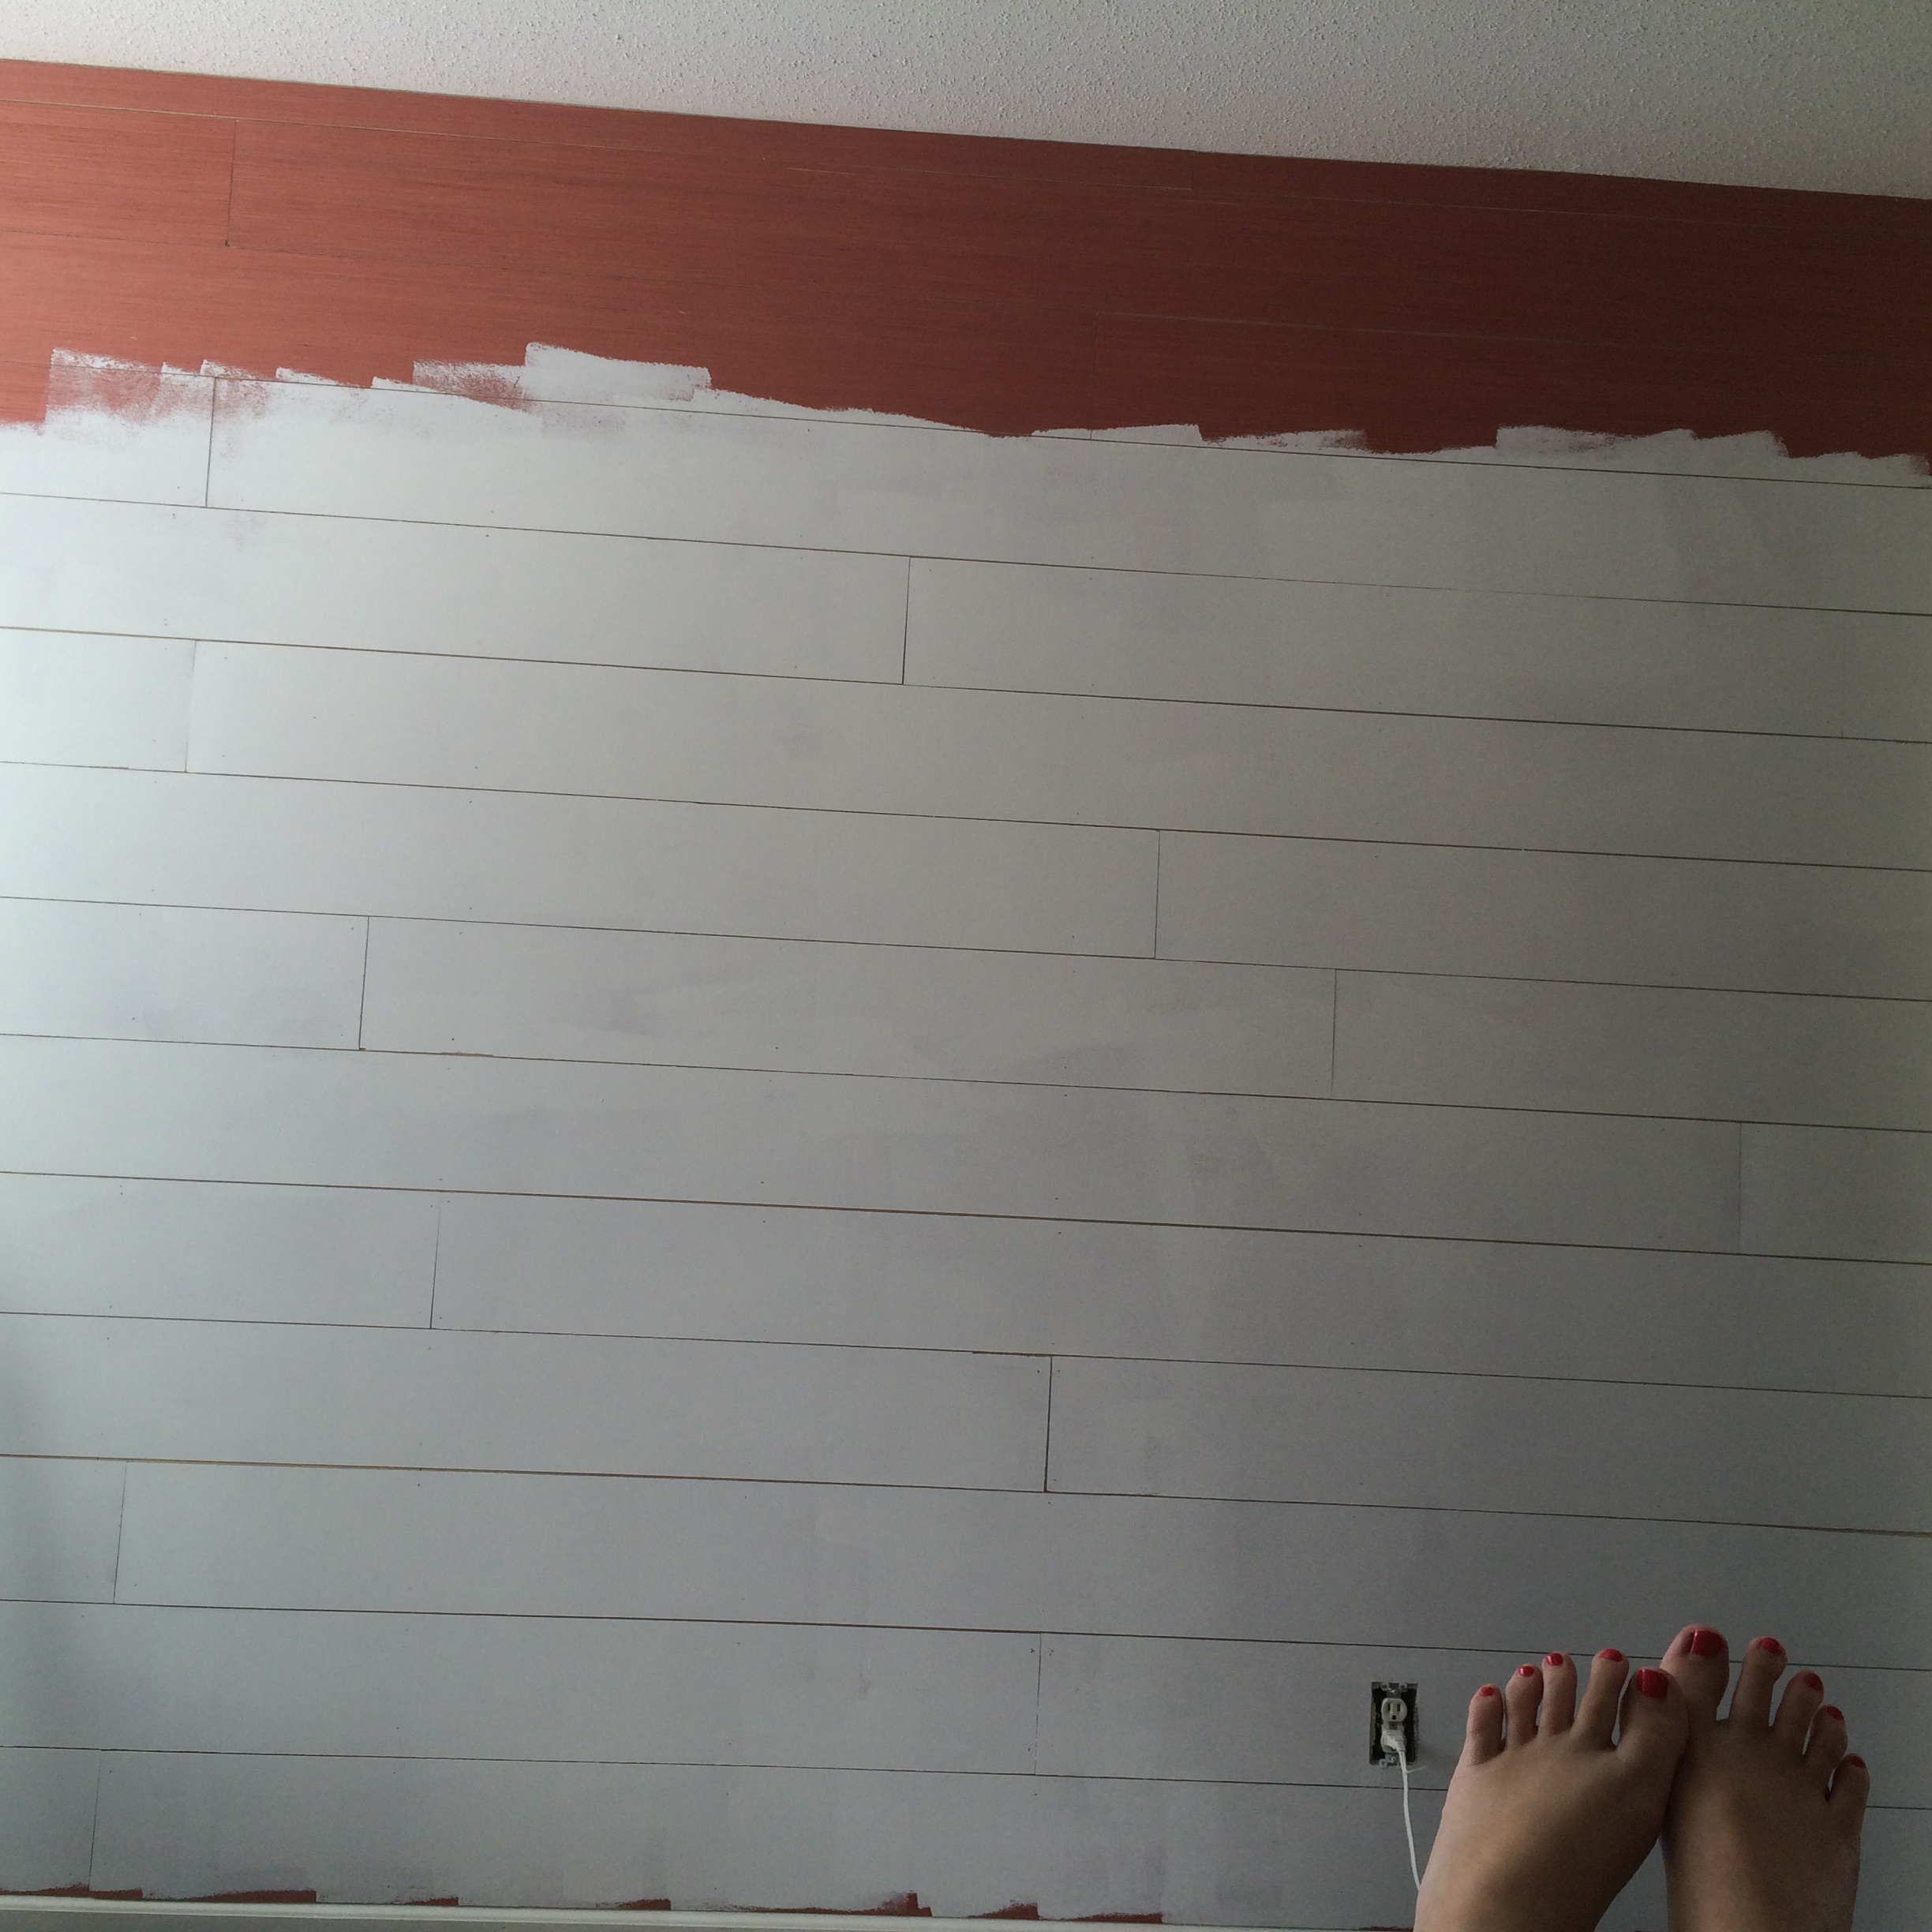
The wall in my master bedroom is much larger than the wall in my half bath. 3X as big to be exact, so I was looking at over $300 to shiplap the wall! EEKKK! So I decided to try something different. Although this is not true shiplap I honestly can not tell a difference between the wall in my half bath vs. the wall in my master bedroom.
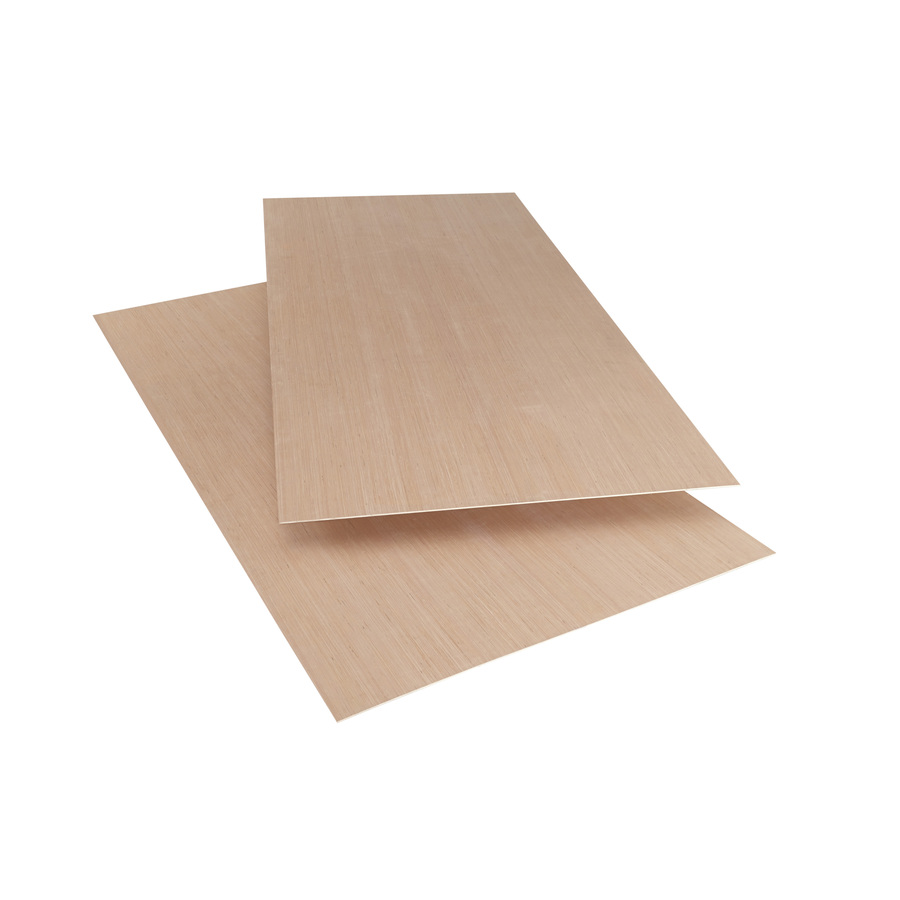
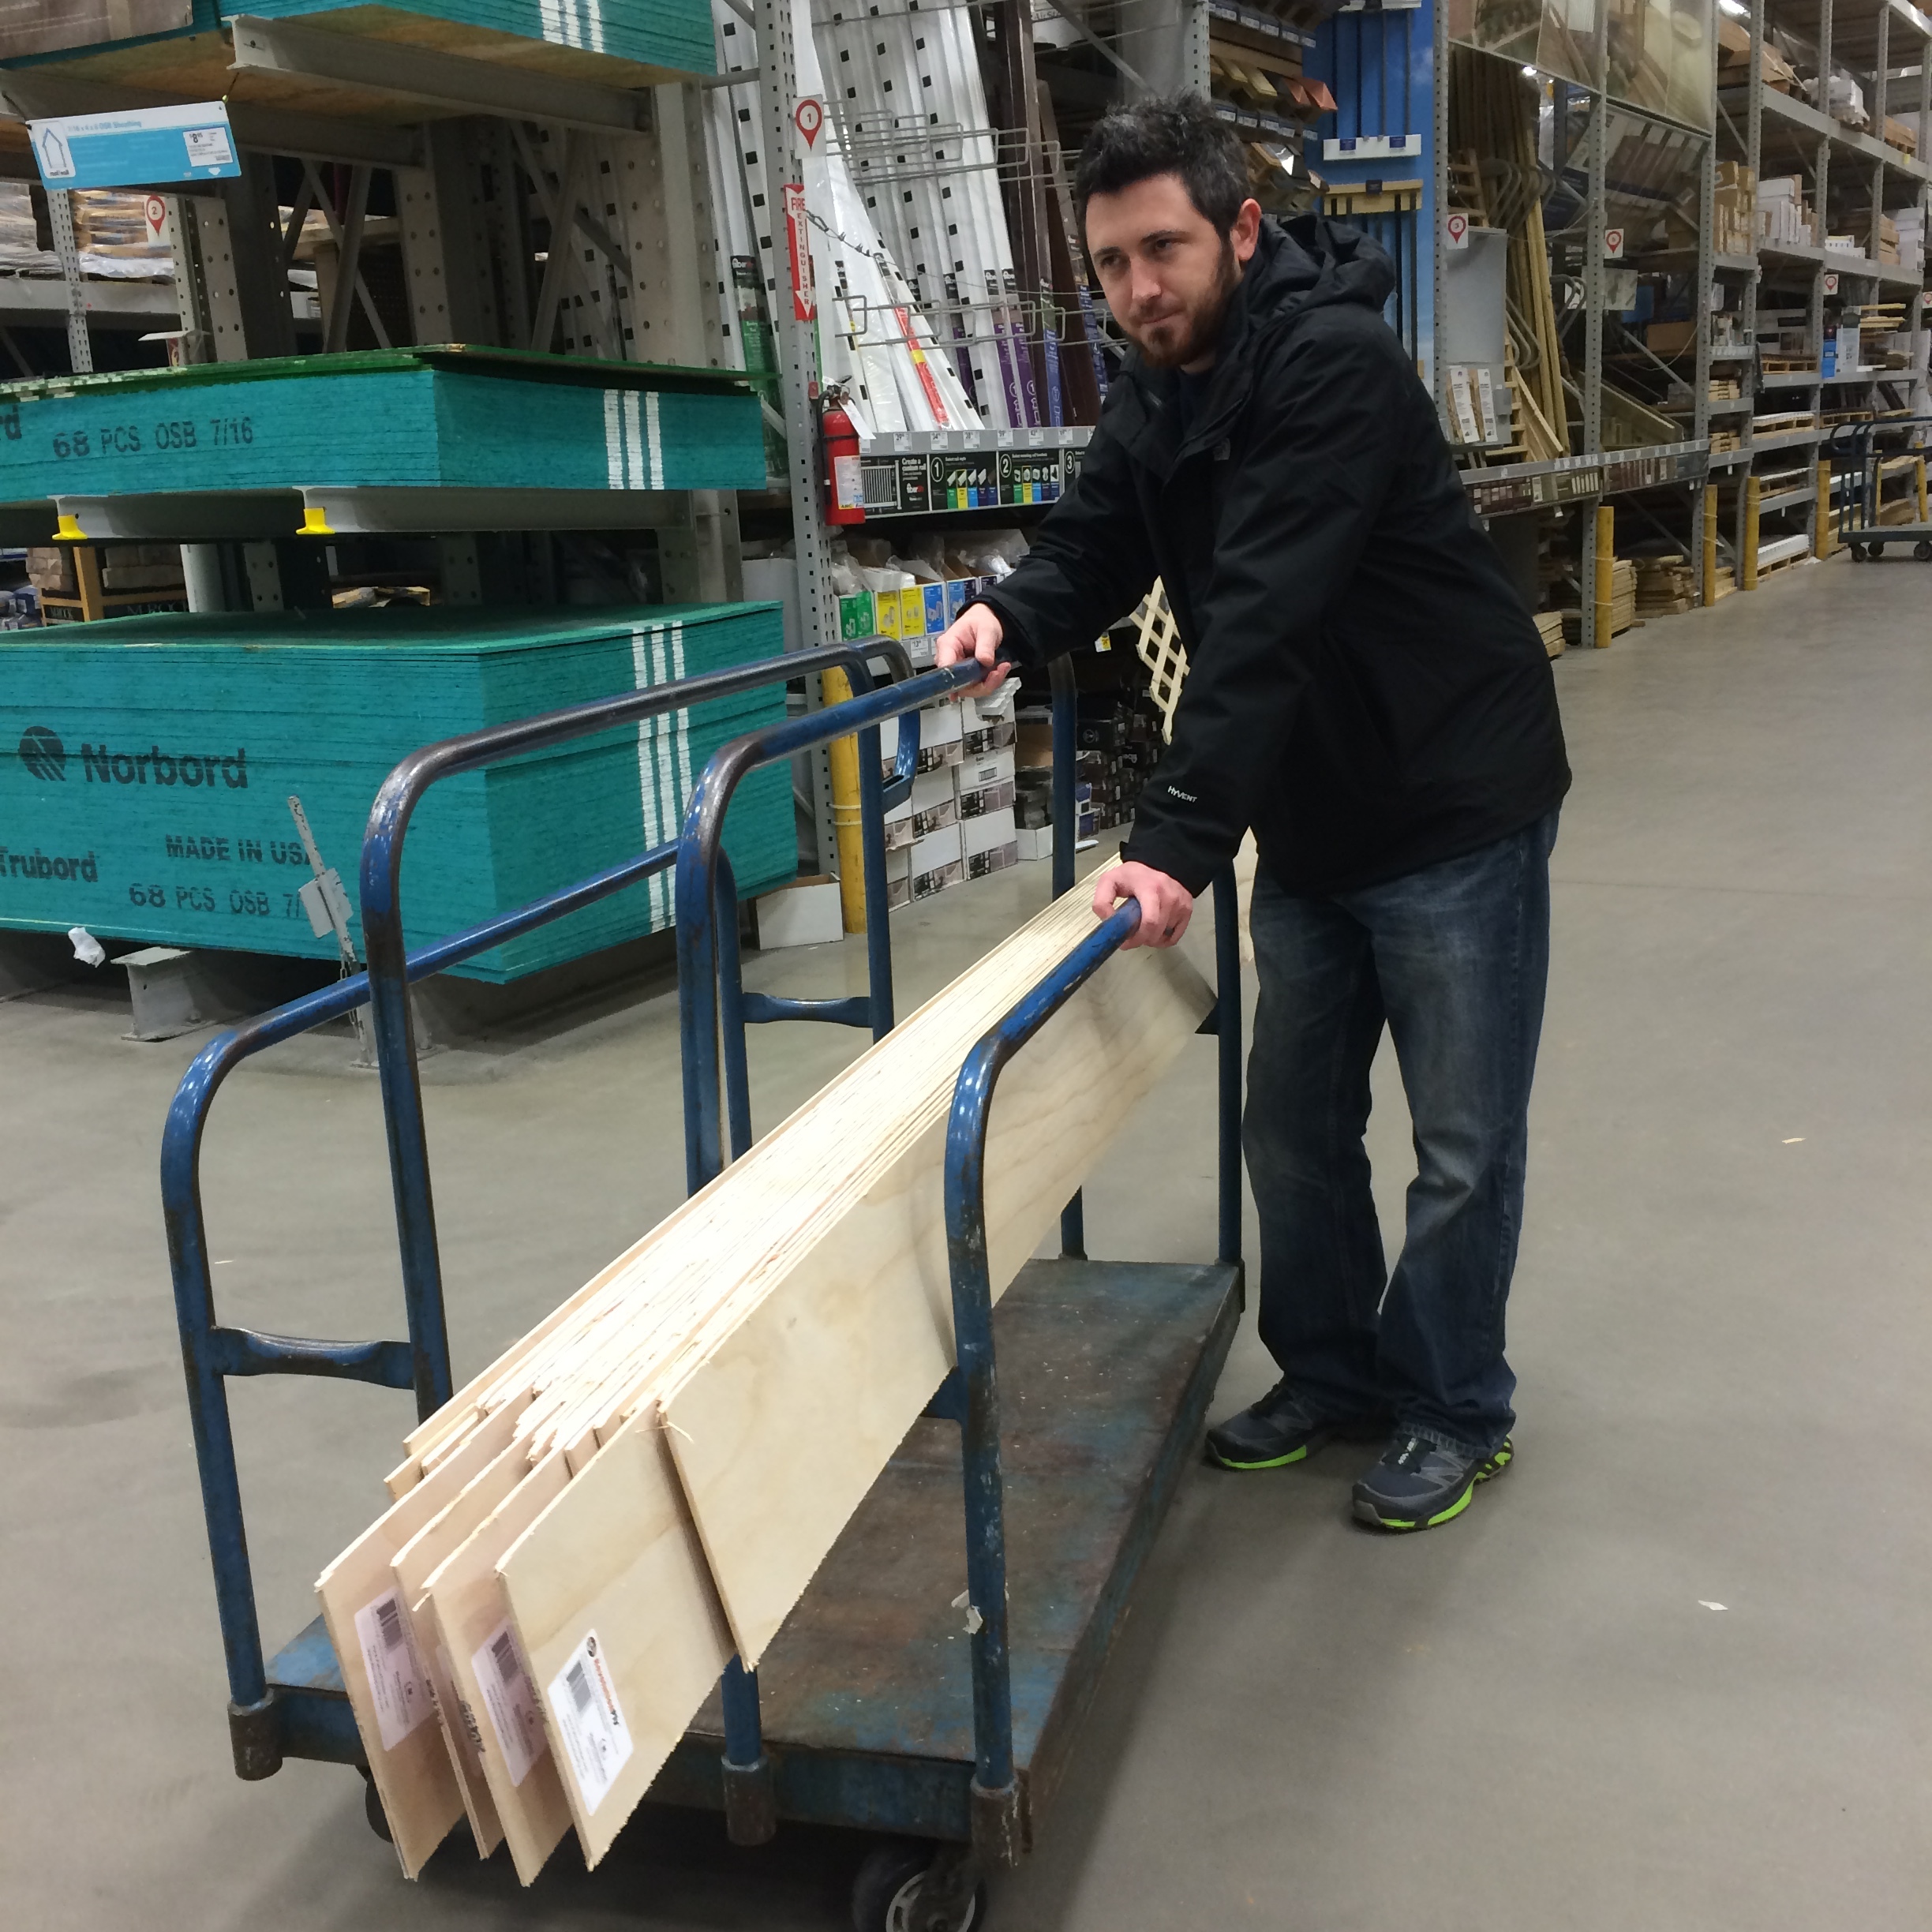
So as an alternative I used RevolutionPly Hardwood Plywood and had it cut into 8" strips at Lowes Hardware. This is commonly used in cabinet making but works great for a cheap alternative shiplap. It comes in 8' x 4' sheets and is 1/4" thick and is only $13.47 per sheet. I was able to get 6 boards per sheet bringing the total per 8" board to roughly $2.25. Having them cut at the store is so much easier because they have a great set up for ripping and cutting boards. Thank you to the wonderful employees at the Burlington, NC Lowes Hardware store for helping me! Y'all are wonderful!


Materials needed:
- Boards cut to your desired width (I used 8" boards)
- Stud finder
- Pencil
- Tape measure
- Level
- Finish nail gun and air compressor
- Finish nails 1"
- Some nickels
- Miter Saw
- Table Saw
- Square
- Wood Filler (Optional)
- Satin white paint
- Paint Brush
- Paint Roller
Here is the process once you get the boards home.
The first thing I did was use a stud finder and located all my studs and marked them all the way up the wall.


I did not remove the baseboard. I started adding my boards right above the baseboard and worked my way up. Before I nailed the first board I checked to make sure it was level using my level. Because you can never assume your baseboards are level due to settling.
I nailed the boards into the studs with my finish nail gun using the lines I drew on the wall as my guideline. If you get to the end of a board and it's not inline with a stud just go ahead and nail it- these boards are so light weight it will not matter and you want to make sure the end of your boards are held down. You could also use liquid nail to hold down these areas but I opted not to incase I ever decided to take it down it wouldn't damage the sheetrock.

Of course your boards will not fit length wise perfectly. There will be gaps shorter than the 8' boards you have. You will need to measure the gap left and cut the next board with your miter saw to that length. Once you start your next level of boards you want to stagger the boards and use your nickels for spacers.
Work your way all the way to the top staggering and spacing your boards. Stagger your boards so all the seams don't line up perfectly. When you get to the very top you may have to rip a board (cut the board making it more narrow to fit). You would do this with a table saw.
Once you're done nailing it all up you can fill in all the nail holes with wood filler if a more clean look is desired. However this is completely optional- I left all my nail holes exposed for a more original farmhouse feel.
Next it's time for paint! I simply rolled on my paint with a roller and didn't worry about getting in all the little cracks. I liked the gaps showing up more. I did use a brush to paint some of the gaps where more wood was showing. I normally use Pure White SW-7005 by Sherwin Williams but this time I used Valspar 7006-4 Bistro White because I bought paint at Lowes Hardware after Sherwin Williams had closed and I'm impatient. This plywood really soaps up the paint- it took 4 coats until I felt the wood was completely covered.

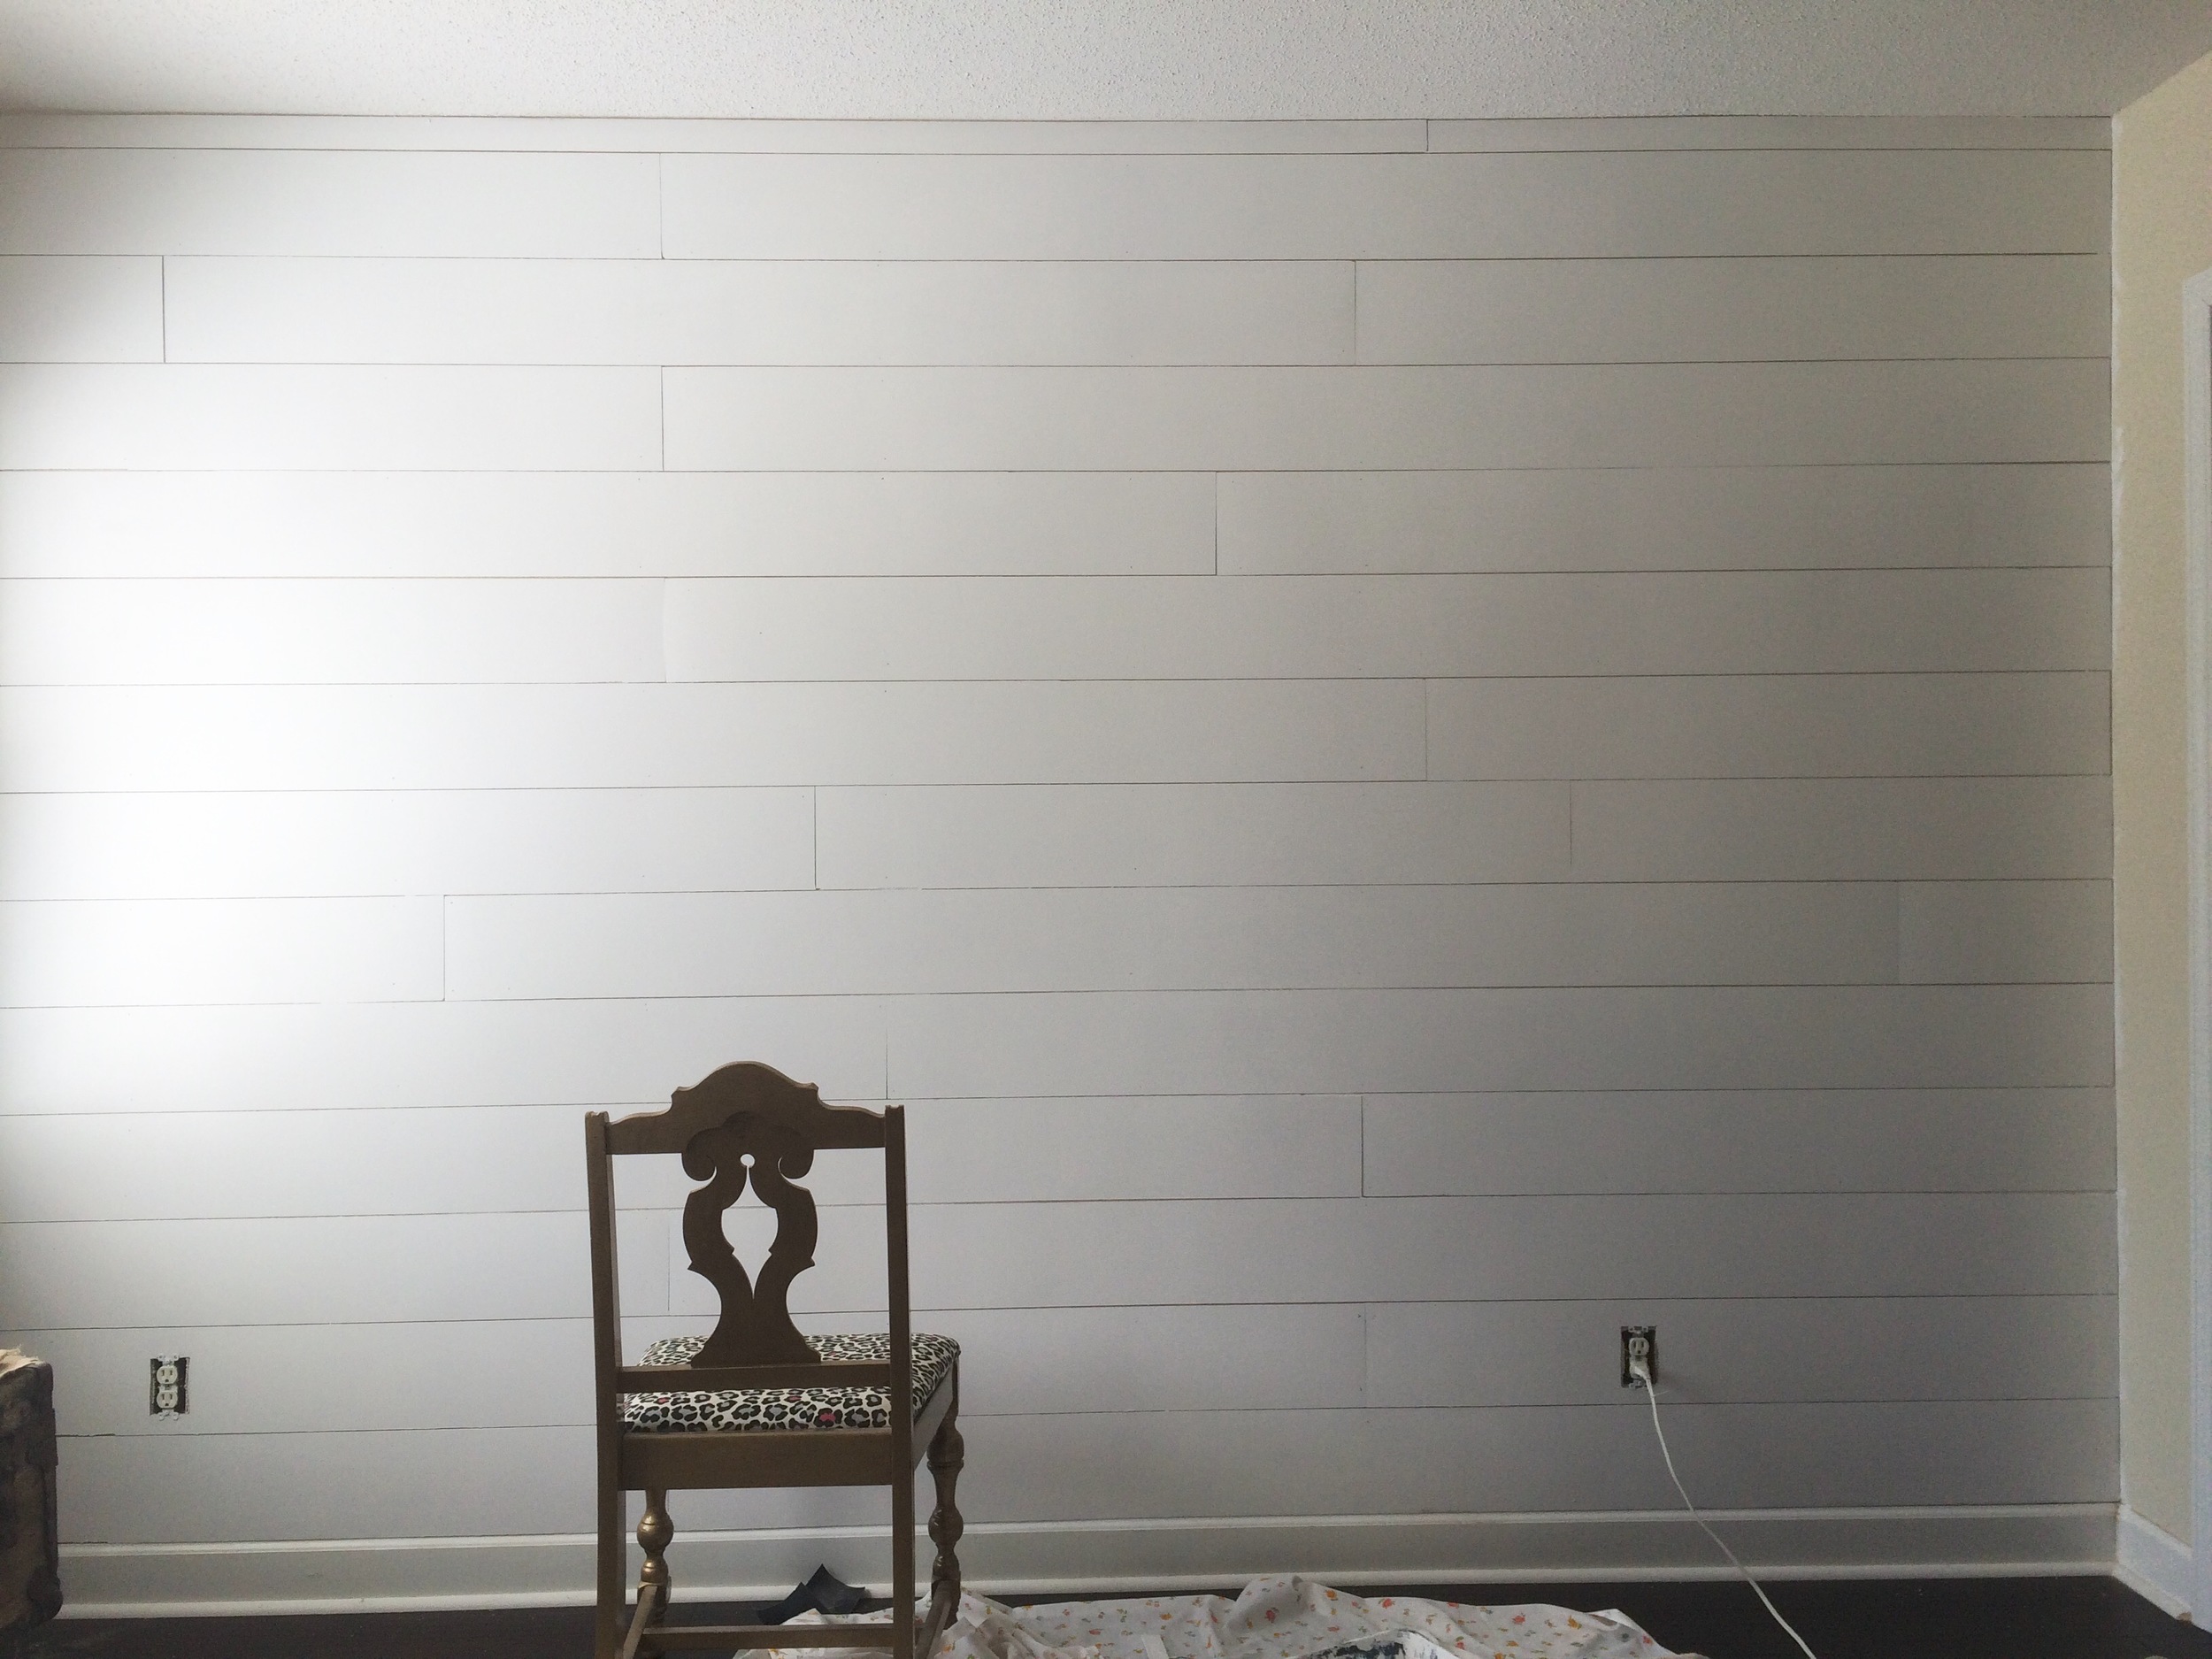
Once you're done lay back and admire your work! The entire wall took about 3 hours to put up so it's a perfect Saturday project.
What also makes this faux version of shiplap so great is if your ever change your mind or if you sale your home and the new owner happens to be the only person on planet earth who does't like shiplap- you can easily remove this shiplap. Just pop it off the wall and putty up all the pin size nail holes.
I can't wait to reveal my complete master bedroom renovation with you! Then you will get to see how this faux shiplap wall fits into the overall design.
Now I'm off to faux shiplap my entire house.... Just kidding... Well maybe!?
With love,
