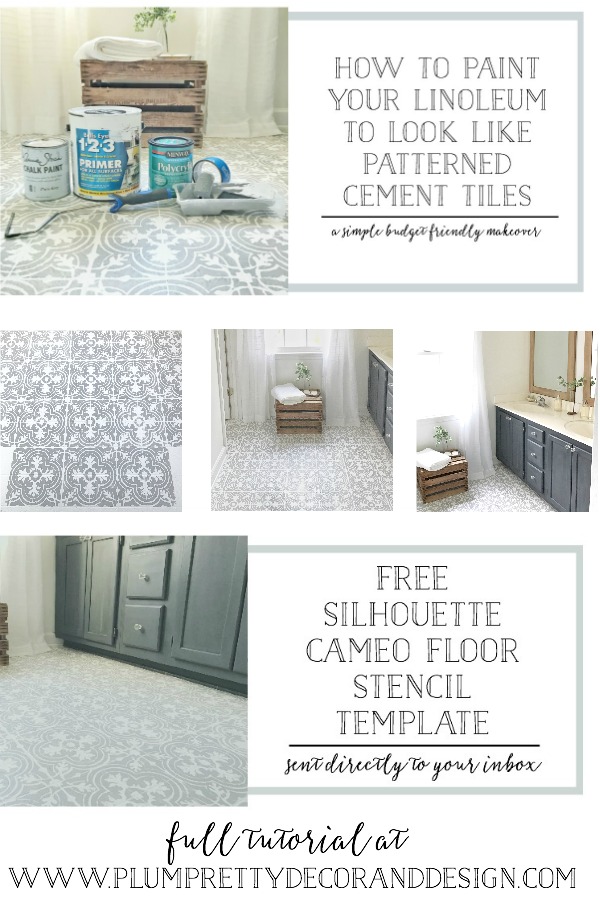
So I know I'm not the only one that has grungy, dingy, or even pink linoleum floors in their home. We have all been there- hating on our ugly outdated floors. We've avoided showing guest these unsightly spaces or even tried covering them up with rugs. So if this all sounds OH SO familiar this DIY tutorial on how to paint your linoleum or tile floors is for you! I tried to get this tutorial up quickly for those of you who wanted to try this on your own floors.
All materials, sources, free stencil download, and how to VIDEO included!

Photo: Joanna Gaines' Instagram
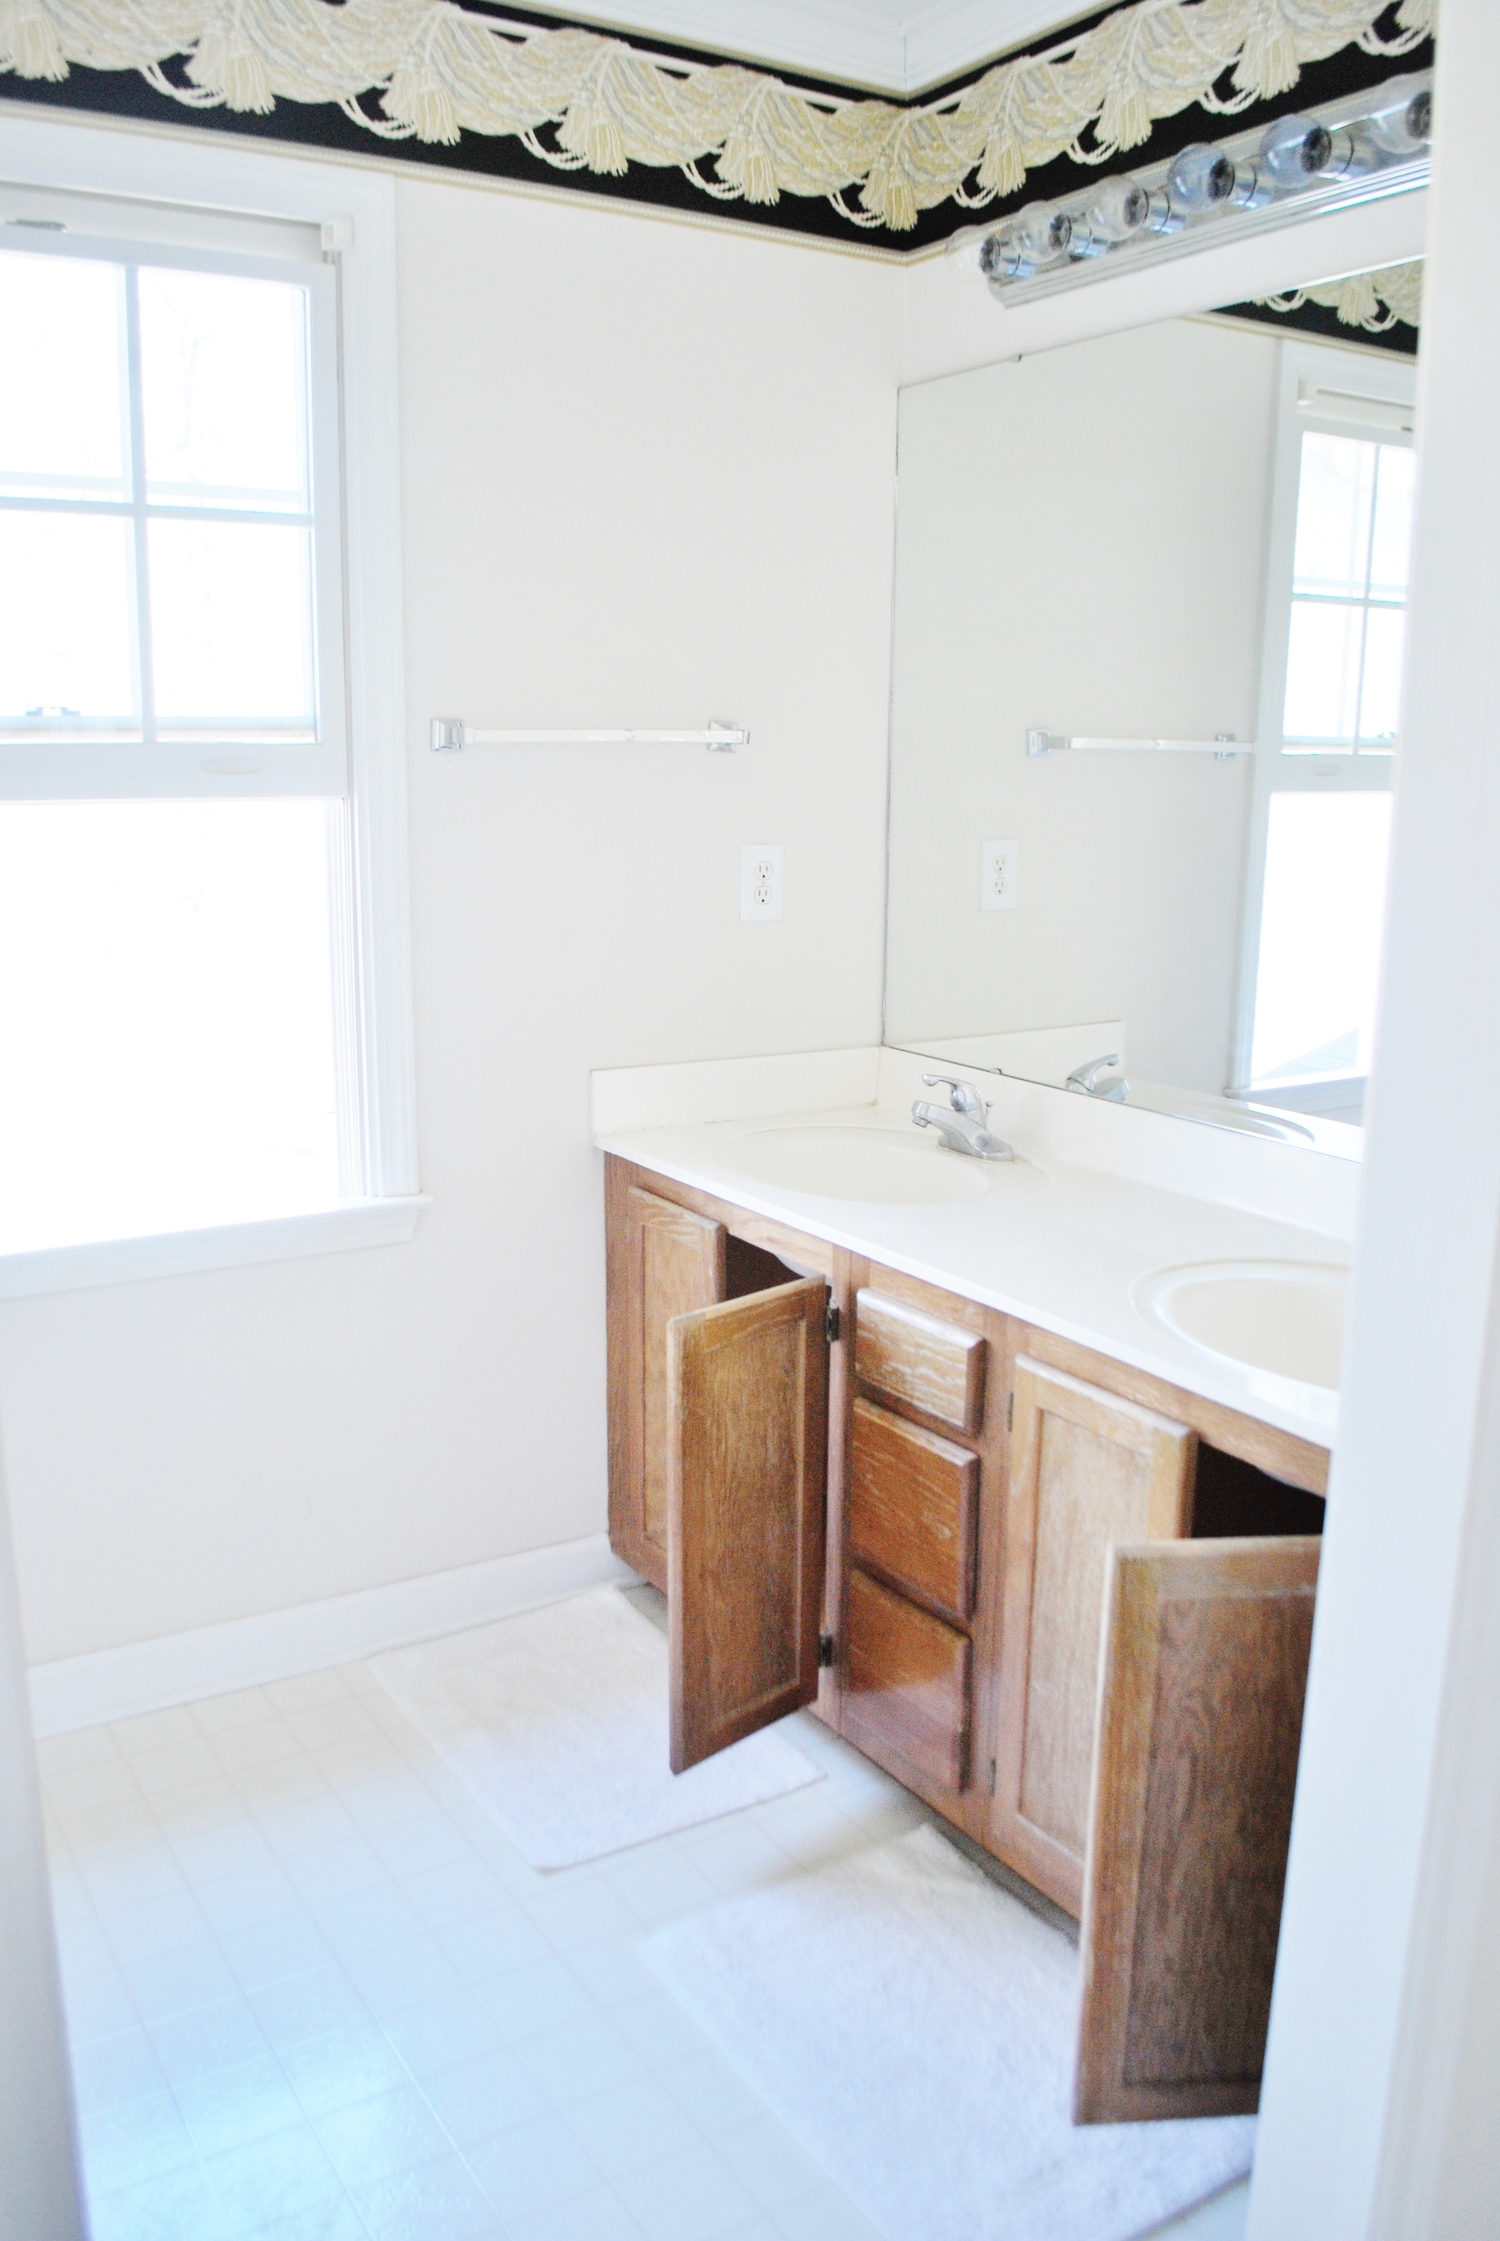
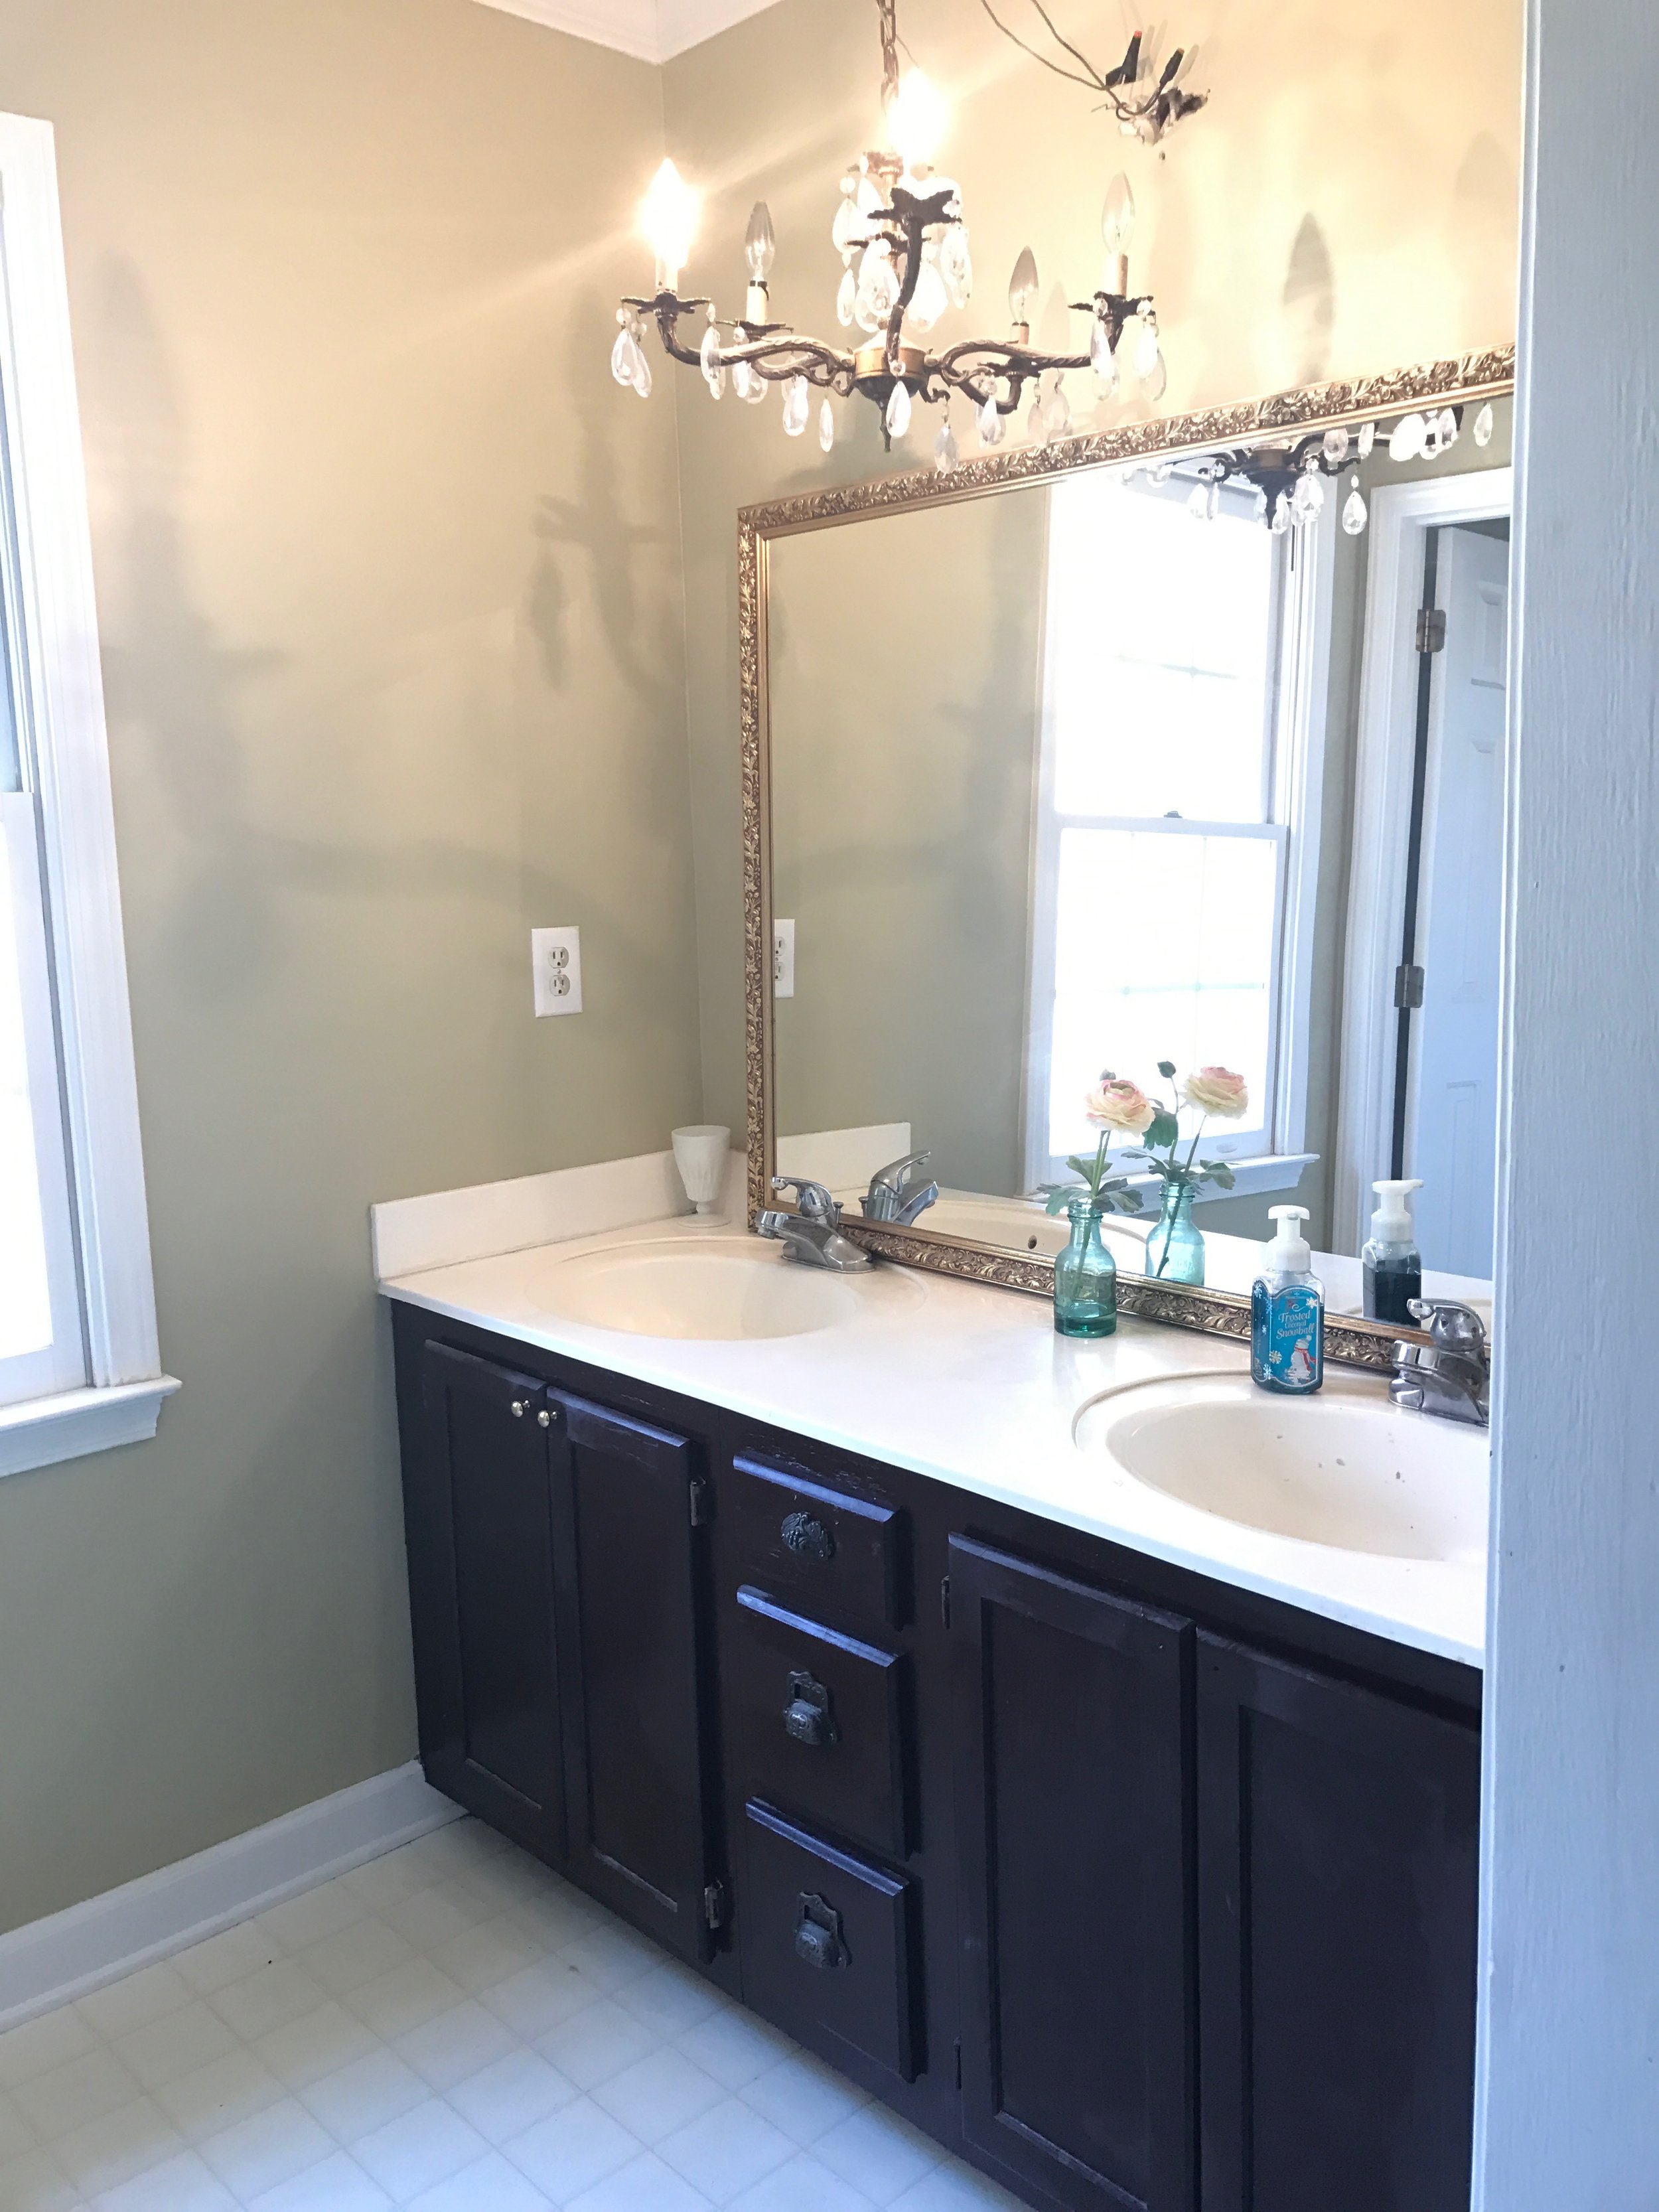
I pretty much fell in love with patterned cement tiles after designer Joanna Gaines started using them in some of her "Fixer Uppers." I love the texture and design they add to a space- such an unexpected pop of pattern. AND I've pretty much wanted to redo our bathroom since the day we moved in! I'm mean you can kinda see why... that gold tassel wallpaper border had to go! Nothing says NON-farmhouse like that border. It was HIDEOUS!!!
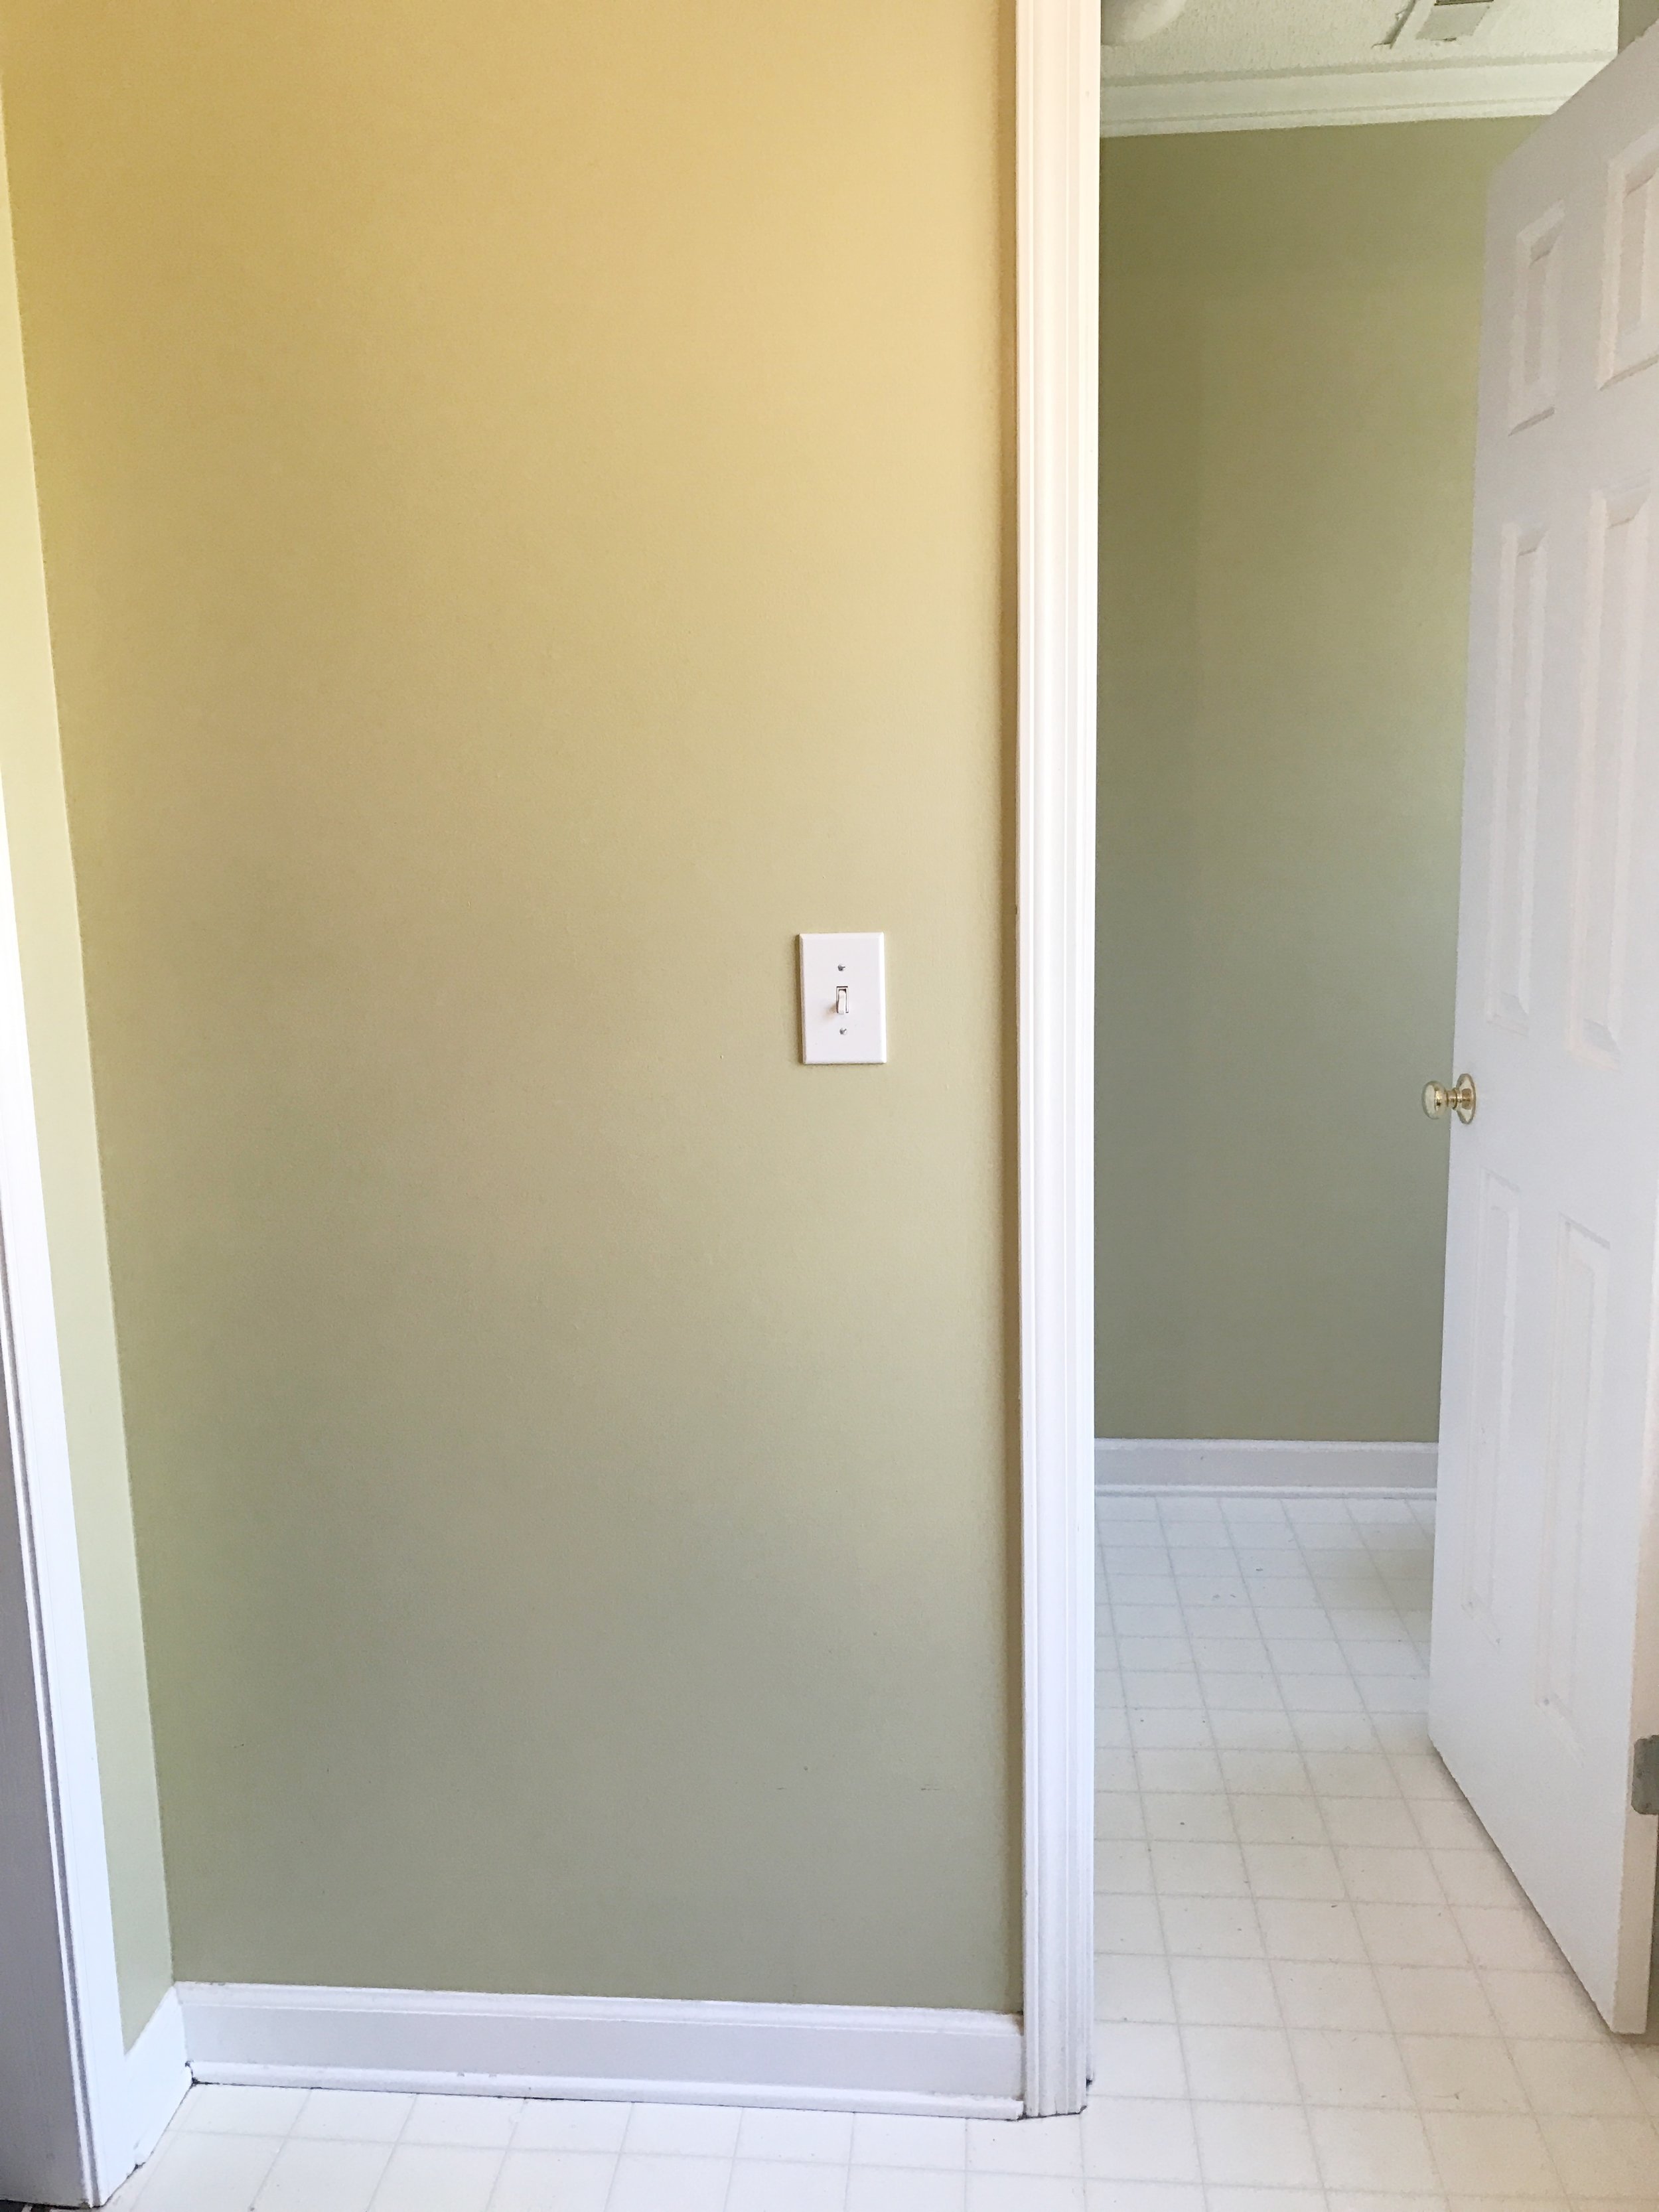
The day we moved in.
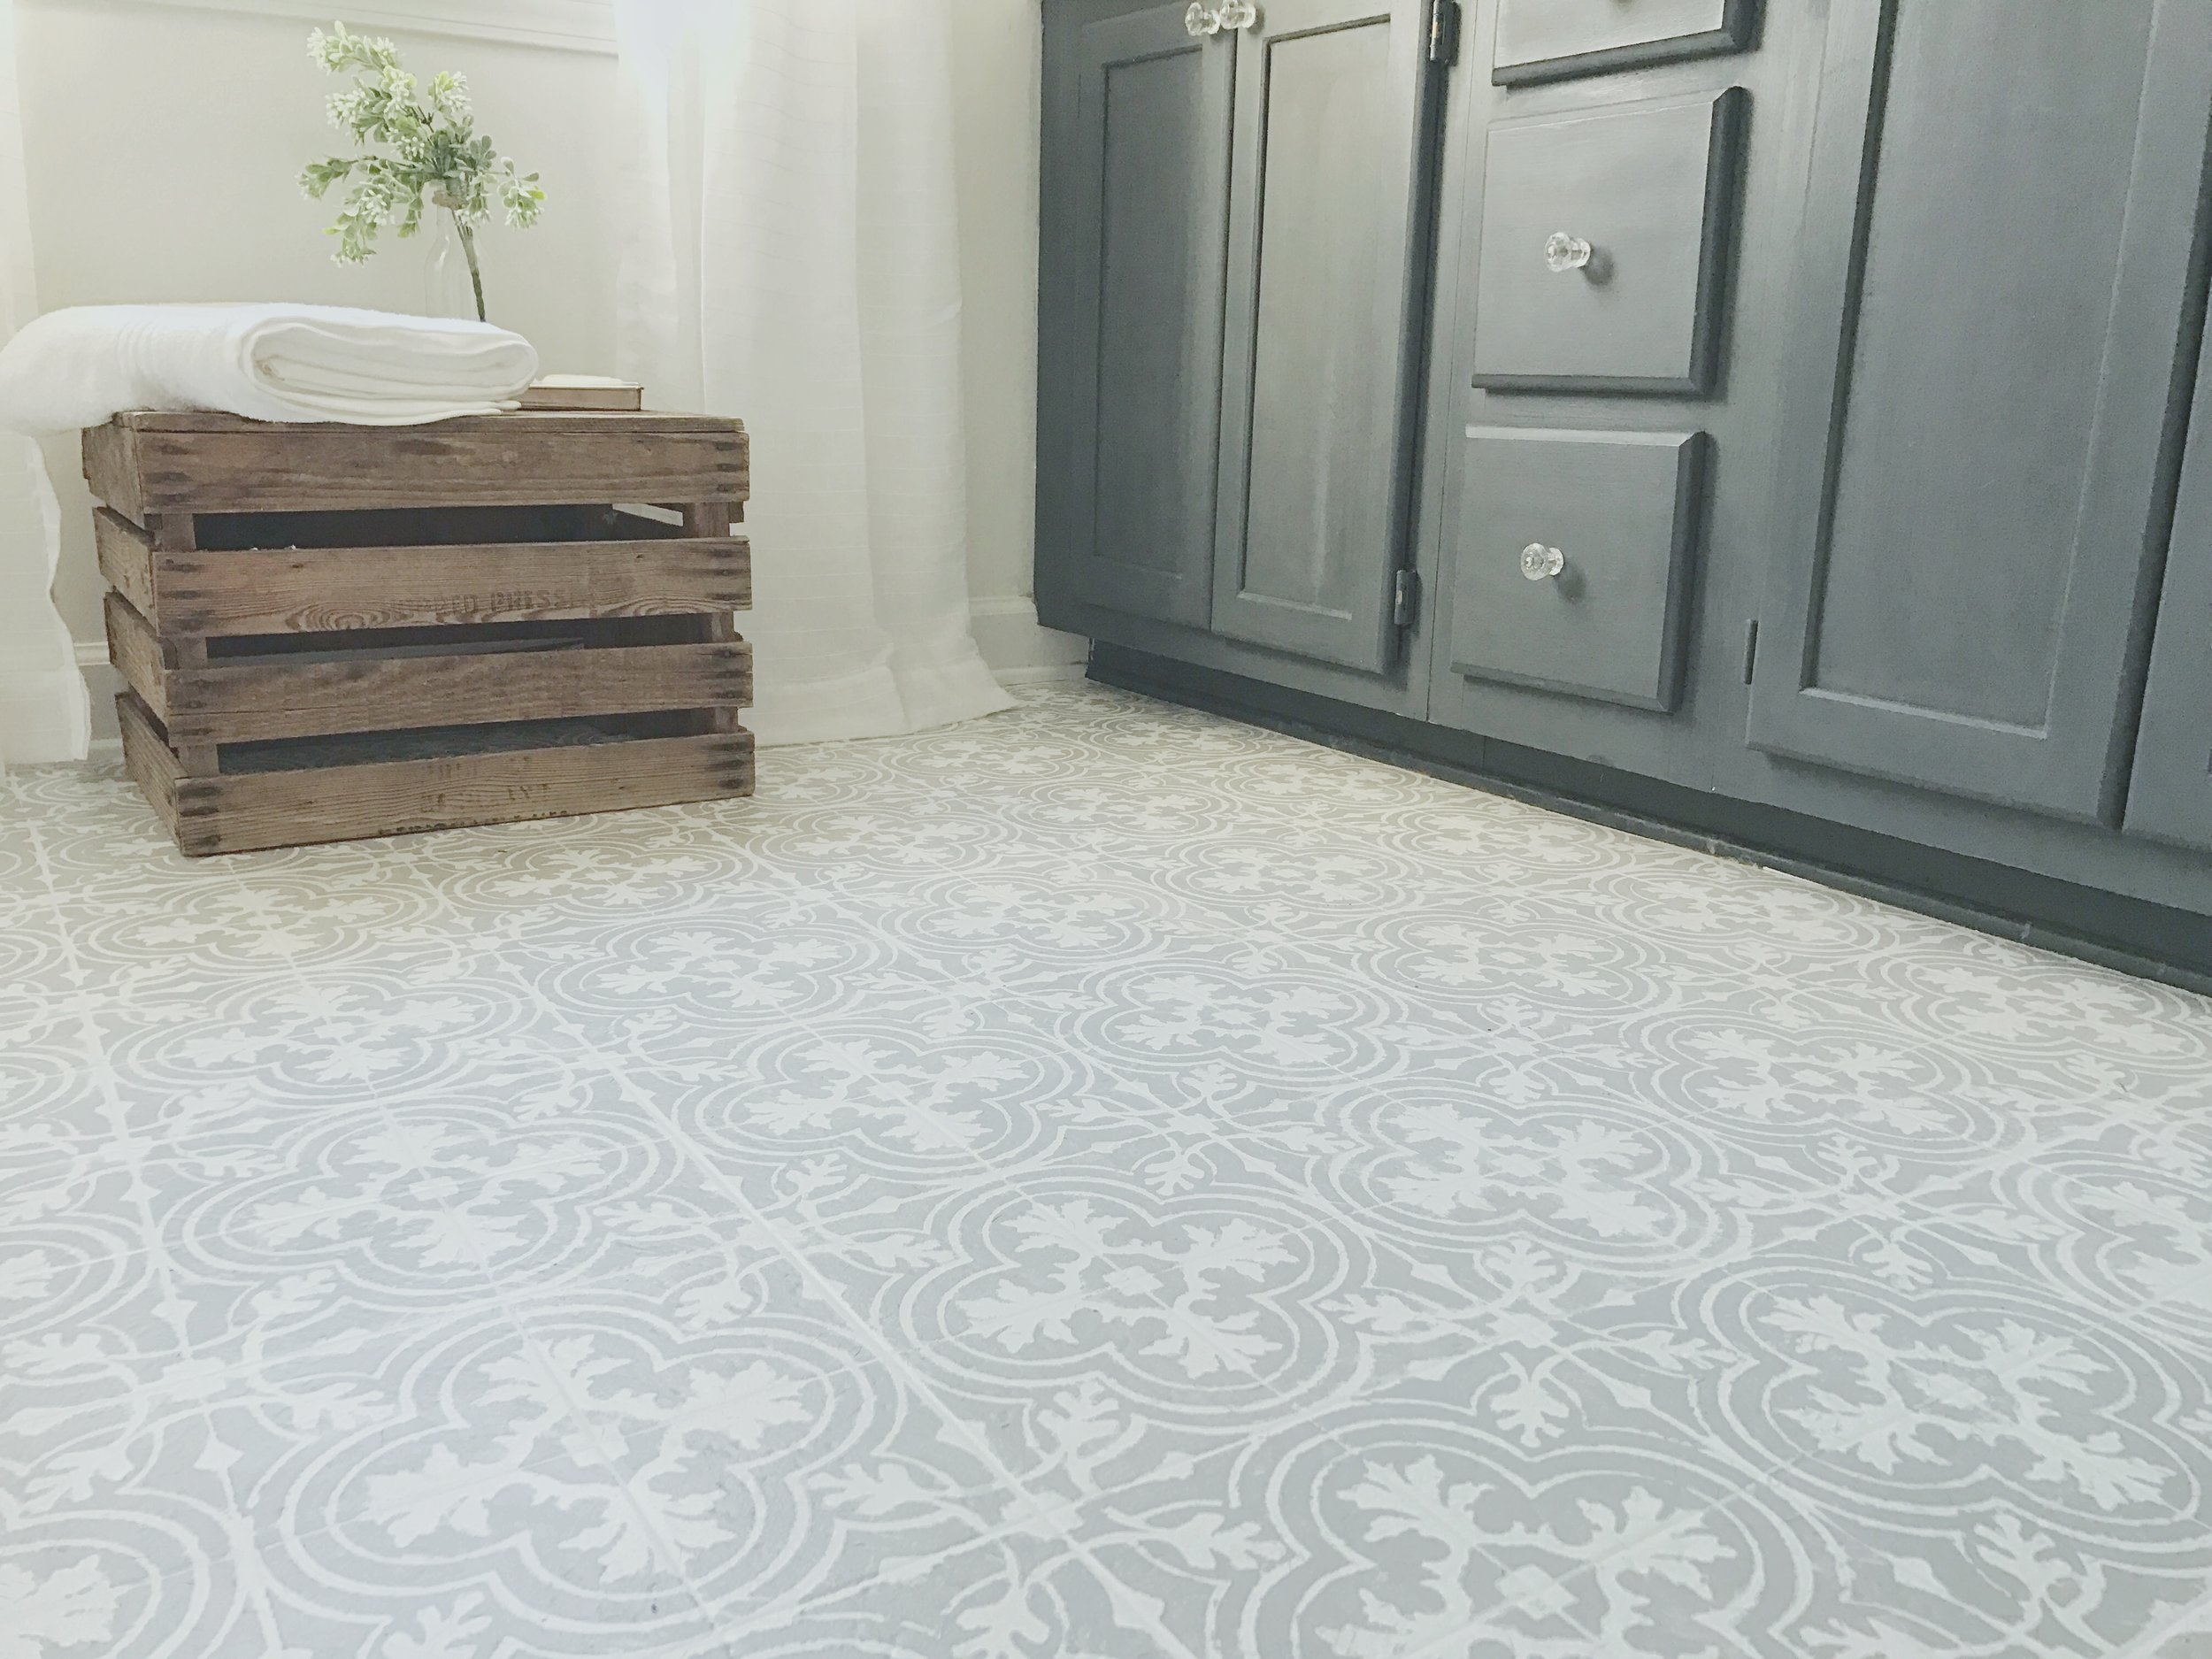
After my first attempt to redo.
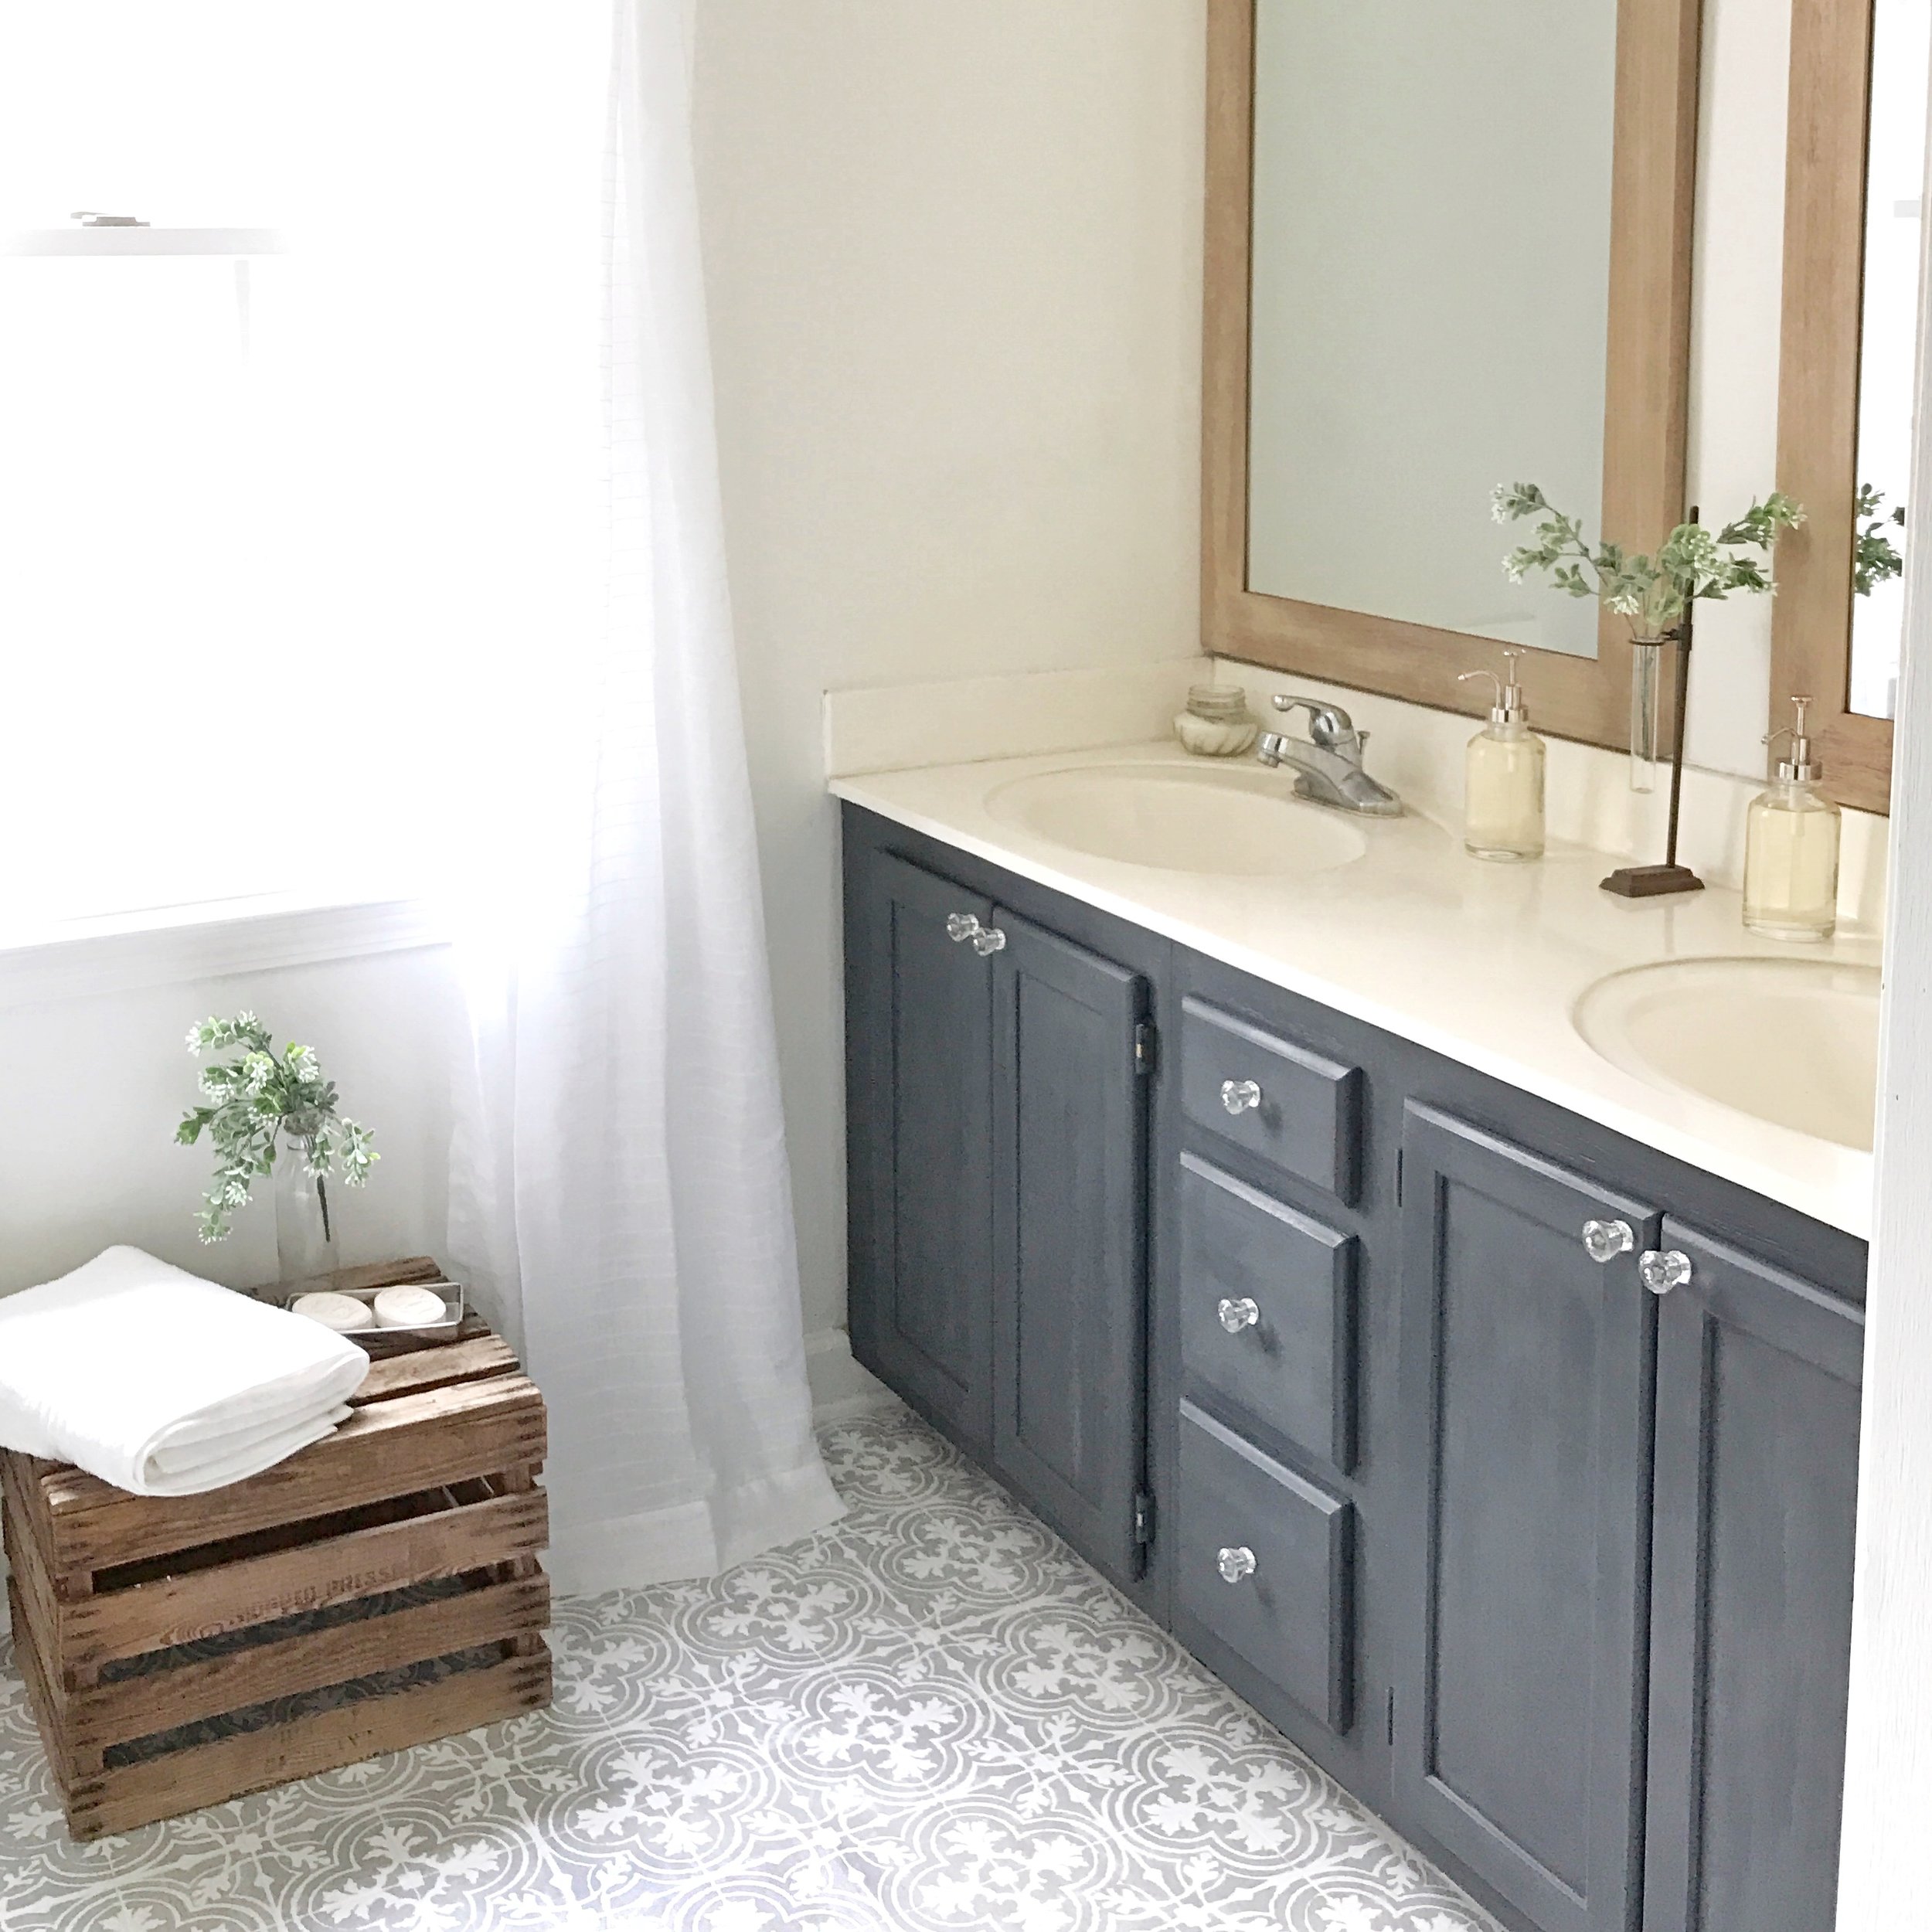
I have slowly been turning our 90s builder basic home into my own little french country/modern farmhouse. But home renovations can be costly and messy. Nobody! Absolutely nobody likes living in a renovation. "Ain't nobody got time of that." That's one reason I LOVED this simple, easy and budget friendly makeover. Not only was it extremely budget friendly, we were back in and using our bathroom in no more than 2 days.
I was originally inspired to paint my (kitchen) floors when my friend Lindsay of Aratari At HOME painted her tile entry way. You can see her amazing transformation HERE. Then this past weekend, one minute I was cleaning the bathroom floors, and the next I was painting the walls. I randomly decided to do a weekend bathroom makeover- on an extremely tight budget. This is seriously how my mind works... I had all I could take of our dated and grungy bathroom. This is the bathroom we use every single day! I wanted to feel happy in there, not look at it in disappointment and anticipate on when I could afford to redo it.

What a great time to try out painting my floor like Lindsay did!! But one major important material was missing, and I'm pretty sure I couldn't order and overnight a stencil. And I wanted to do this NOW! I have a Silhouette Cameo Machine so I decided to try to make my own stencil. I browsed some designs until I found my absolute favorite, then I created a template within the Silhouette software, and cut it out on a piece of coated paper. (I later went and bought the actual Silhouette brand stencil material which I highly recommend over what I started out using).
So I pretty much just jumped head first into this project! Because what did I have to lose?? Ugly linoleum floors?? And here's the steps I used to transform my linoleum floor into beautiful cement tiles:
Materials:
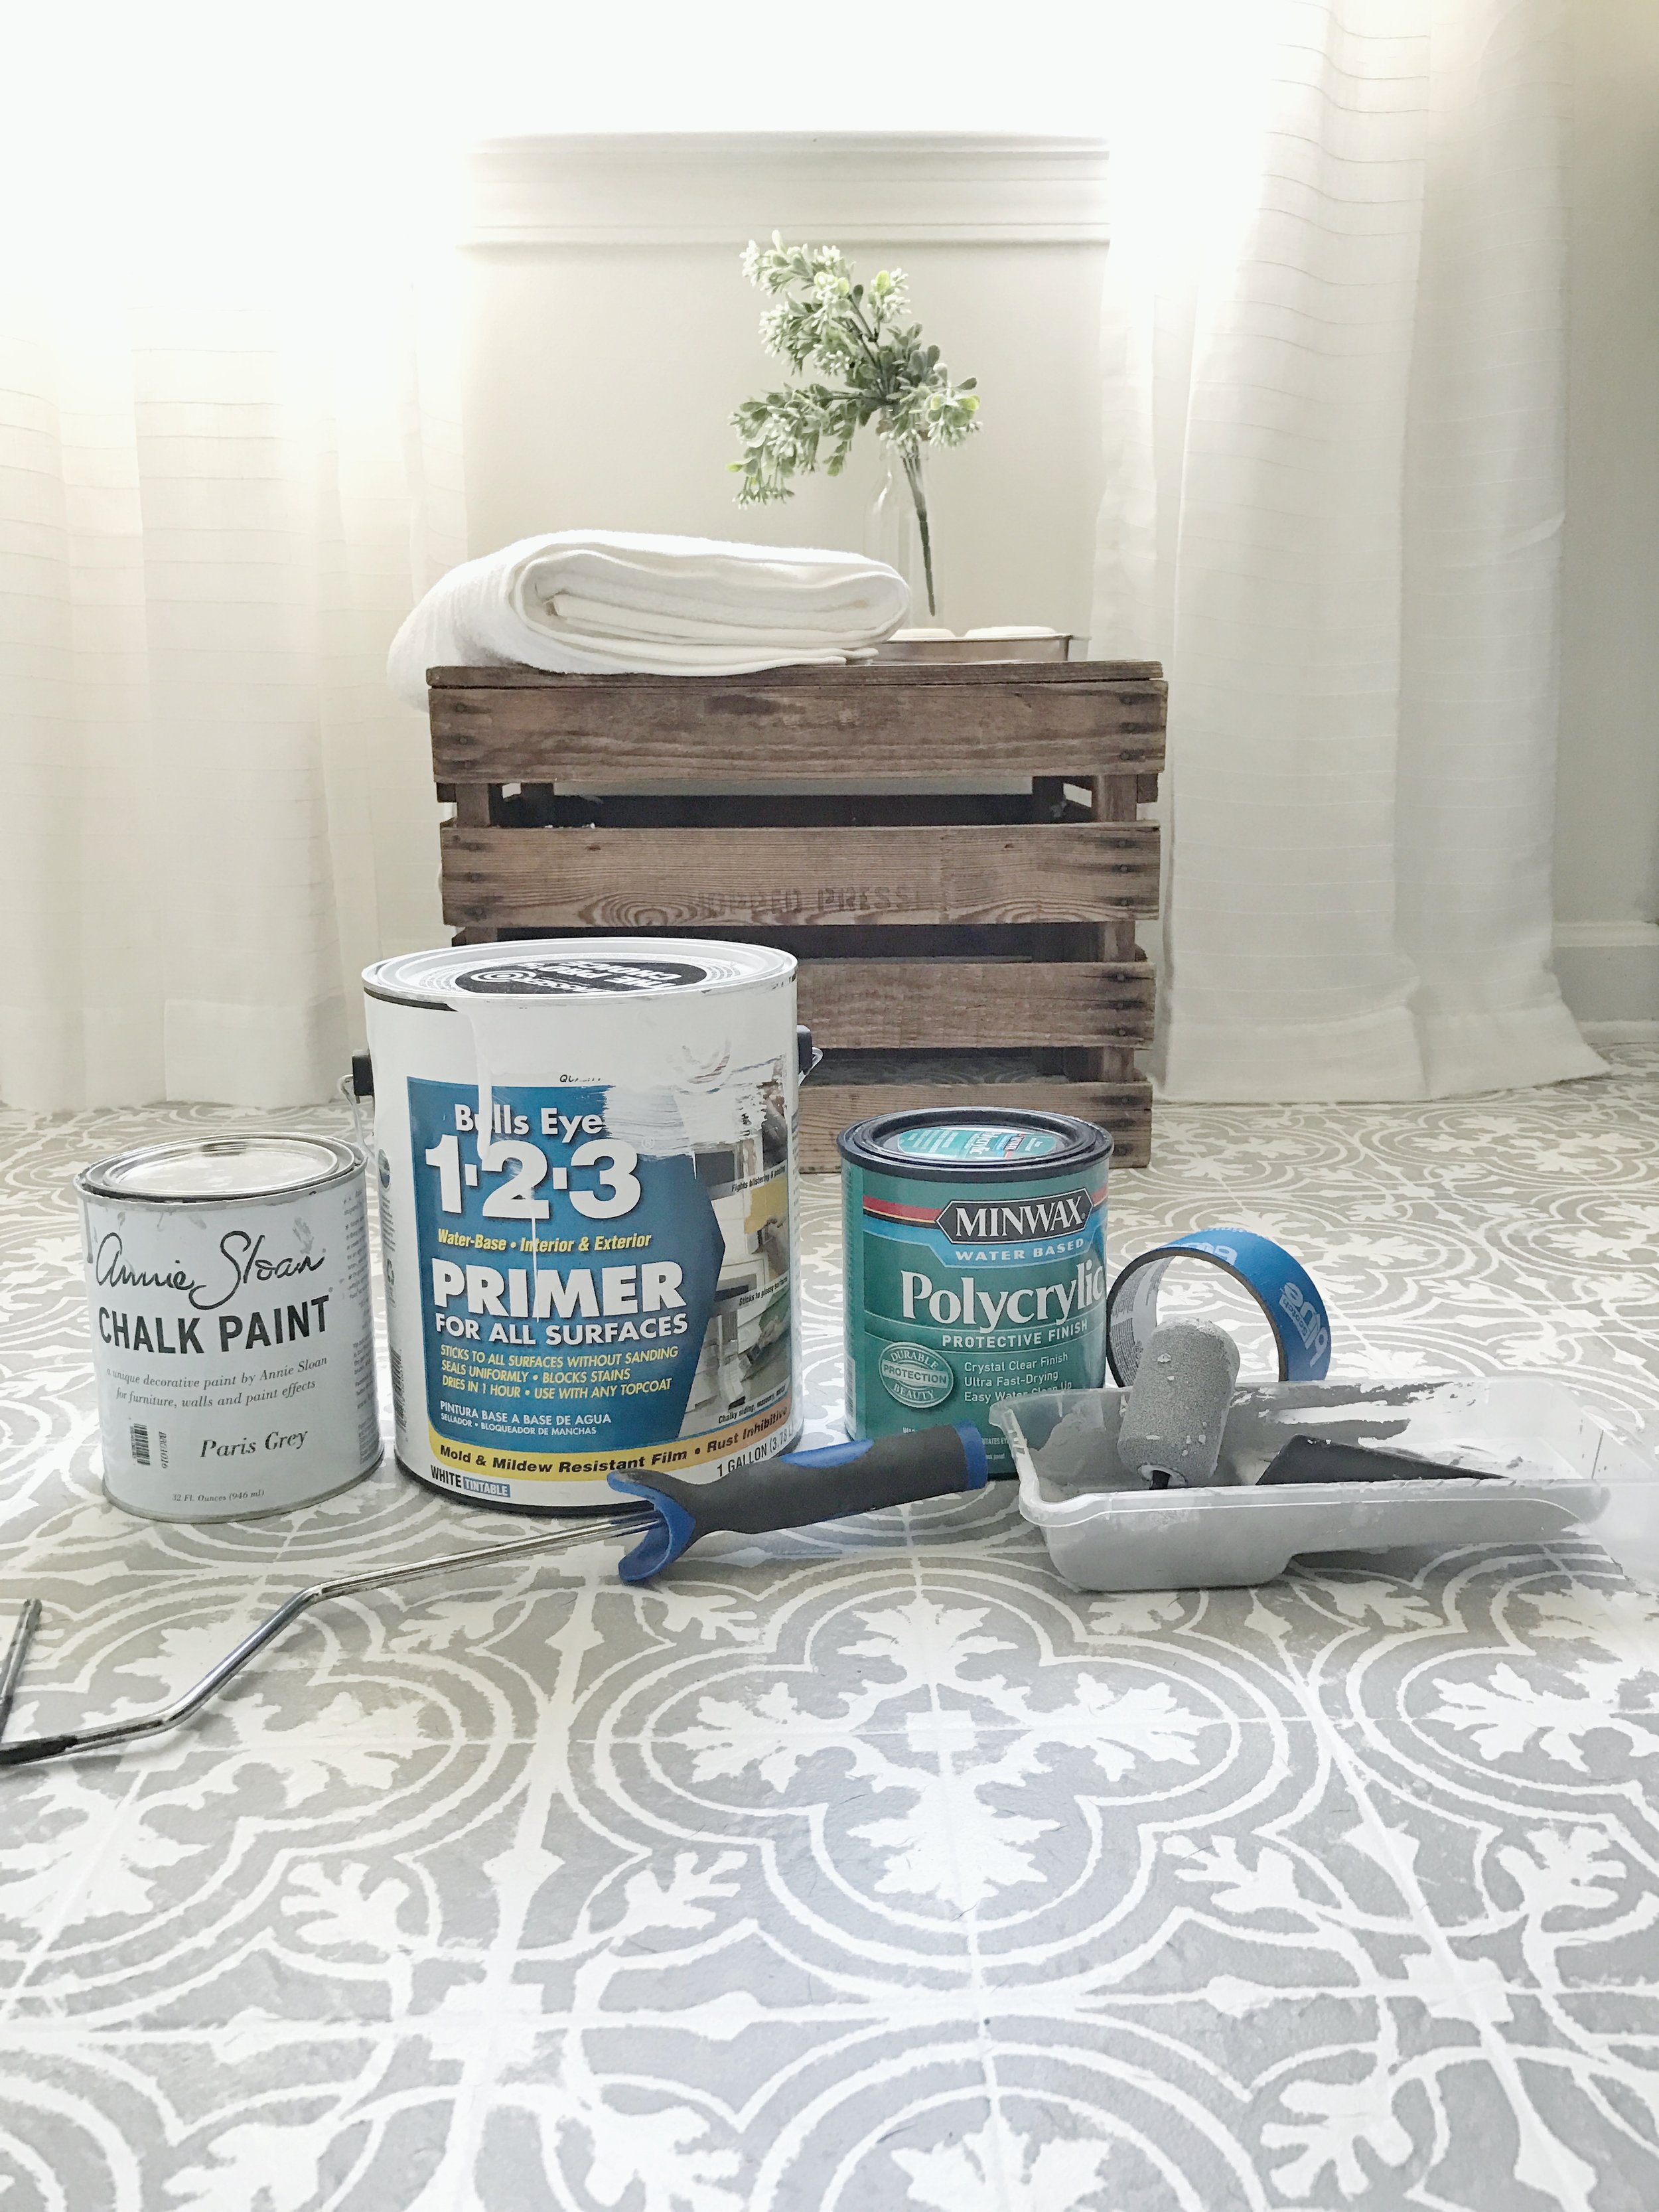
- Greased Lighting
- Isopropyl Alcohol (rubbing alcohol)
- Painters Tape
- Medium Foam Roller $6.97
- Zinsser Bulls Eye 1-2-3 White Primer $19.98
- Stencil (See Download and Links at bottom of post) $7-$14
- Mini Foam Roller $2.97
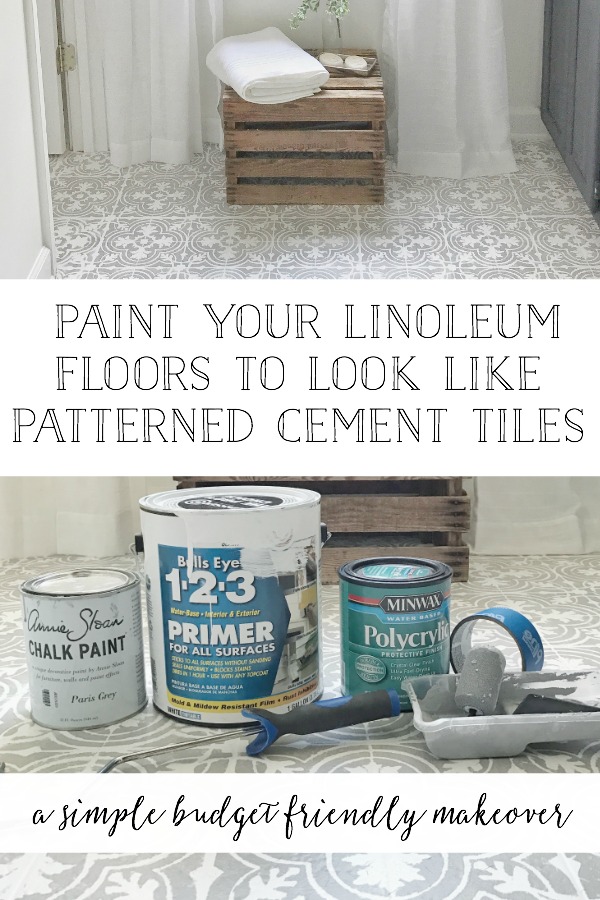
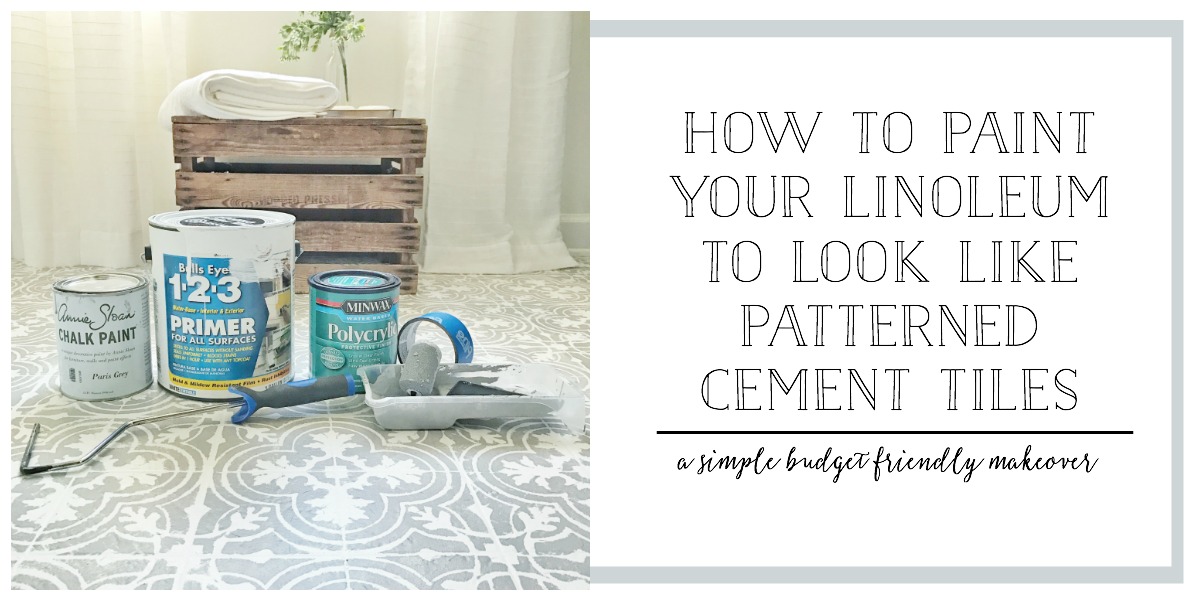
- Chalk Paint in your choice of color - $20
- Minwax Polycrylic Protective Finish in your choice of finish- I used Matte $17.97
Steps:
1. CLEAN AND PREP your floors: I cleaned my floors with Greased Lighting Cleaner and Degreaser. I followed by wiping them down with isopropyl alcohol for extra measures. Also tape off any objects (tub, toilet, doors) and baseboards with painters tape that you don't want paint on.
2. SEAL your floors: I sealed my floors using the Zinsser Bulls Eye 1-2-3 White Primer. Which is designed to stick to all surfaces WITHOUT sanding, blocks stains, and dries within 1 hour. I used a foam roller and rolled a thin coat onto the floors. The first coat was so thin it was transparent. You don't want to apply thick coats because it will increase drying time and may not properly bond. I applied three thin coats following these same steps, waiting an hour between each coat. *If you have darker colored floors it may require more coats to completely seal out the color.

3. STENCIL your floors- I created my own stencil for this project using my Silhouette Cameo. I will provide a link for those of you that have a Silhouette machine at the bottom of this post. I will also link some other options on where to buy for those who do not have a machine.

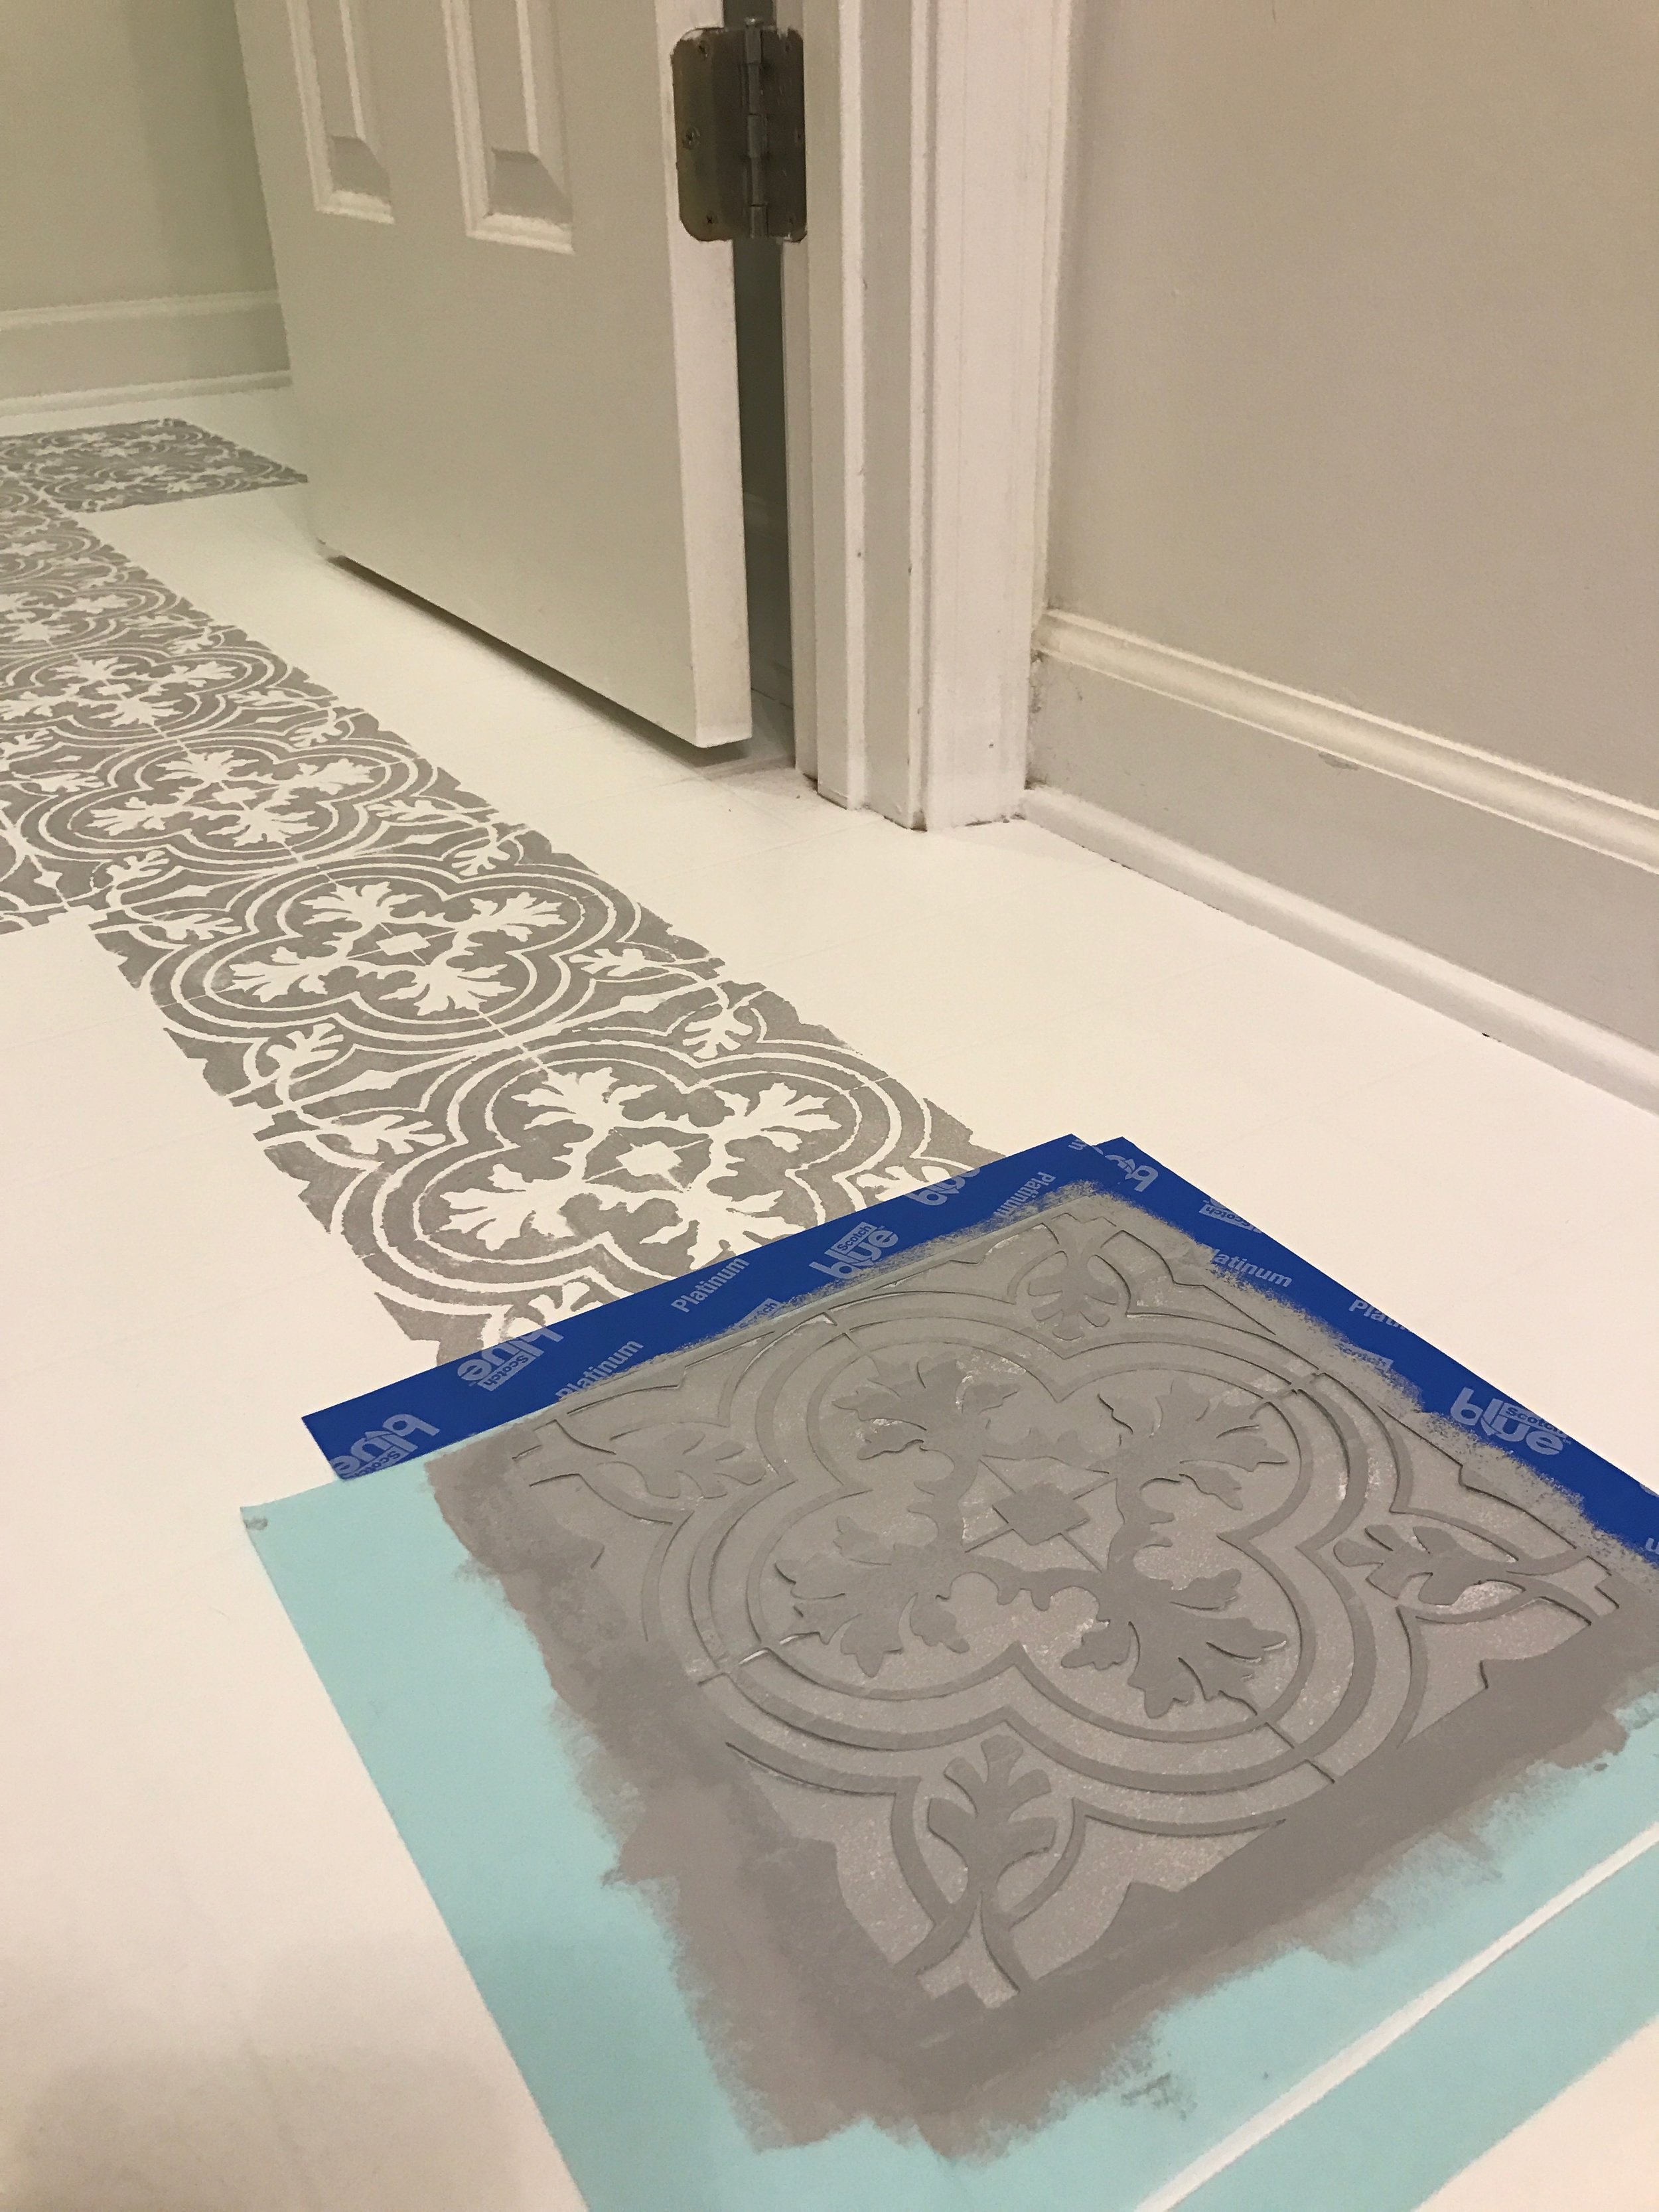
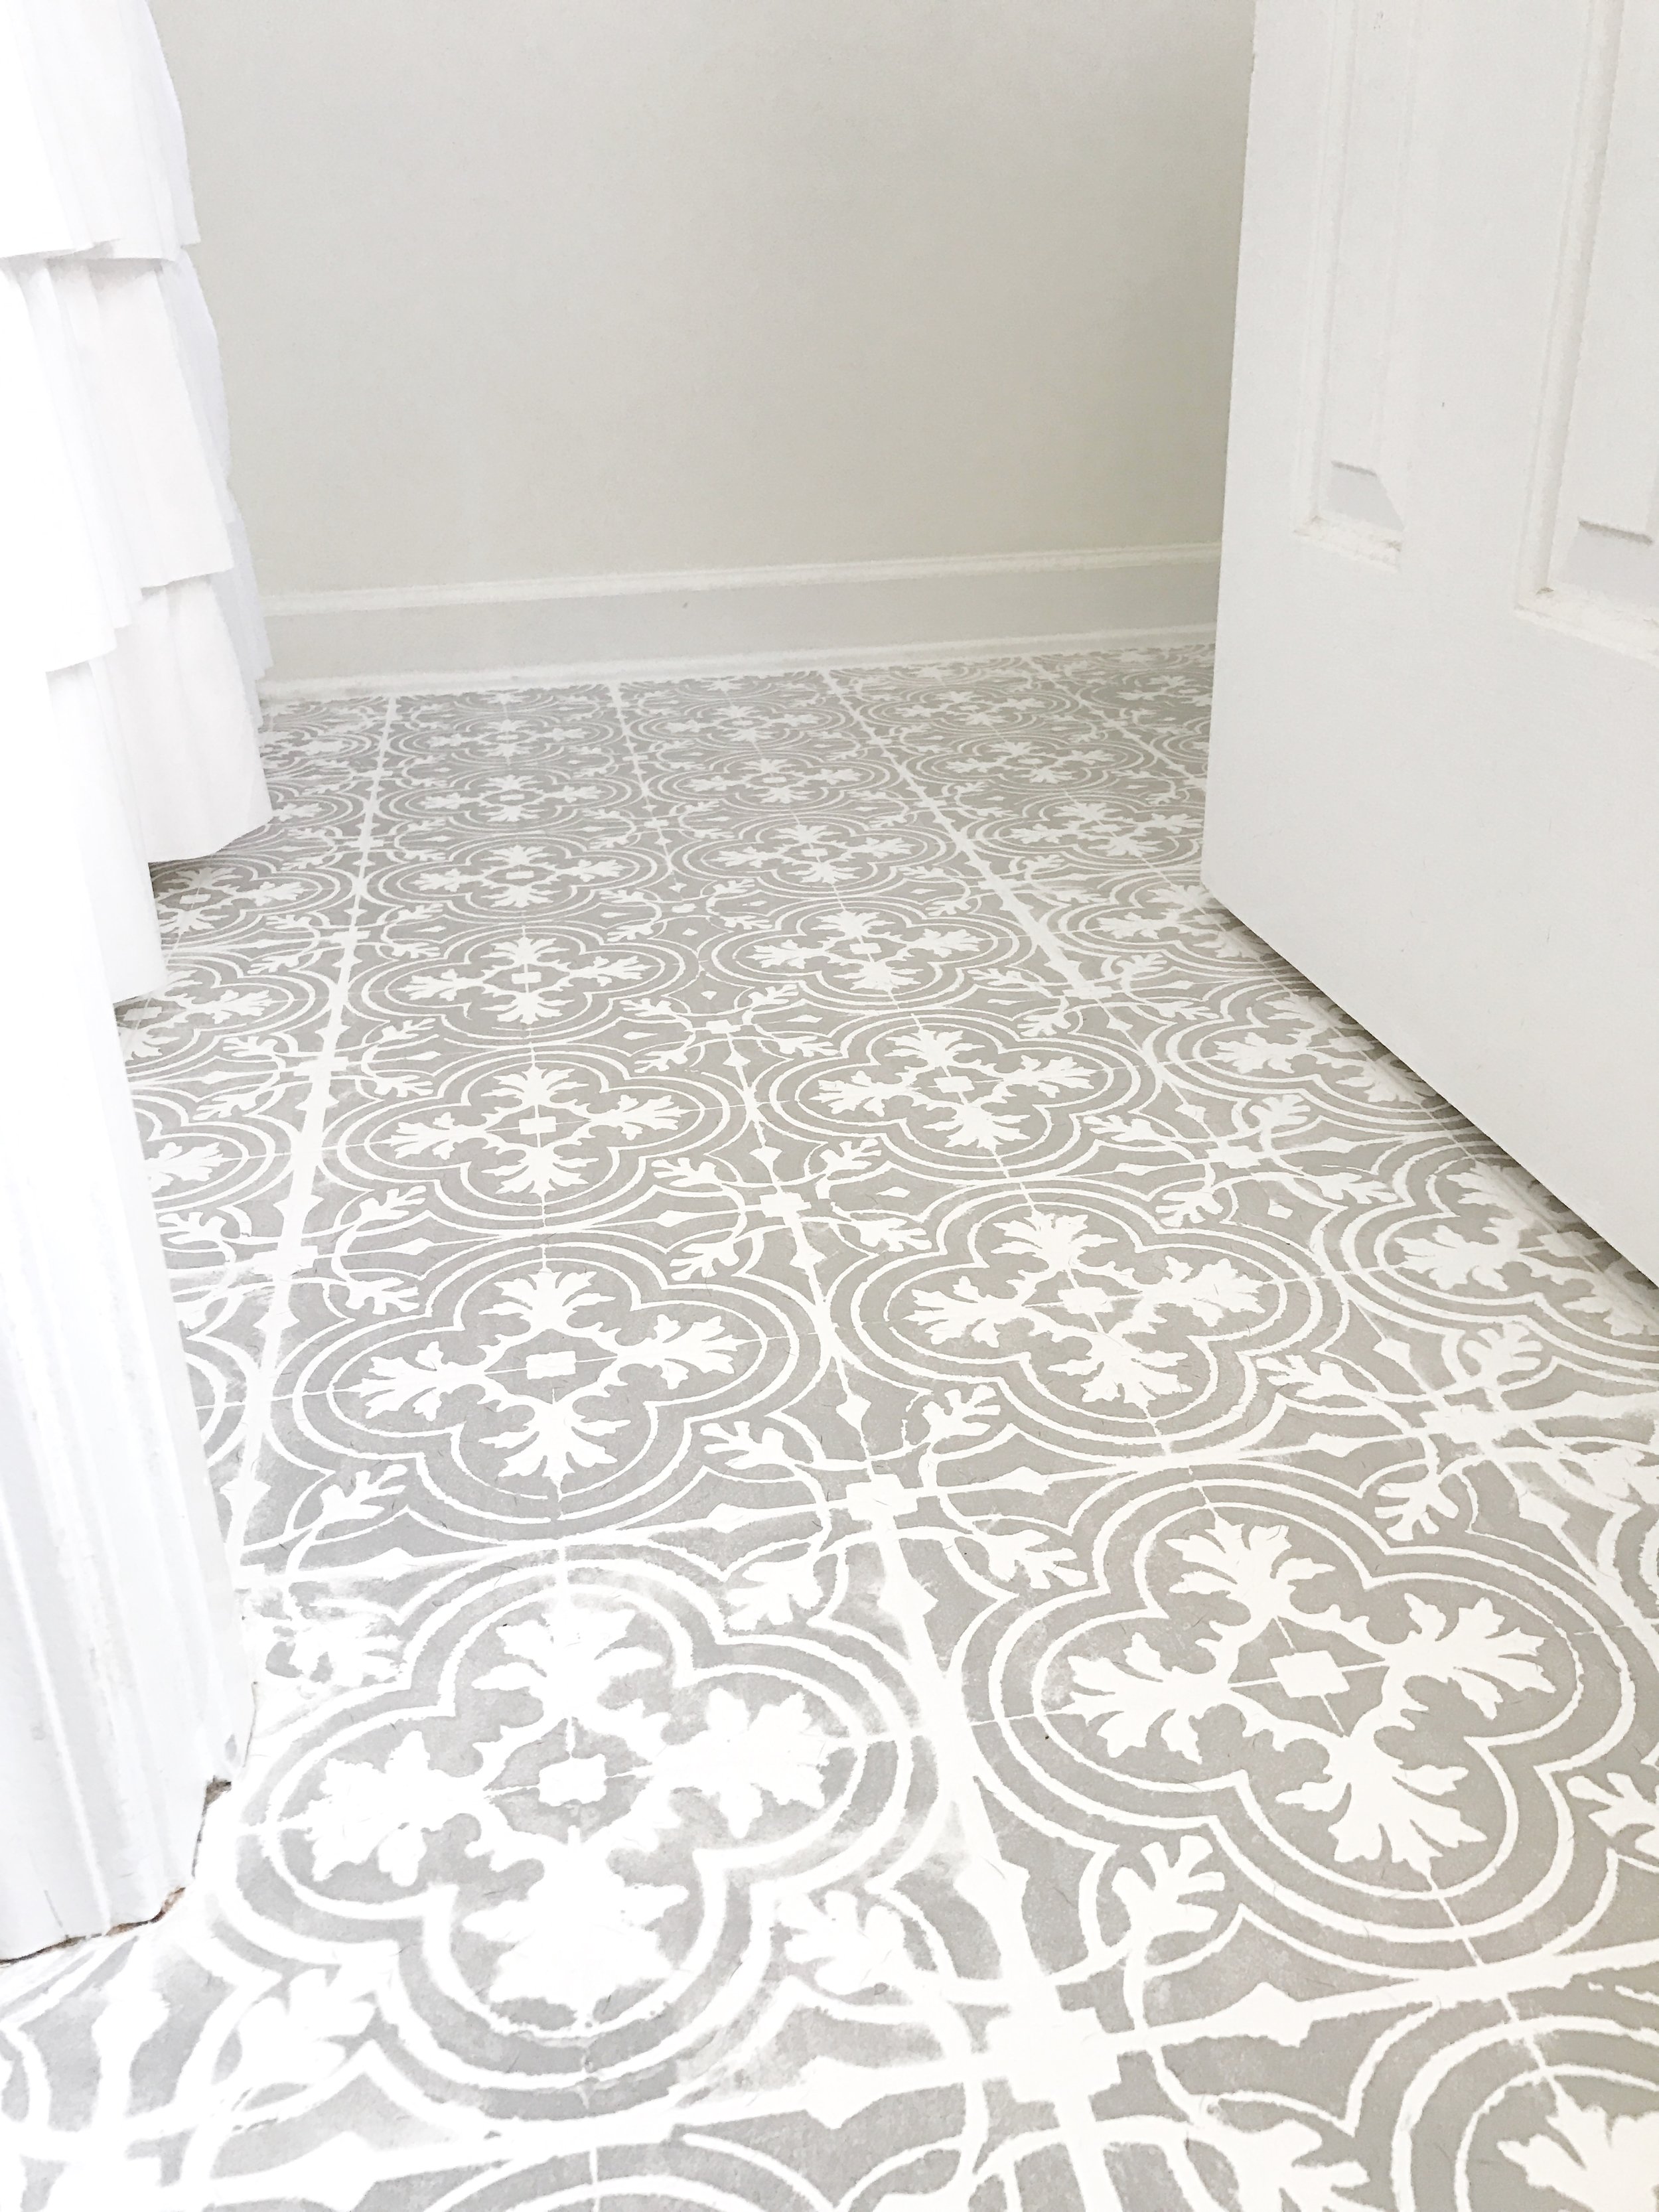
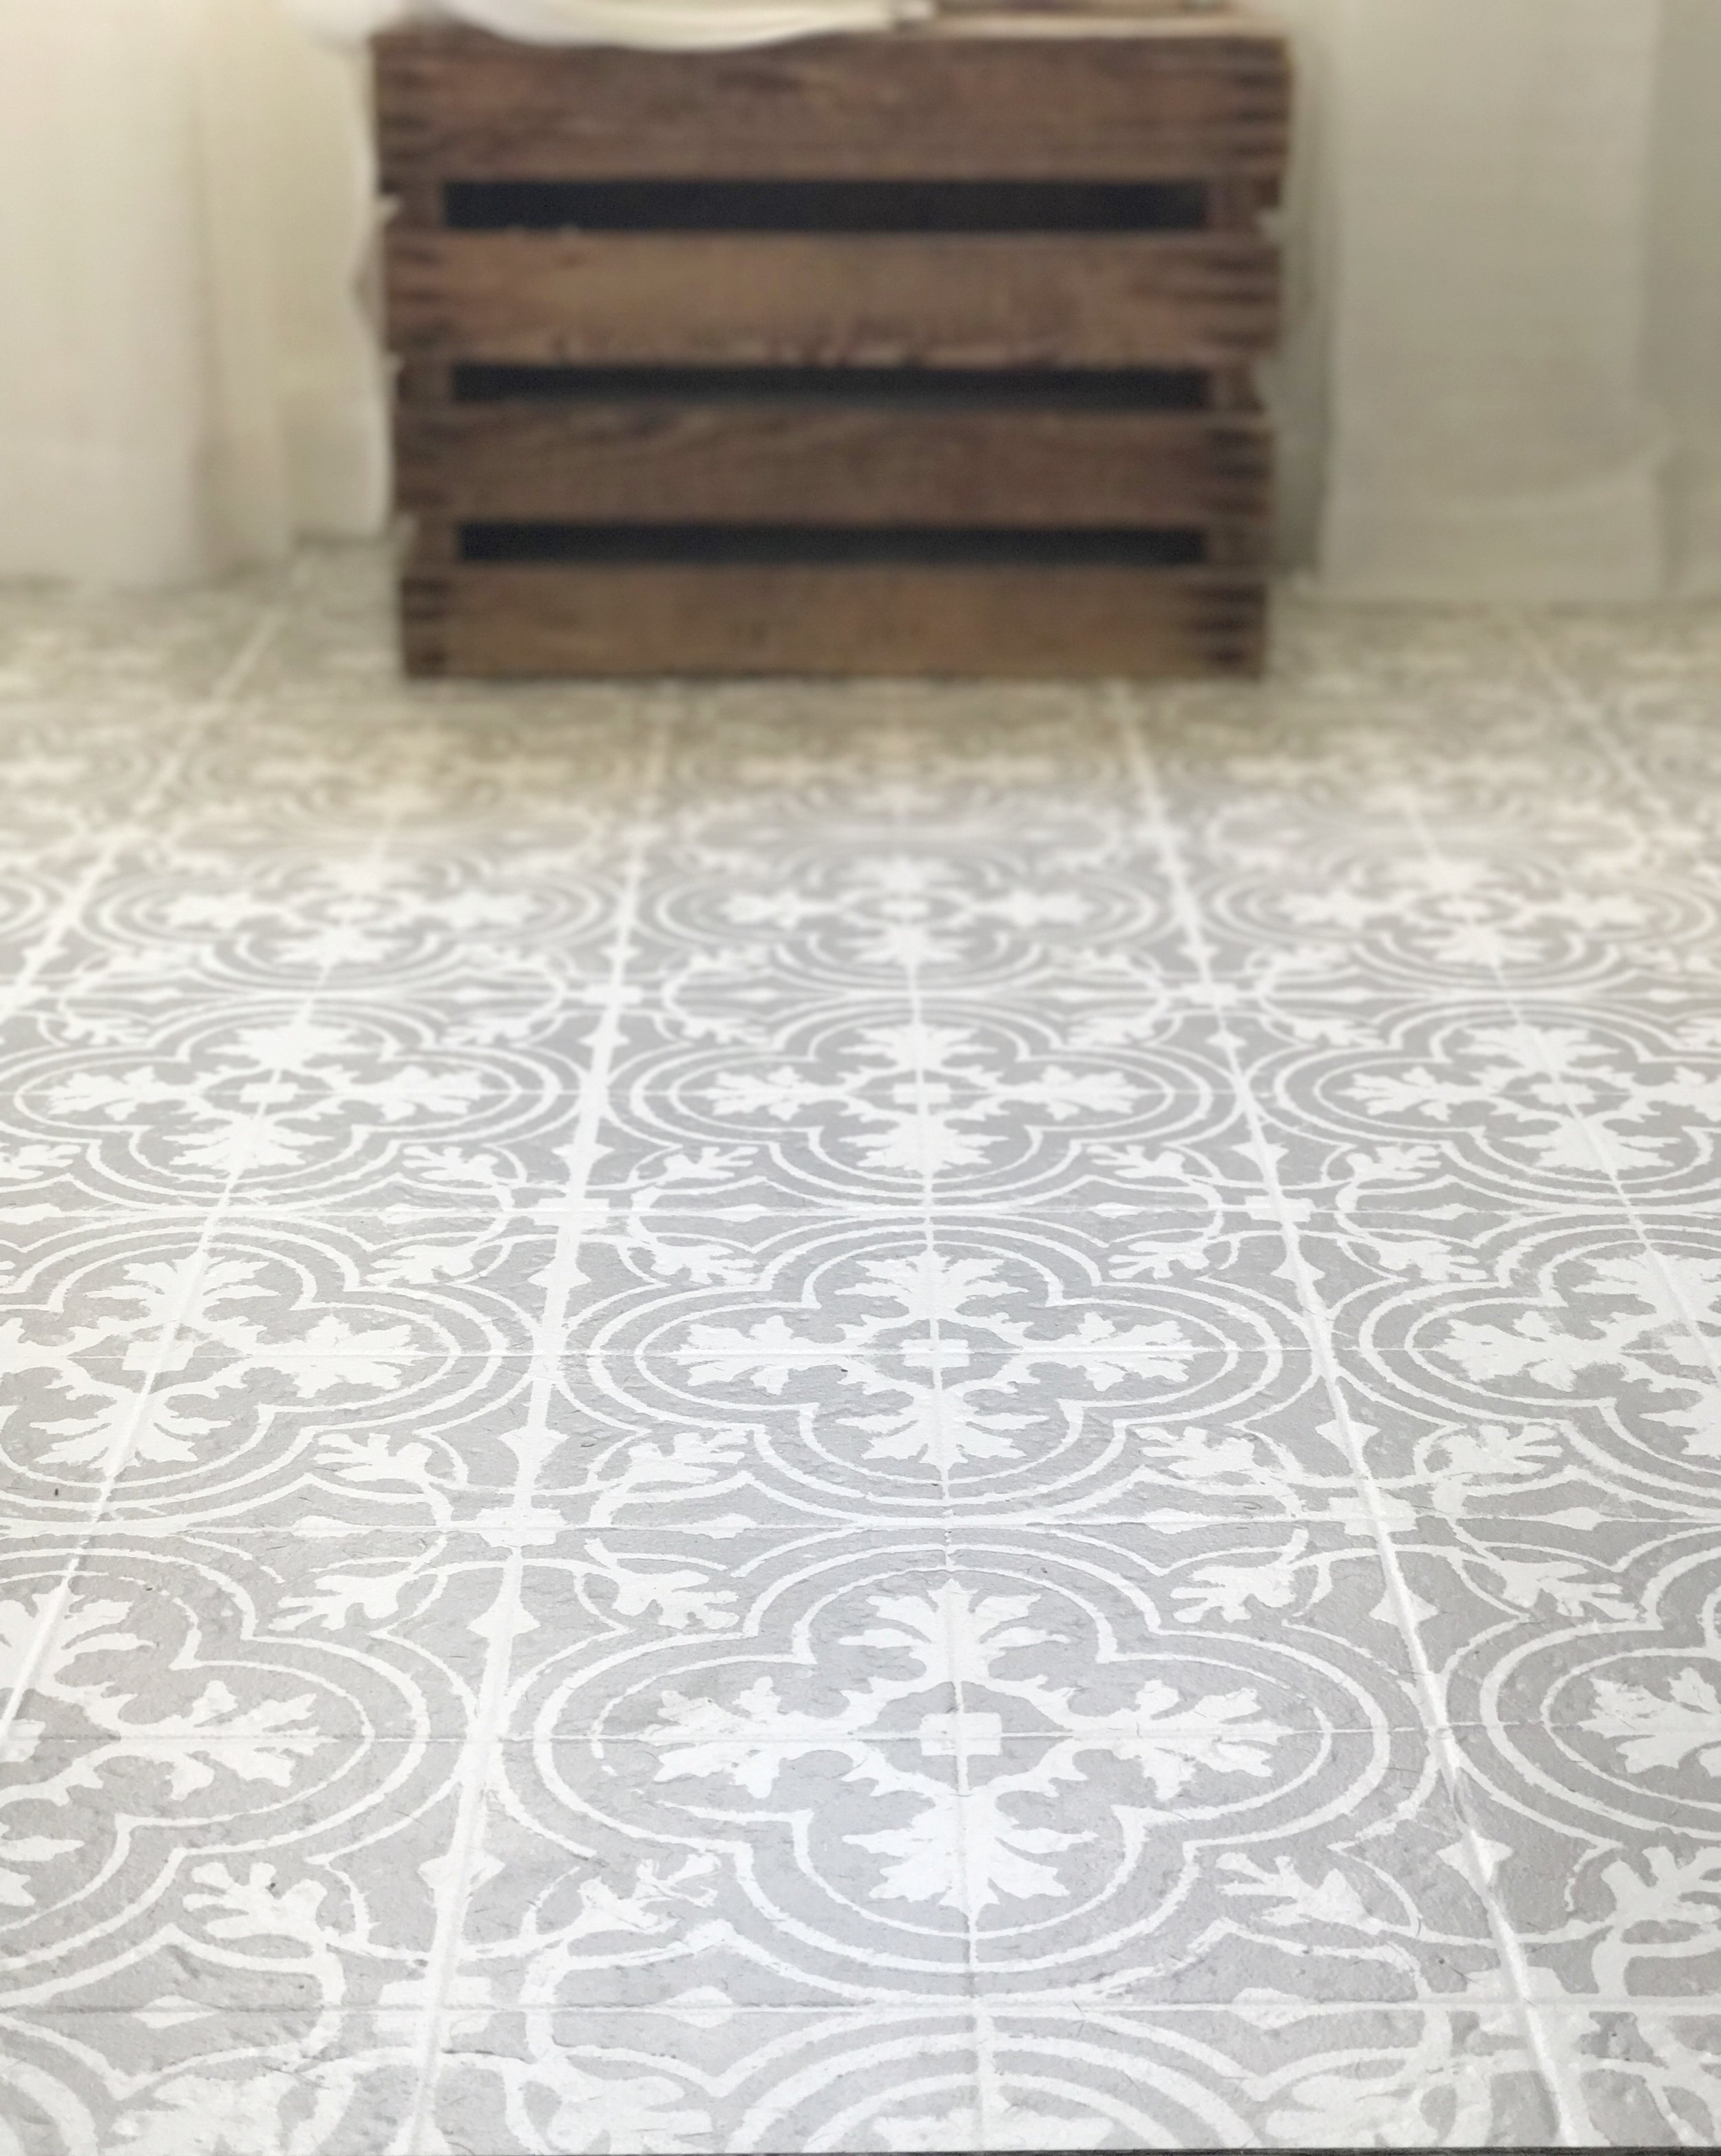
I used Annie Sloan Chalk Paint in the color Paris Grey- you can use any brand of chalk paint- this is just the brand I had on hand. For stenciling you want to start at the furthest point from your exit/door. My linoleum floor was a small 4.5" faux tile design. So I designed my stencil to cover 4 of the small tiles. I started with the first full set of 4 linoleum tiles. Meaning one tile over from the wall- because the tiles up next to the wall were not the full 4.5," they had been cut in half when installed. I left all the wall edges and around the toilet area for last, because doing those areas required bending the stencil. And I didn't want to possibly damage my stencil until after I had done all the full tiles.
- Place your stencil down on the floor, lining it up to the lines in the linoleum, then press down firmly against the floor. The Silhouette brand stencil material has a sticky back so that helps with holding in place. But if you have another type of stencil or use the paper like stencil that I started with, you can simply use painters tape to hold the stencil in place.
- Apply a thin coat of paint using a small foam roller. It is very important that you apply a THIN coat. Having to much paint on your roller can cause bleed. Work your way from one side of the stencil to the other.
- Dry the area with a hair dryer before lifting the stencil- this speeds up the drying process.
- Carefully lift up your stencil.
- Make sure the back of your stencil is dry and doesn't have any residual wet paint before placing it onto the next area.
- Line your stencil up again and repeat the process.
*I cut two stencils so I could speed up the process. Having two going at once is quicker than one.
*If you mess up don't panic!! Chalk Paint wipes up easily with hot water. You can wipe it up without damaging the sealed coat underneath. If you followed along on my Instagram Stories you probably saw where this happened to me.
*For areas around the walls and toilet, line your stencil up and bend it up along the wall and toilet. Press the stencil right up against the wall or toilet down with your fingers while you paint the area. You may have to go back with a small paint brush and touch up these areas. The video below shows you how to do these areas. You can also cut your stencil if you need to. Just make sure you have completed anywhere you might need the whole stencil BEFORE you cut it.
4. CLEAN your floors: After ALL that stenciling bits of trash may have wondered into your work space. Just simply sweep the floor and then wipe with a dry rag. Try to get up any specks of dried paint or grit.
5. TOPCOAT SEALER: This step is VERY important because it seals in all your hard work and makes it last. I sealed my floors with Minwax Polycrylic Protective Finish in a Matte Finish. I chose the matte finish because I didn't want any sheen to my floors. I applied this topcoat using a foam roller. I applied 4 thin coats waiting about 2 hours between each coat. Drying times will vary depending on your environment. The best way to tell if the coat is dry is by giving it a feel test. Touch the floor and see if it feels dry -if not it will feel tacky. After applying the 4 coats of Polycrylic you should have a nice smooth finish.
*I definitely recommend venting the area! This stuff smells very strong! Turn your exhaust fan on and or place a fan in your window drawing out the smell. A fan also helps with drying time.
6. Enjoy all your hard work! And wait at least 24 hrs before normal everyday use.
*The same steps can be used for tile floors.
Here is a little video of the stenciling process:

Project Breakdown:
Total time: 5 HRS -If you minus having to wait for all the coats of sealer and topcoat to dry the entire project took me about 5 hours to complete. I had planned on finishing it on Sunday but I kept getting pulled away from the project due to everyday life matters and to eat, then on Monday I had to work. I actually do interior design stuff for others during the day, shocker I know. So I stenciled a little here and there between tasks and finished Monday night. You could do it all in one day if you needed to. Ideally you could paint the sealer Friday night, stencil and seal on Saturday, and enjoy on Sunday.
Cost: Approximately $80 -It cost me about $50 because I already had some of the supplies- like the chalk paint. Depending on the size of you project a small sample pot of chalk paint should work. I only used about 1/4 of a quart of Annie Sloan on my floors which is roughly 75 sq. ft.
Durability: Others who have painted their floors say once you seal them they hold up great, even in hight traffic areas. I will keep y'all updated on how they are holding up. They feel pretty durable to me. I will do a six month wear blog post- but of course that will be in 6 months.
Stencil Sources:
I made my own stencil but for those of you who don't have a Silhouette Machine there are still plenty of options. And if you do have a machine then sign up for your free download below.
- Cutting Edge Stencils on Esty- {Click HERE}
- Michaels Craft Store- {Click HERE}
- Michaels Craft Store Option #2- {Click HERE)
- Royal Design Studio Stencils- {Click HERE}
- Silhouette Stencil Material -{Click HERE)

I hope this was helpful for those who are wanting to transform your linoleum or tile floors. I am blown away at the responses I received on Instagram over this makeover. I will be sharing the entire "Budget Friendly Weekend Bathroom Makeover" soon with all the sources for that part of the renovation.
Thank you so much for stopping by today and reading my blog. Also as always if you have any questions about anything just let me know! Also feel free to leave me a little comment letting me know how you like the idea of this budget friendly makeover. Can't wait to see everyones floors!!
Be sure to follow me over on FACEBOOK , INSTAGRAM, and PINTEREST to keep up with the latest from me.
With love,

My friend friend Natalie also just painted her tile floors in her laundry room makeover -- Check it out {HERE}.