

Painted Kitchen Cabinets PART 3. If you missed the first two parts of the series you can find them here: {PART 1- CLICK HERE}, {PART 2- CLICK HERE}. You will find all the prep, materials (including the paint colors), and painting process in those two post. This part is all about the little finishing touches we added to our builder basic kitchen, to make it look more custom- in addition to painting the cabinets. I will also be wrapping up with a final reveal of the kitchen in the next and final series post. Outlet covers on and all!
So here are the 3 finishing touches we added:
1. We added moulding to the soffit above the cabinets and painted it the same color as the upper cabinets.
Well why did we do this? You might be wondering. Well here's why... In a perfect "budget-free" world (wouldn't that be the best world ever) I would have torn the soffit out and added nice tall cabinets that extended all the way to the ceiling. But then I definitely could not have called this a "Budget" kitchen makeover. Having cabinets that extend to the ceiling makes a room feel bigger and adds height. And well this little corner the builders decided to call a kitchen in our home needed all the help it could get.
Having a very small budget to work with I knew I could not remove the soffit. In my mind I could picture adding something to the soffit to form some sort of optical illusion- making it appear as the cabinets stretched to the ceilings. So I search Pinterest and Google with very little luck on someone DIYing this particular subject. I found a couple inspirational pictures and decided to just go for it. Which ended up being 2 hours or sorting through moulding at Lowes, laying it all out on the floor, until I found a design I liked. Hopefully, if you have been searching for a similar solution for your soffit this will help you tremendously.
I wanted to keep the existing crown moulding that was already at the top of the soffit and add a couple more accent pieces to make it look like a thick crown that rest on top of the cabinets- extending it to the ceiling. So we added a piece right below the crown moulding and a another piece at the bottom of the soffit.

- Crown Moulding- CLICK HERE
- Below Crown- CLICK HERE
- Bottom of Soffit- CLICK HERE
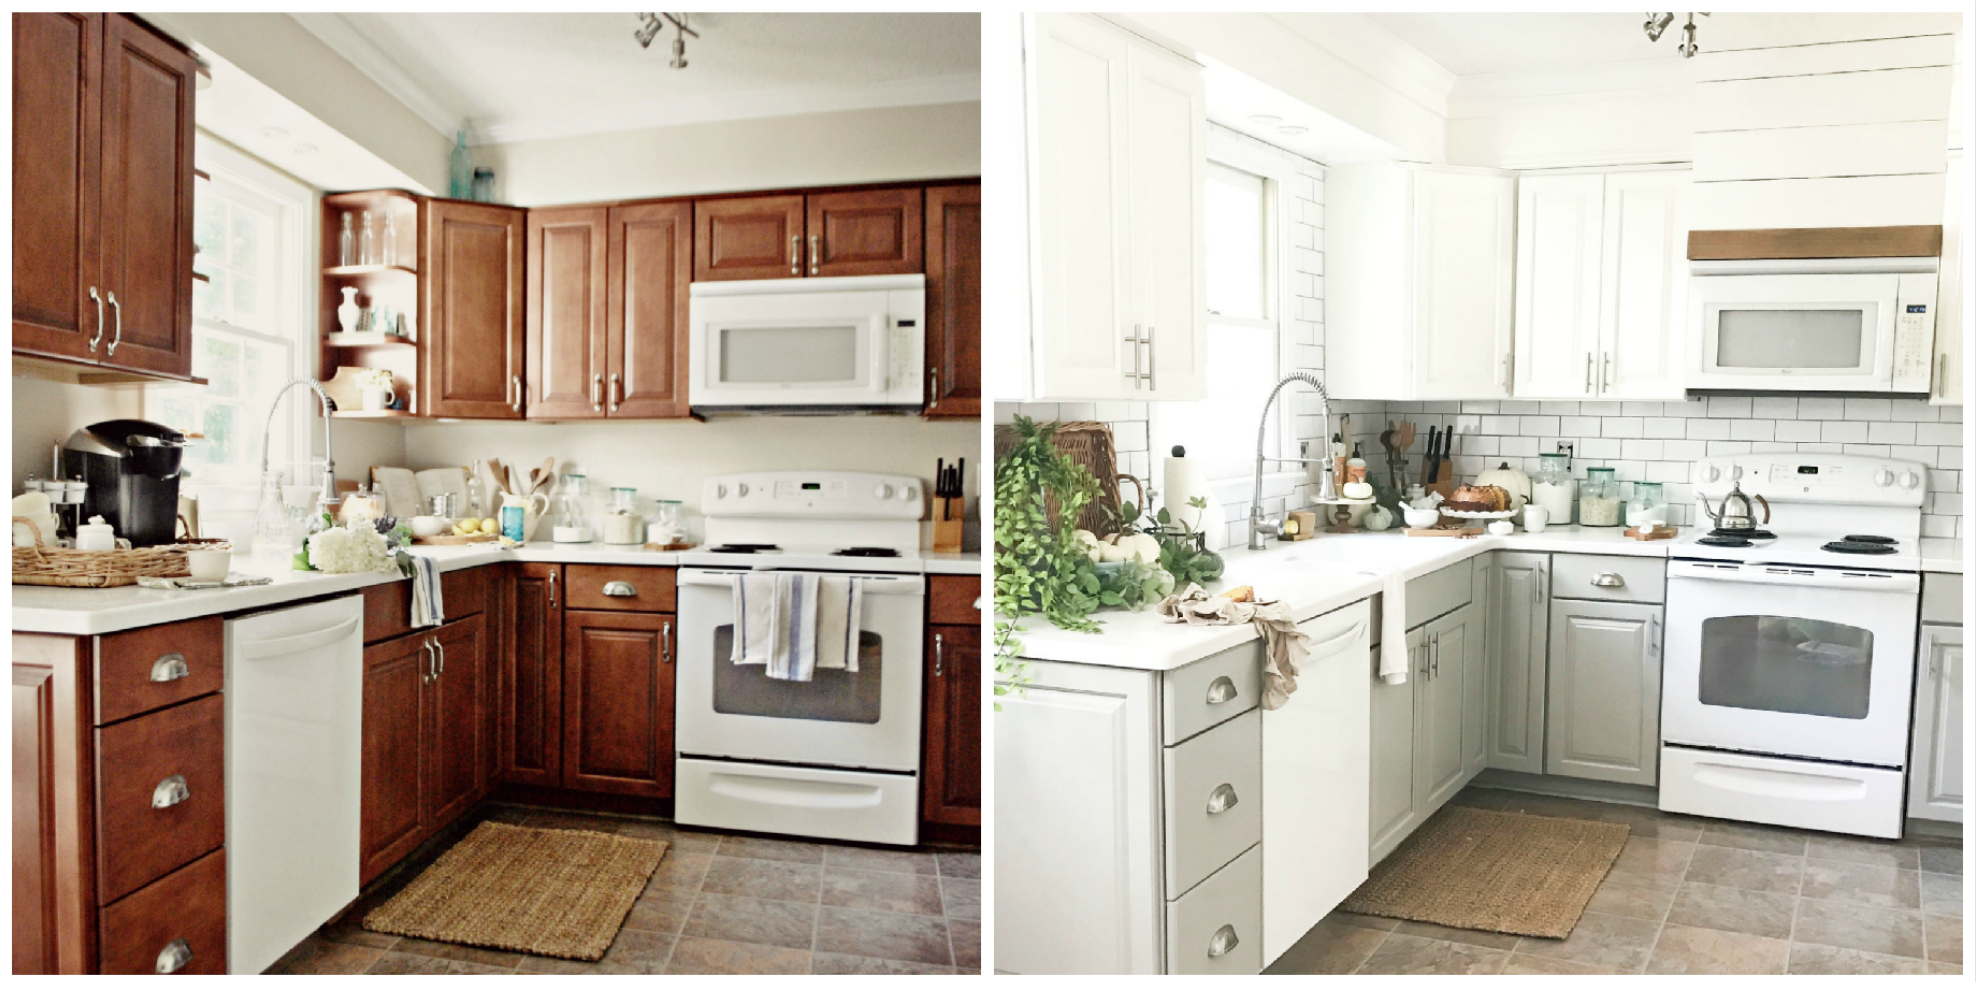
We (we-as in Austin) simply cut all the angles, placed it up there, nailed it into place with a nail gun, caulked all the seams, then sprayed it the same color as the top cabinets. I chaulked and painted- he did all the pesky measurements that I HATE. Seriously y'all!! I can not believe the difference this made. Before the soffit was painted a beige color, and the cabinets were wood. So the soffit was so obvious. Now it blends so well with the cabinets- it actually does create the illusion that they extent to the ceiling. Not only did it add height to my kitchen it also made it feel SO MUCH BIGGER.
Here's a side by side comparison, so you can see the difference it made: HOLY MOLEY!! Night and day difference. Don't you think?
2. Second we added a backsplash. Before, there was only a little kick plate at the back. So I removed that and added a white subway tile backsplash from the countertops all the way up to the soffit around the window. I actually did the backsplash all by myself. I won't be doing a full tutorial on the process (there are tons of amazing PROFESSIONAL videos on laying tile- just Youtube it) but I will share all my materials and details with you.
- Tile: I used a standard 3"x6" Bright White Ice subway tile- CLICK HERE.
- Grout: I used a Dark Gray Grout Non-Sanded (Delorean Gray)- CLICK HERE
- Tile Saw: CLICK HERE
- Tile Spacers 1/16": CLICK HERE
- Grout Boost: CLICK HERE (So worth it because it seals your grout)
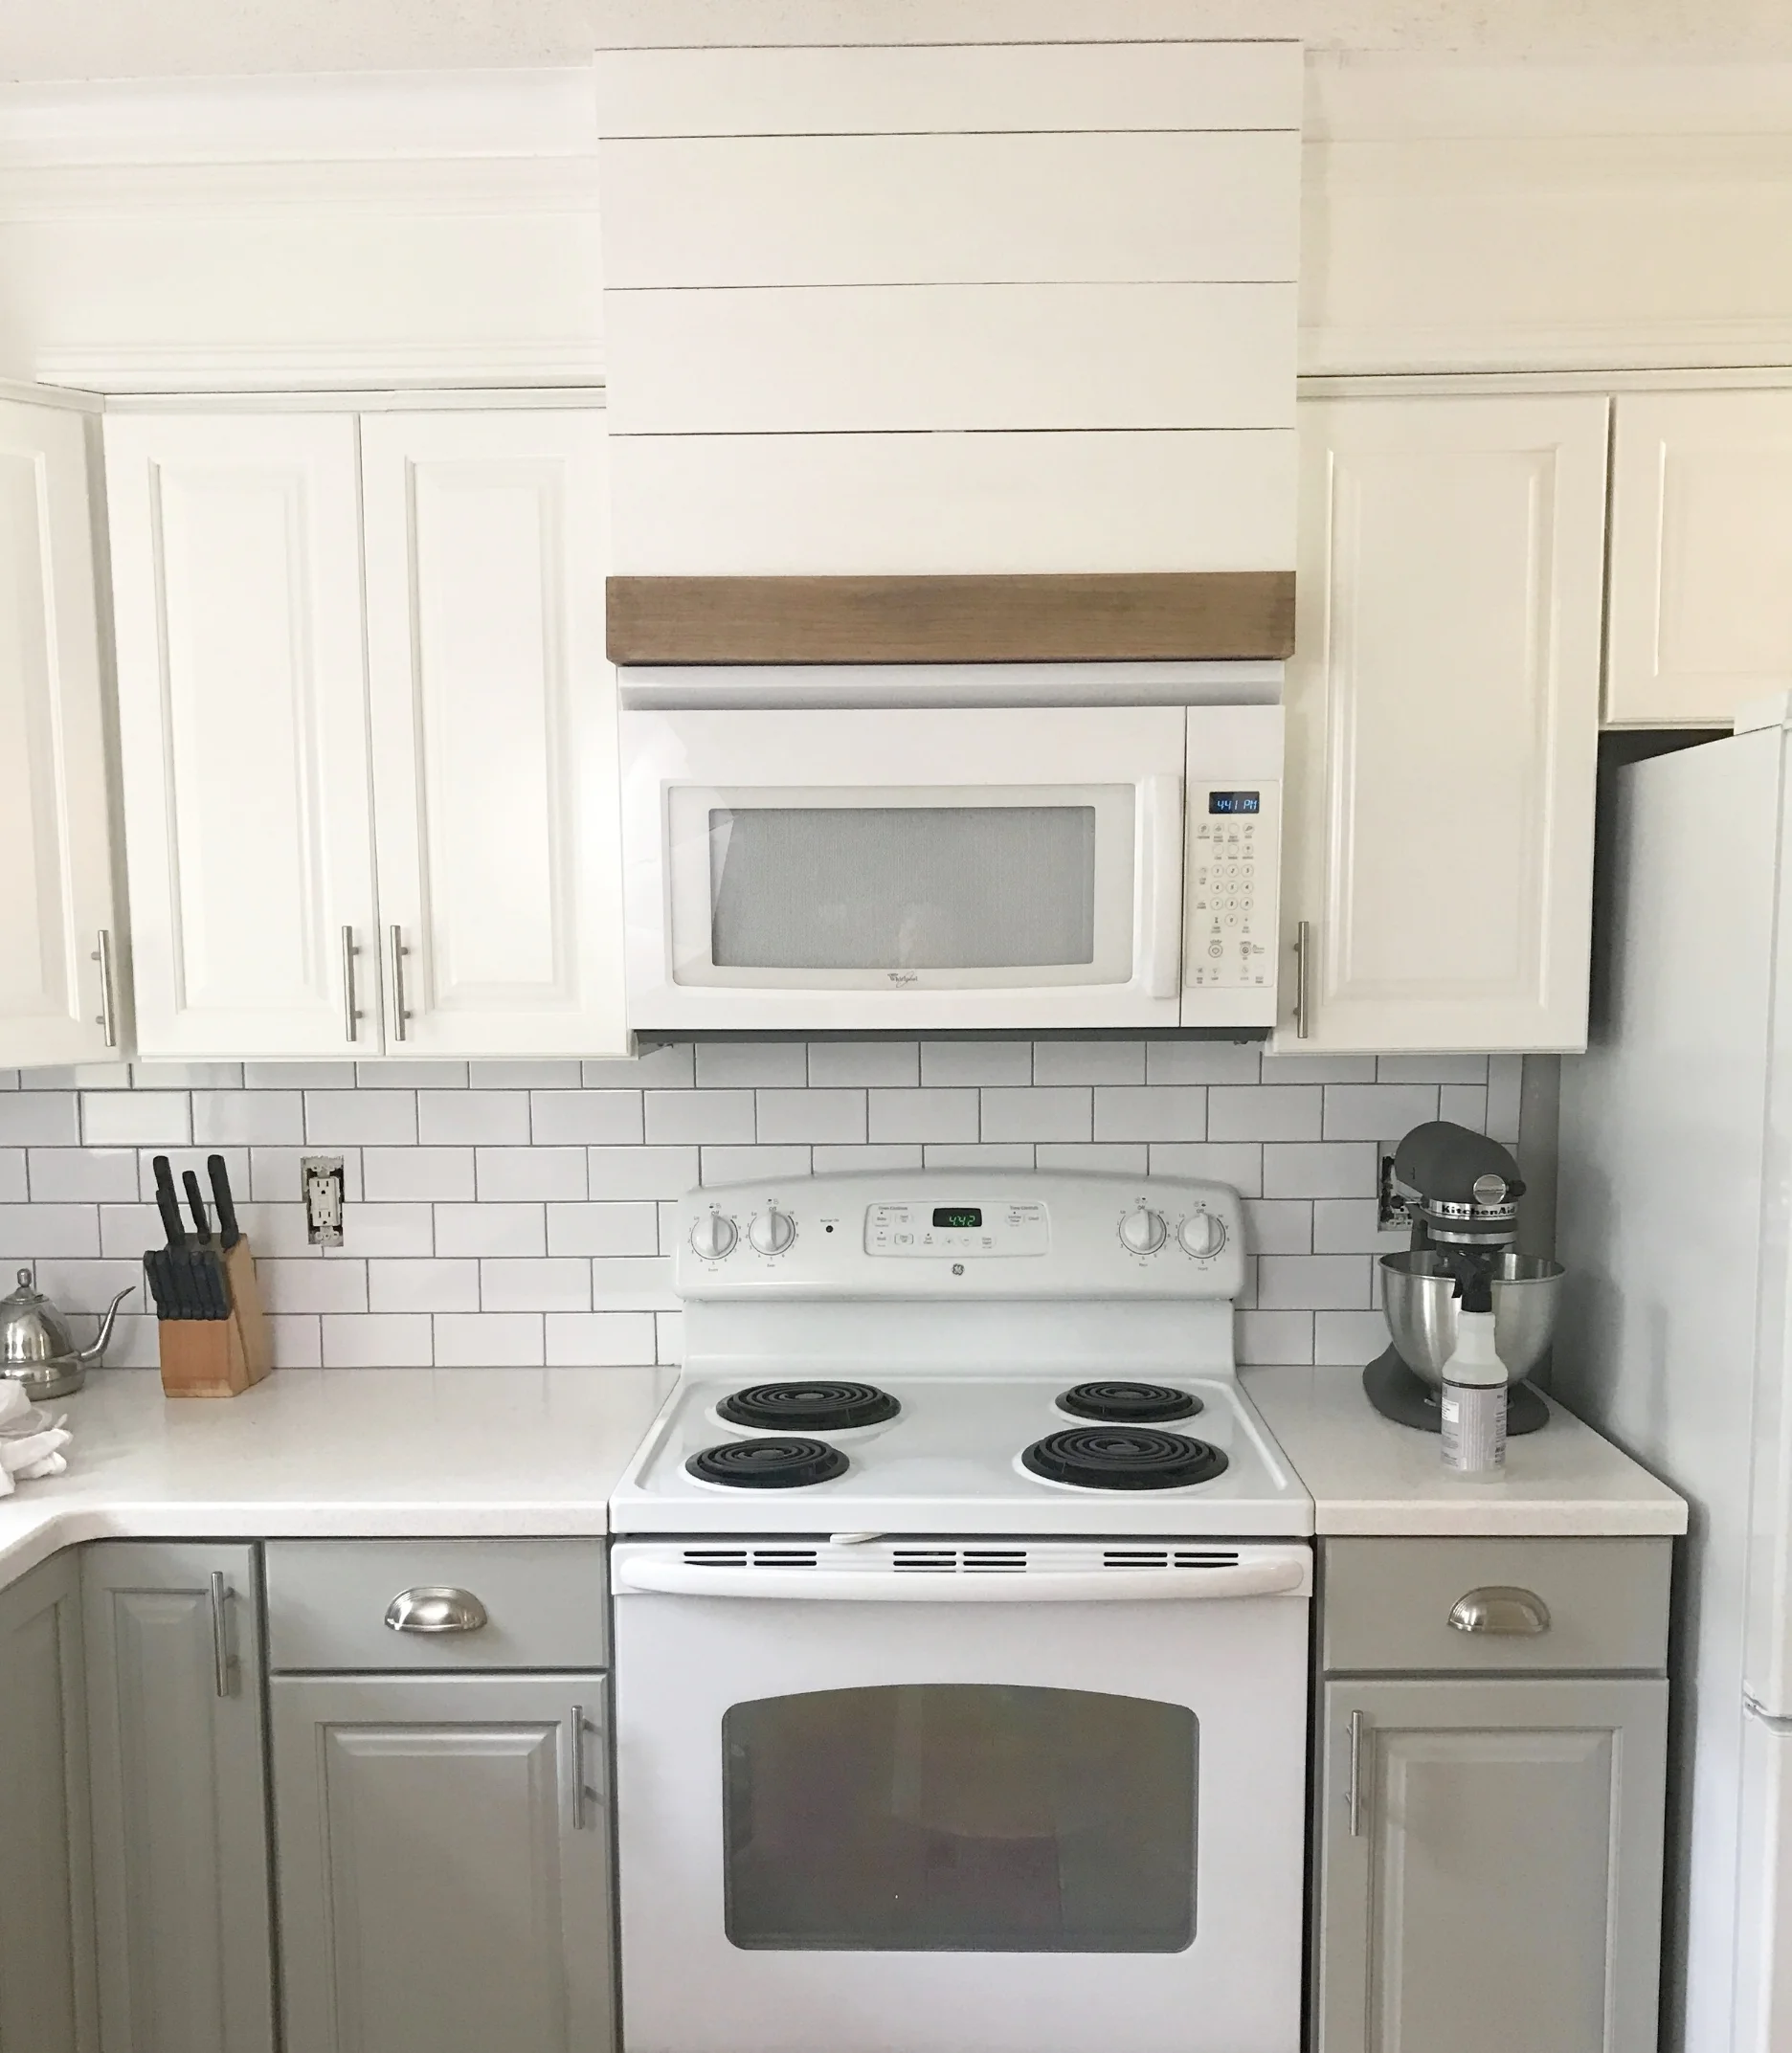
3. The last thing we added to make our kitchen look more custom is a hood above the microwave. I was so excited a few months ago when our microwave stopped working. Because I knew it was a good excuse to switch it out for a custom hood. But it actually wasn't broken, and had only came unplugged. Which was truly a really good thing (in my husbands eyes), because now he didn't have to move the microwave to an inconvenient spot in the kitchen- AKA the laundry closet- and build an actual functioning custom vent hood. So the microwave stayed, but I still wanted to look of a custom hood. So we designed and built a faux one that would work above a microwave. And I actually LOVE it! And I still have the ease of using the microwave.
The microwave plugs into the back of the cabinet right above it. So we could not make the hood permanent. It had to be removable so we could access that plug in- you know.. incase the microwave ever magically unplugs again. Also if the future home owners don't like the hood, they can take it down, and the cabinet is still behind there.
Yes, I know I lost cabinet space by adding this. But those cabinets were so small you could barely fit anything inside them. I think I'll take the custom hood over a few square inches of non-usable cabinet space any day.
Each particular situation will be different for a hood like this. It all depends on your soffit height, depth, microwave, etc. So no need for me to give you the boring precise measurements. But I will give you the basics on how we built it.

First we measured, cut away moulding, and built a frame that would fit right above the microwave and extend to the ceiling. The crown molding was already up, and we had already added the additional moulding pieces... So we had to cut the moulding away so the hood would fit flush against the soffit. Next we used our Kreg Jig and screws to secure the wood board bottom piece to the cabinets. This created a ledge for the hood to rest on. Then we covered the frame in thin faux shiplap boards (Check out my faux shiplap- HERE).

- Cutting the moulding away for a flush fit around the soffit.
- The moulding is removed so the faux hood will fit snug. You want to cut the moulding just wide enough for the hood to fit tight.
- Secured the wood bottom board to the cabinet using a Kreg Jig and screws.
- Test fit to make sure everything fits.

The faux hood is light weight and wedges right in on top the the wood ledge and the ceiling. This also added height to the kitchen and helped with the optical illusion of the cabinets extending to the ceiling. Last we painted the shiplap hood the same color as the upper cabinets and stained the wood accent ledge. The stain color is equal parts Minwax Early American and Weathered Oak mixed together.
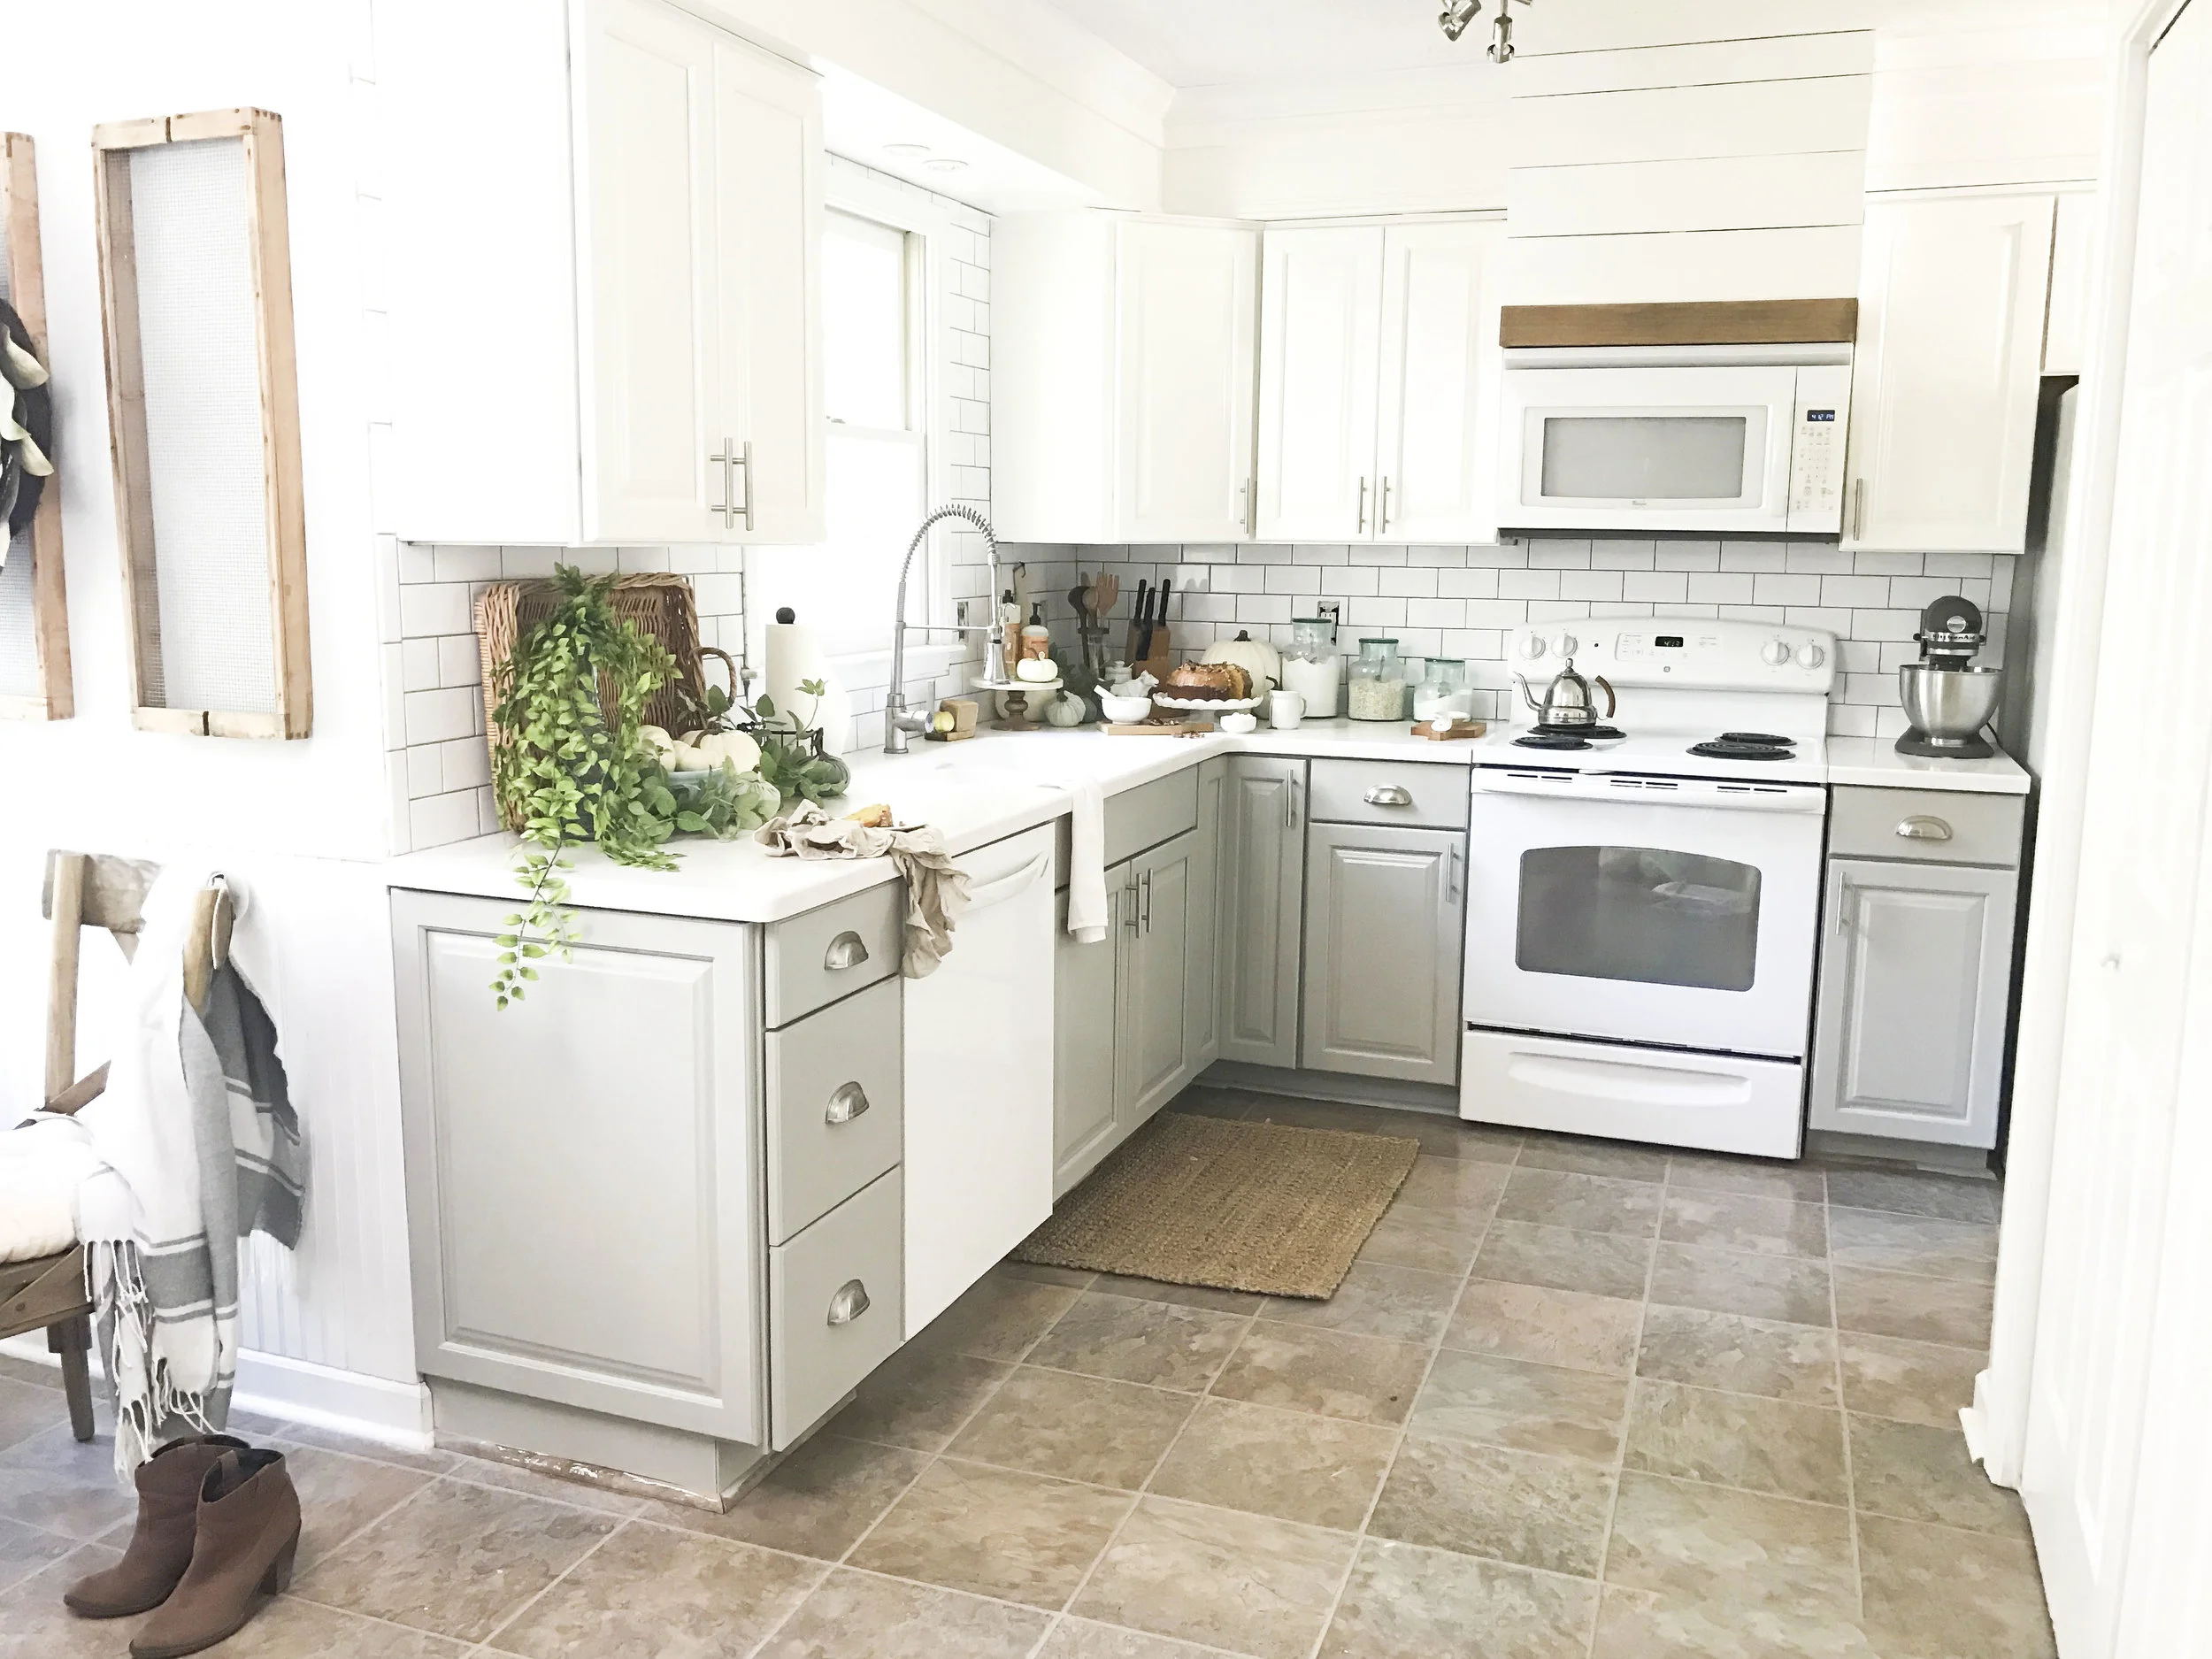
So those are the finishing touches that helped bring our kitchen from build basic to designer grade. Well designer grade on a small budget that is. This entire kitchen makeover (painting the cabinets and everything) cost less than $500. And the difference is astounding! I still walk by it and have to take a double look. I'm so thankful and happy I finally have a kitchen I LOVE! Look for the final reveal coming soon.
As always thank you so much for stopping by today and reading my blog. I hope this blog series will help inspire others who also do not love their kitchen. And if I can do this you can too! Be sure to follow me over on FACEBOOK and INSTAGRAM for more behind the scenes of this little business I call life. OHH and PINTEREST for even more inspo. Lots of dream kitchen inspo over on Pinterest!
With love,

*This post was not sponsored or endorsed by any of the products I used. Post may contain affiliate links, but as always all words, reviews and opinions are by yours truly.
Click the images below for the other parts of the series:

Part 1:

Part 2:

Part 3:
